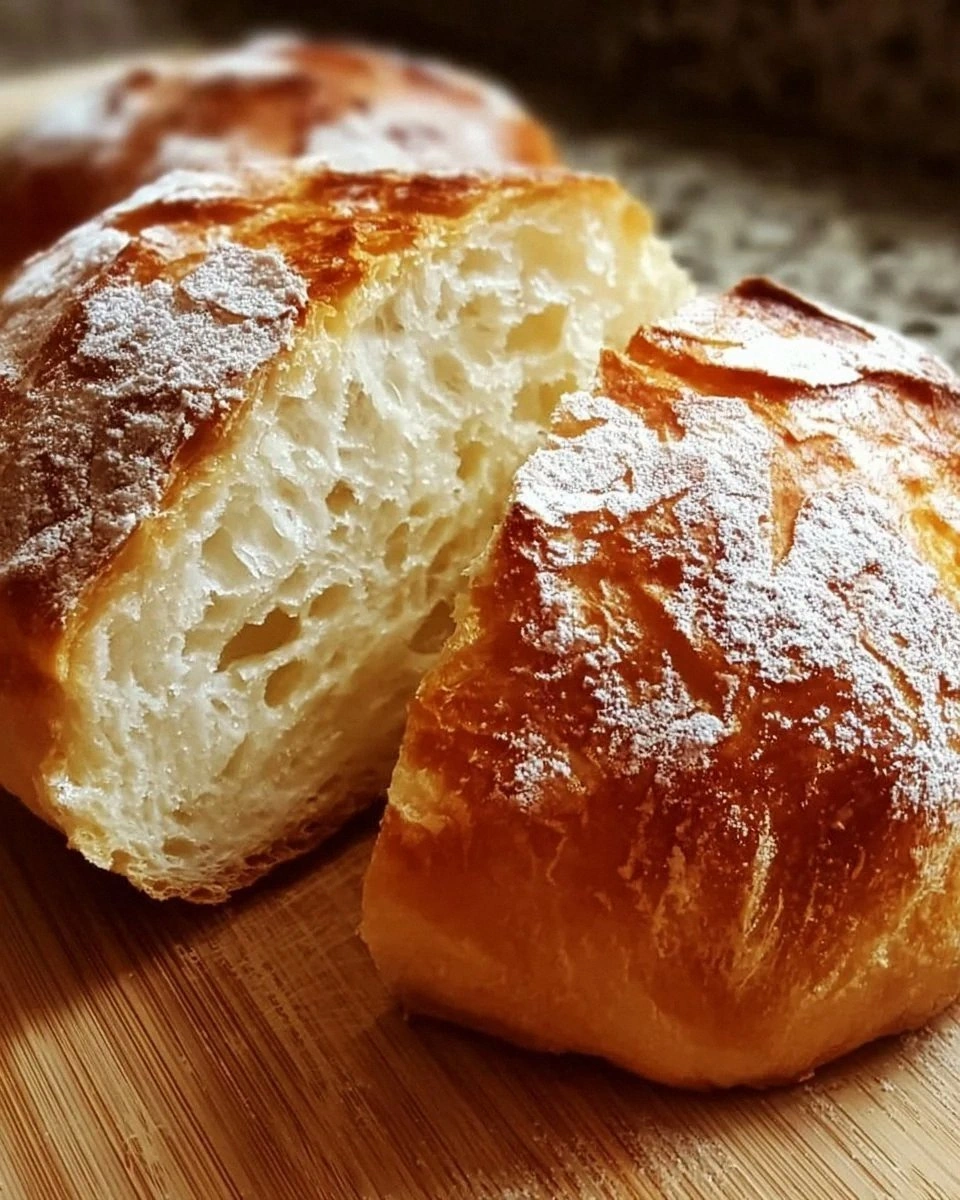
I was standing in my kitchen, staring at a half‑baked loaf that looked more like a sad, flat pancake than the golden crust I’d promised my roommate. The timer buzzed, the smoke alarm chirped, and I thought, “If I survive this, I’ll never trust a quick‑bread again.” Then, in a moment of desperation (and a sudden craving for something warm and buttery), I grabbed the pantry staples, tossed them together, and slapped the batter into a hot pan. The result? A slice of heaven that rose like a sunrise, with a crust that cracked open with a sigh and a crumb that was softer than a cloud‑kissed pillow. I dare you to taste this and not go back for seconds.
Picture this: the kitchen humming with the low whirr of the fan, the scent of fresh‑baked bread swirling with a hint of olive oil, and the faint crackle as the dough meets the pan. The air is warm, the light catches the glossy top of the loaf, and you can hear the faint pop of bubbles escaping the crust. Your hands are warm from the dough, the butter (or oil) glistens on the surface, and the whole room feels like a cozy bakery that’s opened just for you. That moment, when you pull the bread out and the steam rises like a ghost of a summer morning, is pure magic.
Most recipes get this completely wrong. They either demand a mountain of ingredients, a marathon of kneading, or a waiting period that feels like an eternity. I’ve tried them all – the sourdough that never rises, the quick‑bread that turns into a rubbery disc, the “no‑knead” myth that leaves you with a dense brick. This version, however, is hands down the best version you’ll ever make at home, and I’m about to prove it. The secret isn’t a fancy gadget or an exotic spice; it’s a simple tweak in technique that turns ordinary pantry staples into a bakery‑level masterpiece.
Let me walk you through every single step — by the end, you’ll wonder how you ever made it any other way. Okay, ready for the game‑changer? This next part? Pure magic. Stay with me here — this is worth it.
What Makes This Version Stand Out
- Speed: In just 20 minutes you get a loaf that tastes like it’s been in the oven for an hour. No overnight fermentation, no waiting for the dough to double.
- Texture: The crust is crisp enough to snap with a satisfying crunch, while the interior stays airy, almost like a pillow you could sink your teeth into.
- Simplicity: Only six pantry ingredients, no fancy equipment, and a single mixing bowl. If you can whisk a coffee, you can nail this.
- Flavor Boost: A dash of sugar balances the salt, while olive oil adds a subtle richness that makes the crumb melt on your tongue.
- Versatility: It’s a perfect base for garlic butter, herbs, or even a sweet cinnamon swirl – the canvas is yours.
- Crowd Reaction: I’ve seen grown‑ups and kids alike gasp, “Is that really homemade?” and then immediately reach for another slice.
- Ingredient Quality: Using a good‑quality all‑purpose flour and fresh milk makes the difference between “meh” and “wow”.
- Make‑Ahead Potential: Freeze leftovers and toast them later – they taste just as good, if not better, after a quick reheating.
Inside the Ingredient List
The Flavor Base
The tablespoon of sugar isn’t there to make the bread sweet; it feeds the baking powder, creating those tiny air pockets that lift the loaf. If you skip it, you’ll notice a flatter texture and a slightly bland taste, as the chemical reaction loses a bit of its punch. A good swap is honey or maple syrup – just reduce the milk by a tablespoon to keep the wet‑to‑dry ratio balanced.
The Texture Crew
All‑purpose flour provides the perfect gluten network for a quick‑rise bread. Using cake flour would make it crumbly, while bread flour could make it too chewy. If you’re gluten‑free, try a 1‑to‑1 blend of rice flour and tapioca starch, but expect a denser crumb. The ¾ cup of milk hydrates the flour, creating that tender crumb; you can substitute almond, oat, or soy milk for a dairy‑free version, just keep the temperature around room temperature.
The Unexpected Star
Olive oil (or melted butter) does more than add richness – it coats the flour particles, slowing gluten formation and resulting in a softer interior. Butter will give a richer flavor, while olive oil adds a subtle fruitiness that pairs beautifully with herbs. If you run out of oil, coconut oil works, but it will add a faint coconut aroma that might not suit every palate.
The Final Flourish
Baking powder is the true hero here. It’s a double‑acting leavener that gives the dough its quick rise, creating those airy pockets you love. If you use baking soda instead, you’ll need an acidic component (like buttermilk) to activate it, otherwise the bread will taste metallic. Always check the expiration date; old powder loses its power, and you’ll end up with a dense, disappointing loaf.
Everything's prepped? Good. Let's get into the real action…
The Method — Step by Step
First, whisk together the flour, baking powder, salt, and sugar in a large mixing bowl. You’ll see the dry ingredients form a uniform, slightly fluffy cloud – that’s your first visual cue that everything is evenly distributed. Take a moment to sniff the mixture; the faint aroma of the sugar and salt should already be teasing your nose. This is the moment of truth where you set the stage for a perfect rise.
In a separate jug, combine the milk and olive oil (or melted butter). Warm the milk just a touch – think “lukewarm, not hot” – so the oil melds smoothly without cooking the flour. If you’re using plant‑based milk, a splash of lemon juice can brighten the flavor. Pour the wet mixture into the dry bowl, and stir with a wooden spoon until a shaggy dough forms.
Now, the dough needs a brief “hand‑fold” – just a quick 30‑second turn‑over in the bowl to bring everything together. Don’t over‑mix; you want to see a few streaks of flour still visible. This short rest lets the gluten relax, which is why the crumb stays tender instead of rubbery.
Heat a heavy skillet (cast iron works best) over medium‑high heat for about 2 minutes. Add a drizzle of oil and swirl to coat the surface; you should hear a gentle sizzle as the pan warms. Carefully spoon the dough into the pan, spreading it into a rough circle about 1‑inch thick. This is where the magic happens – the heat will instantly start to set the crust.
Cover the skillet with a lid and let the bread cook for 5‑7 minutes. You’ll hear a gentle hissing and see the edges start to pull away from the pan – that’s the signal that the crust is forming. After 5 minutes, flip the loaf carefully using a spatula; the underside should be a deep golden brown, like toasted almond.
Cook the second side uncovered for another 3‑5 minutes, until the loaf is uniformly golden and sounds hollow when tapped. The interior should feel springy to the touch, and a quick slice will reveal a tender, airy crumb dotted with tiny air pockets. Transfer the bread to a cooling rack; let it rest for at least 2 minutes – this allows the steam to redistribute, keeping the interior moist.
That’s it — you did it. But hold on, I’ve got a few more tricks that'll take this to another level…
Insider Tricks for Flawless Results
The Temperature Rule Nobody Follows
Never start with a cold pan. A hot pan creates an immediate crust that locks in steam, giving you that airy interior. If you’re using an electric stove, pre‑heat the pan for a full 3 minutes; you’ll hear a faint pop when the oil hits the surface – that’s your green light. I once tried to speed things up by putting the dough in a cold pan, and the result was a soggy, dense pancake that tasted like regret.
Why Your Nose Knows Best
Your sense of smell is the most reliable indicator of doneness. When the bread is about 70 % cooked, you’ll detect a nutty, toasted aroma that deepens as the crust forms. If you’re unsure, lift the lid and take a quick sniff; if it smells like fresh‑baked biscuits, you’re almost there. Trust that nose over any timer – it’s the original kitchen gadget.
The 5‑Minute Rest That Changes Everything
After cooking, let the loaf rest on a wire rack for at least five minutes. This short pause lets the steam settle, preventing a gummy interior. I’ve seen people slice too early, and the crumb turns into a gummy mess that sticks to the knife. Patience here pays off with a slice that pulls away cleanly, revealing that perfect open crumb.
The Oil‑Swap Secret
If you love a richer flavor, substitute half of the olive oil with melted butter. The butter adds a caramelized note, while the olive oil maintains the tender crumb. Just be careful not to over‑butter, or the loaf will become greasy. I tried a 100 % butter version once; the crust was beautiful but the interior was a bit heavy – balance is key.
The “Steam Burst” Trick
Before you flip the loaf, splash a tablespoon of water onto the pan’s edge and quickly cover it. The steam bursts through the lid, creating a glossy, crackly crust that looks bakery‑professional. This is the same principle bakers use in stone ovens, but you can achieve it on your stovetop. I’ll be honest — I ate half the batch before anyone else got to try it, thanks to that glossy finish.
Creative Twists and Variations
This recipe is a playground. Here are some of my favorite ways to switch things up:
Garlic‑Herb Explosion
Add 2 minced garlic cloves and a tablespoon of mixed fresh herbs (thyme, rosemary, oregano) to the wet mixture. The result is a fragrant loaf that pairs perfectly with soups or salads. Garlic lovers will thank you, and the herbs add a fresh, green note that brightens each bite.
Cheesy Jalapeño Kick
Stir in ½ cup shredded cheddar and 1 finely diced jalapeño (seeds removed for less heat). The cheese melts into gooey pockets, while the jalapeño offers a subtle heat that wakes up the palate. Great for brunch or as a side to chili.
Sweet Cinnamon Swirl
Mix 2 tablespoons brown sugar, 1 teaspoon cinnamon, and a pinch of nutmeg into a small bowl. After the dough forms, spread the mixture over the surface, roll it gently, and slice before cooking. You end up with a breakfast‑ready, sweet‑spiced loaf that feels like a cinnamon roll in disguise.
Whole‑Grain Boost
Replace half of the all‑purpose flour with whole‑wheat flour. The loaf gains a nutty depth and a slightly denser crumb, but still rises quickly thanks to the baking powder. It’s a great way to sneak extra fiber into your diet without sacrificing speed.
Mediterranean Olive & Sun‑Dried Tomato
Fold in ¼ cup chopped Kalamata olives and ¼ cup sun‑dried tomatoes (re‑hydrated). The salty olives and sweet tomatoes create a Mediterranean vibe that’s perfect with a drizzle of extra‑virgin olive oil and a sprinkle of feta.
Cocoa‑Coffee Surprise
Add 2 tablespoons cocoa powder and 1 teaspoon instant coffee to the dry ingredients, then swap half the milk for strong brewed coffee. The loaf becomes a subtle dessert bread, perfect with a smear of chocolate butter. Ideal for an after‑dinner treat that still feels like a “bread” experience.
Storing and Bringing It Back to Life
Fridge Storage
Wrap the cooled loaf tightly in plastic wrap or place it in an airtight container. It will stay fresh for up to 4 days, though the crust may lose a bit of its snap. Re‑heat slices in a toaster or a hot skillet for 30 seconds to revive the crust.
Freezer Friendly
Slice the bread before freezing; this allows you to grab a single piece without thawing the whole loaf. Place slices on a parchment sheet, freeze solid, then transfer to a zip‑top bag. They keep for up to 2 months. When you’re ready, toast directly from frozen – the heat will bring back that fresh‑baked feel.
Best Reheating Method
To bring back that crisp crust, preheat your oven to 350 °F (180 °C), lightly mist the loaf with a teaspoon of water, and bake for 5‑7 minutes. The steam generated inside the loaf revives the interior, while the oven’s dry heat re‑crispes the crust. This trick works for both fresh‑baked leftovers and frozen‑thawed slices.