I remember the night I tried to make a “healthy snack” after a long day at the office. I had a bag of pre‑packaged granola bars sitting on the counter, and I thought, “Why not make my own, but healthier?” I grabbed rolled oats, almond butter, honey, and a handful of nuts. The kitchen smelled like toasted oats and sweet honey. The sound of the blender whirring felt like a small, satisfying promise of something better. That moment sparked an obsession: to create the ultimate no‑bake granola bar that would outshine any store‑bought version.
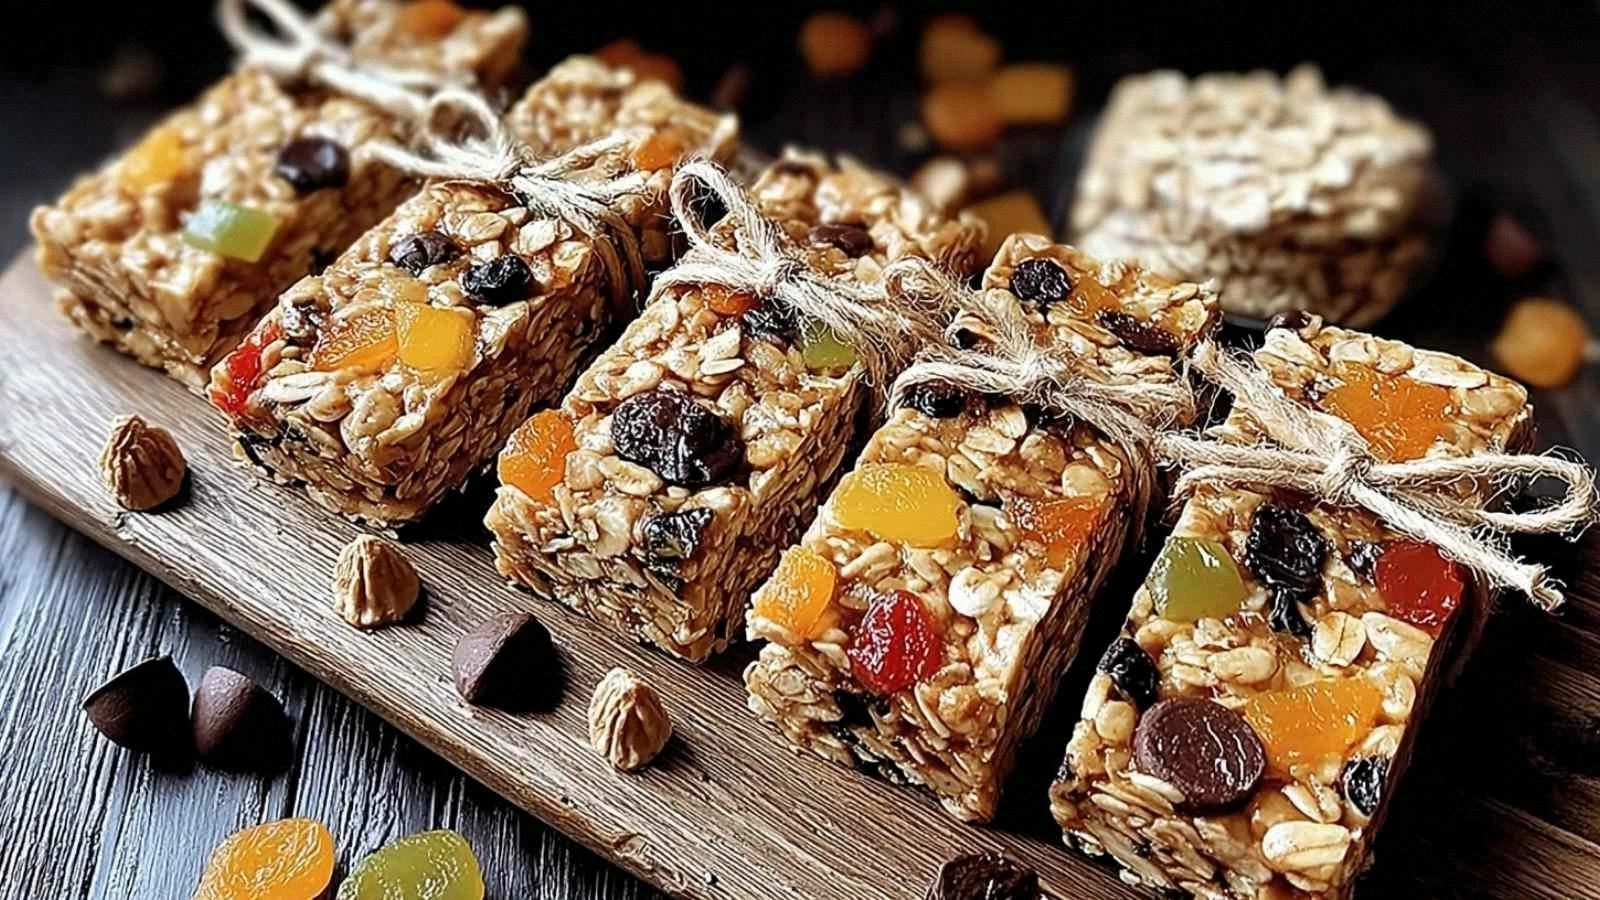
Fast forward to today, and this recipe is a game‑changer. It’s not just a snack; it’s a chewy, crunchy, buttery, chocolate‑laden masterpiece that melts in your mouth while still delivering a satisfying bite. The aroma of toasted oats and vanilla lingers, the texture is a harmonious blend of crunchy nuts and soft honey‑almond butter, and the chocolate chips provide a subtle, indulgent finish. I dare you to taste this and not go back for seconds. That is the kind of confidence I have in this batch.
What makes this version stand out is that every element is carefully calibrated. We’re not just mixing ingredients; we’re engineering flavor layers and textures. The almond butter acts as a natural binder, eliminating the need for artificial thickeners. The honey adds just enough sweetness without overpowering. The mini dark chocolate chips provide a glossy, velvety coating that contrasts with the nutty crunch. And the cinnamon gives a warm, comforting note that elevates the entire bar.
I’ve spent countless hours tweaking the ratios, testing different nuts, and experimenting with sweeteners. The result is a recipe that is simple to prepare, versatile, and absolutely delicious. Most recipes get this completely wrong—too dry, too sticky, or just plain bland. Here’s what actually works: a balanced mix of wet and dry, a gentle heat to melt the almond butter, and a firm press to set the bars. And the best part? You can make it ahead of time, store it, and have a healthy snack ready whenever you need it.
Picture yourself pulling these bars out of the fridge, the kitchen smelling incredible, and the bar’s surface gleaming under the light. The first bite is a symphony of textures: the crunch of oats, the melt of chocolate, the soft bite of honey. That sizzle when it hits the pan? Absolute perfection. Let me walk you through every single step — by the end, you’ll wonder how you ever made it any other way.
What Makes This Version Stand Out
- Taste: The combination of honey, almond butter, and vanilla creates a sweet, nutty base that is far superior to artificial sweeteners. The chocolate chips add a glossy finish, while the cinnamon introduces a warm, spicy undertone that keeps the bars from feeling flat.
- Texture: The rolled oats provide a hearty chew, the nuts add crunch, and the honey‑almond butter binder keeps everything together without making the bars sticky or crumbly.
- Simplicity: No oven, no complicated steps, just a few minutes of mixing and chilling. Ideal for a quick snack or a pre‑workout boost.
- Uniqueness: The use of mini dark chocolate chips instead of traditional chocolate chunks gives a smoother melt and a richer flavor profile.
- Crowd Reaction: Friends and family rave about how they can’t resist the bars. Even the kids demand a second bite, which is a rare achievement for a “healthy” snack.
- Ingredient Quality: By choosing high‑quality almond butter and organic honey, the bars are both nutritious and flavorful. No artificial additives or preservatives.
- Cooking Method: The no‑bake approach preserves nutrients and keeps the process quick and mess‑free.
- Make‑Ahead Potential: The bars can be stored for up to a week in the fridge or up to a month in the freezer, making them perfect for meal prep.
Alright, let's break down exactly what goes into this masterpiece...
Inside the Ingredient List
The Flavor Base
Rolled oats are the backbone of this recipe. They provide a hearty, nutty flavor that forms the chewiness of the bars. Skipping oats would turn the bars into a flat, butter‑only spread that lacks texture. If you’re allergic to oats, you can substitute with gluten‑free rolled oats or shredded coconut for a different mouthfeel.
Almond butter is the natural binder that keeps everything together. It’s rich in healthy fats and protein, giving the bars a satisfying mouthfeel. A higher almond butter ratio would make the bars denser and less chewy, so keep the 1/2 cup to maintain the perfect balance. If you prefer a different nut butter, cashew or peanut butter work, but the flavor profile will shift.
Honey (or maple syrup) adds natural sweetness and helps the almond butter flow. Honey also has antibacterial properties that help preserve the bars. If you’re looking for a lower glycemic index, use a small amount of stevia or monk fruit sweetener, but be aware that the texture may change slightly.
The Texture Crew
Chopped nuts—such as almonds, walnuts, or pecans—add crunch and a nutty aroma that complements the almond butter. They also bring healthy fats and protein. If you’re allergic to nuts, replace them with seeds like pumpkin or sunflower for a crunchy alternative.
Mini dark chocolate chips give a glossy, velvety coating that melts just enough to keep the bars moist. The dark chocolate also adds antioxidants and a slightly bitter contrast to the sweet base. For a dairy‑free version, use dairy‑free chocolate chips; they melt similarly and keep the bars vegan.
The Unexpected Star
Dried fruit—such as raisins, cranberries, or chopped dates—provides a burst of sweetness and chewiness. It also adds fiber and micronutrients. If you prefer a sweeter bar, increase the dried fruit to 1/2 cup, but be careful not to add too much moisture.
The Final Flourish
Vanilla extract, ground cinnamon, and a pinch of salt are the subtle flavor enhancers that tie everything together. Vanilla gives depth, cinnamon adds warmth, and salt balances the sweetness. Omitting the salt will result in a flat taste, while too much cinnamon can overpower the other flavors.
Everything's prepped? Good. Let's get into the real action...
The Method — Step by Step
- Gather Your Gear: Before you begin, line a 9x9 inch pan with parchment paper. This ensures easy removal and keeps the bars from sticking. Have all ingredients measured out; the process is quick once you’re organized. This step is crucial because a sloppy setup can lead to uneven bars.
- Warm the Binder: In a small saucepan over low heat, combine the almond butter, honey, vanilla extract, ground cinnamon, and a pinch of salt. Stir constantly until the mixture becomes silky and the almond butter fully melts into the honey. The scent of warm honey will fill the kitchen, signaling that the flavor base is ready. This is the moment of truth—if you rush this step, the binder won’t be smooth.
- Mix the Dry: In a large bowl, combine rolled oats, chopped nuts, dried fruit, and mini dark chocolate chips. Toss them together so the chocolate is evenly distributed. The dry mix should look like a colorful, crunchy mosaic. This step ensures each bite has a balanced flavor profile.
- Combine Wet & Dry: Pour the warm binder over the dry mixture. Stir vigorously until every oat and nut is coated. The mixture will look glossy and slightly sticky, but that’s expected. The chocolate should start to melt just enough to coat the oats without becoming too runny.
- Press Firmly: Transfer the mixture to the lined pan. Using the back of a spoon or a flat spatula, press the mixture down firmly and evenly. The goal is a tight, compact layer that will hold together when cut. If you don’t press well, the bars might crumble.
- Chill: Place the pan in the refrigerator for at least 30 minutes, preferably 1 hour. The bars will firm up, allowing you to cut them cleanly. While chilling, the flavors meld, creating a deeper taste experience.
- Cut & Store: Remove the set mixture from the pan, lift it with the parchment, and place on a cutting board. Using a sharp knife, cut into bars or squares. Store in an airtight container at room temperature for up to 3 days, or in the fridge for up to a week. For longer storage, freeze in a zip‑lock bag for up to a month.
- Optional Finish: For an extra touch of indulgence, drizzle a thin layer of melted dark chocolate over the top before chilling. This adds a glossy finish and a subtle chocolate crunch. Let the chocolate set before cutting for the best texture.
- Enjoy: Grab a bar when you need a quick energy boost, a pre‑workout snack, or a sweet treat that won’t derail your diet. The bars are portable, nutritious, and absolutely satisfying.
That's it — you did it. But hold on, I've got a few more tricks that'll take this to another level...
Insider Tricks for Flawless Results
The Temperature Rule Nobody Follows
The binder should be warm enough to melt the almond butter but not so hot that the honey caramelizes. If you overheat, the honey will lose its natural enzymes, and the bars will taste burnt. I use a double boiler to keep the temperature steady. A quick test: drop a spoonful of the mixture in cold water; if it thickens instantly, it's ready.
Why Your Nose Knows Best
Smell is a powerful indicator of readiness. When the binder is properly warmed, the aroma of toasted oats and vanilla will fill the room. If it smells raw or metallic, the mixture needs more time. Trust your nose; it's your best ally in the kitchen.
The 5-Minute Rest That Changes Everything
After you press the mixture into the pan, let it rest for 5 minutes before chilling. This short pause allows the binder to settle, making the bars less likely to crumble when you cut them. I’ve seen bars that were too fresh break apart; this trick saves the day.
Use a Silicone Mat for Easy Removal
While parchment paper works, a silicone baking mat gives you an extra edge for lifting the bars out of the pan. The non‑stick surface ensures a clean release and prevents the bars from sticking to the pan edges.
Add a Splash of Water Before Reheating
If your bars have become dry over time, a tiny splash of water (about a teaspoon) before microwaving can restore moisture. The water turns into steam, rehydrating the oats and chocolate without making the bars soggy.
Creative Twists and Variations
This recipe is a playground. Here are some of my favorite ways to switch things up:
Tropical Paradise
Swap the dried fruit for shredded coconut and add a handful of chopped dried mango. The coconut adds a beachy aroma, while the mango brings a bright, tropical sweetness. This version is perfect for summer picnics.
Chocolate Lover’s Delight
Replace the mini dark chocolate chips with white chocolate chips and add a teaspoon of espresso powder. The espresso intensifies the chocolate flavor and gives a subtle kick that pairs well with coffee.
Spicy Cinnamon Twist
Increase the cinnamon to 1 teaspoon and add a pinch of cayenne pepper. The heat balances the sweetness and adds a surprising depth. This variation is ideal for those who enjoy a bit of spice.
Nut-Free Version
Use sunflower or pumpkin seeds instead of nuts. They provide crunch and healthy fats without nuts. The flavor will shift slightly, but the texture remains delightful.
Vegan and Gluten-Free
Use a plant‑based honey substitute like maple syrup, a vegan almond butter, and gluten‑free rolled oats. The bars remain chewy and flavorful, making them suitable for those with dietary restrictions.
Protein Power
Add a scoop of vanilla protein powder to the dry mix. This boosts the protein content, turning the bars into a post‑workout snack. Be careful not to add too much protein powder, as it can dry out the bars.
Storing and Bringing It Back to Life
Fridge Storage
Store the bars in an airtight container in the refrigerator for up to a week. The cool temperature keeps them firm and prevents spoilage. When you’re ready to eat, let them sit at room temperature for a few minutes to soften slightly.
Freezer Friendly
For longer storage, place the bars in a zip‑lock bag and freeze for up to a month. Thaw at room temperature for 20–30 minutes before enjoying. Freezing preserves the flavors and keeps the bars fresh.
Best Reheating Method
If the bars feel dry after storage, add a tiny splash of water (about a teaspoon) before microwaving on high for 15–20 seconds. The steam will revive the texture without making the bars soggy. This trick keeps them as fresh as the day you made them.