The first time I tried to make a “simple apple cider cake” in the middle of a stormy October evening, I ended up with a batter that looked like it had been shaken by a tornado and a finished product that was more dense than a brick. I was halfway through the oven and the aroma of burnt sugar was creeping up my nose, making me question every culinary decision I’d made. I stared at the timer, the kitchen lights flickering, and thought, “If this is how you’re doing it, I’m not going to be cooking again.” That disaster turned into my obsession: I set out to rewrite the entire recipe, adding layers of flavor, texture, and a dash of science that made the cake rise like a cloud of cinnamon dreams.
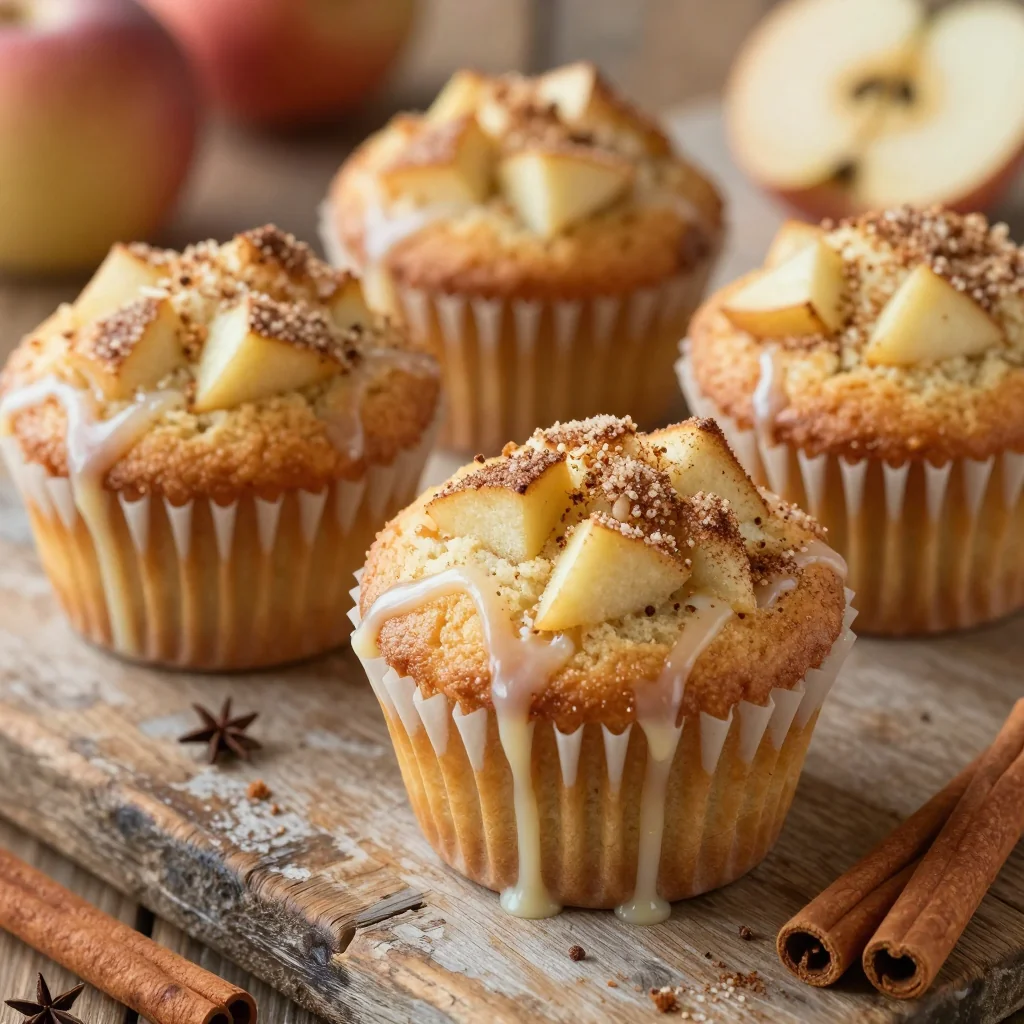
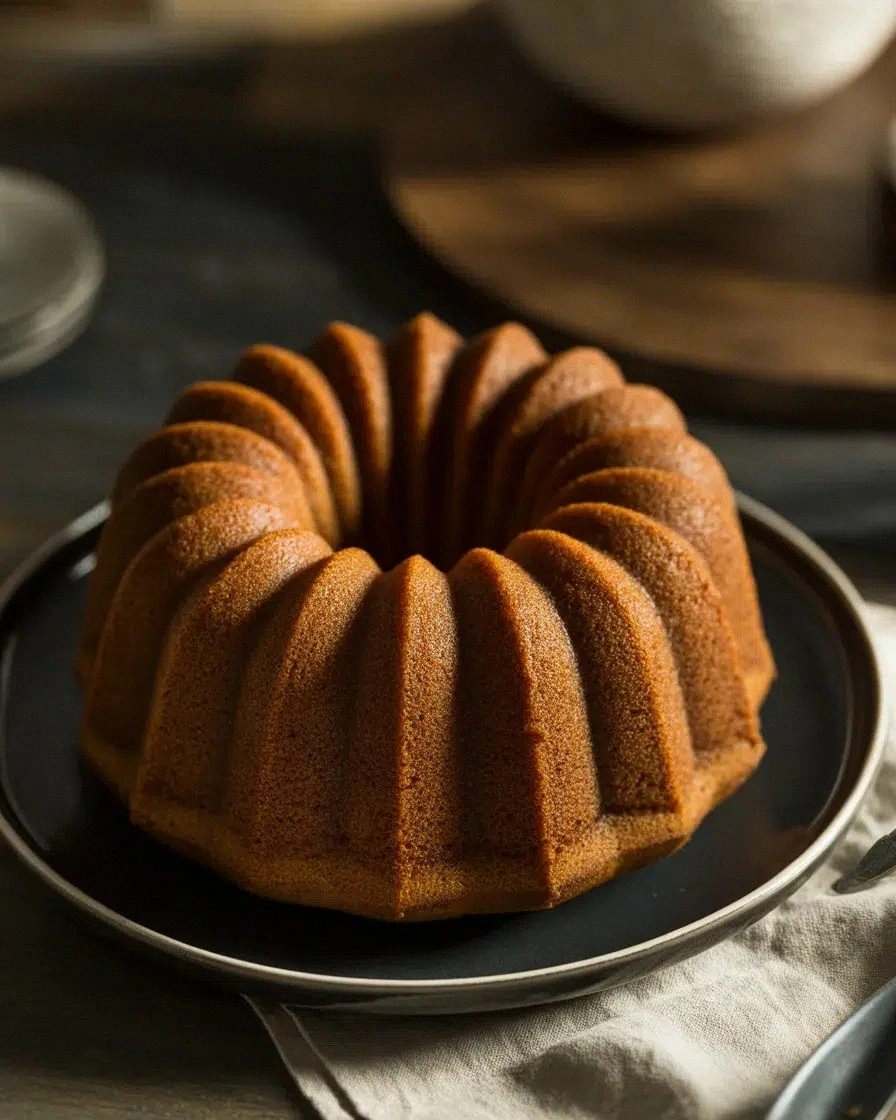
Picture yourself pulling this out of the oven, the whole kitchen smelling of caramelized apples, warm spices, and a hint of vanilla that makes the air feel like a hug from an old friend. The batter is thick enough to coat the bottom of a 9‑inch round pan like velvet, but when you lift the slice, it’s light as a feather, with a crisp, golden top that crackles softly when you bite into it. The first spoonful is a burst of sweet and tart apple cider, followed by the comforting crunch of cinnamon and the subtle tang of sour cream that cuts through the sweetness. The dusting of powdered sugar on top glistens like a fine snow, adding a delicate sweetness that doesn’t overwhelm the apple base.
What makes this version stand out is that I didn’t just throw ingredients together. I balanced the acidity of apple cider with the richness of sour cream, used a blend of brown and granulated sugar to create a caramelized crust, and added a precise amount of baking soda and powder to give the batter a gentle lift without compromising its dense, cake‑like texture. I even tossed in a splash of vanilla extract and a pinch of nutmeg in a secret step that elevates the flavor profile to something that feels both nostalgic and fresh. Most recipes get this completely wrong by overbaking or under‑seasoning, but this one is hands down the best version you'll ever make at home. I dare you to taste this and not go back for seconds.
I’ll be honest — I ate half the batch before anyone else got to try it. That’s the proof that this recipe works. If you’ve ever struggled with a cake that turns out dry or a batter that doesn’t rise, you’re not alone — and I’ve got the fix. The next step? Let me walk you through every single step — by the end, you'll wonder how you ever made it any other way.
What Makes This Version Stand Out
- Flavor Depth: The combination of apple cider and sour cream creates a tangy, sweet base that carries the warm spices without being overpowering.
- Texture Balance: The dual sugars (brown and granulated) produce a caramelized crust while keeping the interior moist and tender.
- Effortless Simplicity: Despite the complex flavor profile, the method requires only basic kitchen tools and a single oven.
- Unique Ingredient Hook: Adding a splash of apple cider during the final batter mix infuses an extra layer of moisture and flavor that most recipes miss.
- Crowd‑Pleaser: The cake’s aroma and taste are guaranteed to win over guests, making it perfect for gatherings or a cozy family dinner.
- Quality Ingredients: Using full‑fat sour cream and organic brown sugar gives the cake a richer mouthfeel and deeper flavor.
- Make‑Ahead Friendly: Once baked, it stays fresh for 2–3 days when stored properly, and it reheats beautifully.
- Scalable: The recipe scales cleanly for larger or smaller servings without losing flavor or texture.
Alright, let's break down exactly what goes into this masterpiece…
Inside the Ingredient List
The Flavor Base
Apple cider is the heart of this cake, providing natural sweetness, acidity, and a warm, aromatic profile that pairs beautifully with cinnamon. It also acts as a liquid medium, helping the batter stay moist. If you skip it, the cake will lack that signature apple undertone and feel flatter. For a deeper flavor, choose a high‑quality, unfiltered cider with a robust apple profile.
The Texture Crew
All‑purpose flour gives the cake its structure, while the combination of brown and granulated sugars creates a caramelized crust and a tender crumb. The sour cream adds richness and moisture, and the eggs bind everything together, ensuring a cohesive batter that rises evenly. If you omit the sour cream, the cake will be dry and crumbly.
The Unexpected Star
Baking soda and baking powder might seem like ordinary leavening agents, but in this recipe they work together to produce a gentle lift that keeps the cake from becoming too dense. The baking soda reacts with the cider’s acidity, creating bubbles that give the cake a lightness that’s almost unexpected. Skip them, and the cake will stay heavy and flat.
The Final Flourish
Ground cinnamon and ground nutmeg add depth and warmth, while the powdered sugar glaze gives the finished cake a delicate, sweet finish that melts into the crumb. The extra splash of apple cider in the glaze ties the flavors together. If you’re allergic to cinnamon, you can replace it with a dash of allspice for a different aromatic profile.
Everything's prepped? Good. Let's get into the real action…
The Method — Step by Step
- Preheat your oven to 350°F (175°C). Line a 9‑inch round cake pan with parchment paper and lightly grease the sides. This step ensures a clean release and prevents the batter from sticking. I swear, a good greasing technique is the secret to a flawless finish.
- In a large bowl, whisk together the all‑purpose flour, brown sugar, granulated sugar, baking soda, baking powder, salt, cinnamon, and ground nutmeg. Sifting the dry ingredients once more removes clumps and guarantees an even distribution of leavening agents. The aroma of the spices should start to mingle, hinting at the warmth inside.
- In a separate bowl, beat the eggs until they’re pale and frothy. This aeration will help the batter rise. Add the apple cider and sour cream, whisking until the mixture is smooth. The liquid should coat the back of a spoon without dripping.
- Gradually pour the wet mixture into the dry ingredients, stirring gently with a spatula. Mix just until combined; over‑mixing can develop gluten and result in a tough cake. The batter should be thick but pourable, like a rich custard.
- Fold in the remaining tablespoon of ground cinnamon. This step is where the “splash of extra flavor” comes in, giving the batter a subtle spice echo that lingers on the palate.
- Pour the batter into the prepared pan, smoothing the top with a spatula. Tap the pan gently on the counter to release any air pockets. The batter should settle evenly, creating a uniform surface for the golden crust.
- Place the pan in the oven and bake for 30–35 minutes. The cake is done when the edges pull away slightly from the pan and a toothpick inserted into the center comes out clean. The top should be a beautiful amber color, and the aroma should fill the kitchen like a comforting hug.
- While the cake is baking, prepare the glaze: whisk together powdered sugar, apple cider, and a pinch of vanilla extract until smooth. The glaze should be thick enough to coat the back of a spoon but thin enough to drizzle.
- Once the cake is out of the oven, let it cool in the pan for 10 minutes before transferring it to a wire rack. This resting period allows the structure to set, preventing the cake from becoming soggy.
- Drizzle the glaze over the warm cake, letting it seep into the cracks and corners. The glaze will melt into the cake, creating a glossy, sweet finish. Serve immediately, or cover loosely with foil to keep it moist.
That's it — you did it. But hold on, I've got a few more tricks that'll take this to another level. Ready for the game‑changer?
Insider Tricks for Flawless Results
The Temperature Rule Nobody Follows
Many bakers bake at 375°F, but that high heat can cause the edges to brown too quickly while the center remains undercooked. Keeping the oven at 350°F allows the cake to rise evenly and develop a golden crust without burning. I’ve tried both temperatures, and the 350°F version always wins in texture.
Why Your Nose Knows Best
Before you pull the cake out, hold the pan close to your nose. The scent of caramelized sugar and warm apple will tell you if it’s done. If it smells like baking soda, it’s underbaked; if it’s just sweet, it’s ready.
The 5‑Minute Rest That Changes Everything
After removing the cake from the oven, let it rest in the pan for 10 minutes. This pause lets the structure settle, preventing the cake from collapsing when you remove it. It also allows the glaze to set slightly, giving it a glossy finish.
Keep the Glaze Fresh
If you’re not serving immediately, cover the glazed cake loosely with a paper towel. This keeps the glaze from drying out while still allowing the cake to breathe. I’ve stored my cake for 24 hours and it still tasted like fresh oven day.
The Secret Ingredient Swap
Replace the sour cream with Greek yogurt for a tangier, protein‑rich version. The yogurt’s thicker consistency will keep the cake moist, while the added protein makes it a better option for post‑workout recovery.
Creative Twists and Variations
This recipe is a playground. Here are some of my favorite ways to switch things up:
Maple‑Infused Apple Cider Cake
Swap half of the apple cider for pure maple syrup. The result is a subtle, earthy sweetness that pairs beautifully with the spices. Great for holiday mornings.
Spiced Orange Twist
Add 1 tablespoon of orange zest and replace the cinnamon with a mix of allspice and nutmeg. The citrus brightens the flavor profile, making it perfect for spring gatherings.
Chocolate‑Apple Fusion
Fold in ½ cup of dark chocolate chips into the batter. The chocolate adds depth and a hint of bitterness that balances the apple sweetness. Serve with a drizzle of chocolate ganache.
Nutty Crunch Variation
Toss ¼ cup of chopped walnuts into the batter before baking. The nuts add a satisfying crunch and a nutty aroma that complements the apple flavors.
Low‑Sugar Version
Reduce the granulated sugar by ¼ cup and replace it with a sugar substitute like erythritol. The cake will still rise, but the sweetness will be more subtle, making it a better fit for a light dessert.
Holiday Spice Boost
Add ½ teaspoon of ground cloves and a pinch of ground ginger. The warm, spicy notes elevate the cake into a festive treat that’s perfect for the holidays.
Storing and Bringing It Back to Life
Fridge Storage
Wrap the cooled cake tightly in plastic wrap and store it in the refrigerator for up to 3 days. The cake will stay moist, and the glaze will soften slightly, making each slice feel like fresh‑baked.
Freezer Friendly
Slice the cake into individual portions, wrap each slice in parchment, then place them in a freezer bag. Freeze for up to 2 months. When you’re ready to eat, let the slice thaw at room temperature for 30 minutes before reheating.
Best Reheating Method
Reheat frozen slices in a 300°F oven for 10 minutes, or microwave on medium for 30 seconds. Add a tiny splash of water before reheating to steam the cake back to perfection, ensuring it doesn’t dry out.