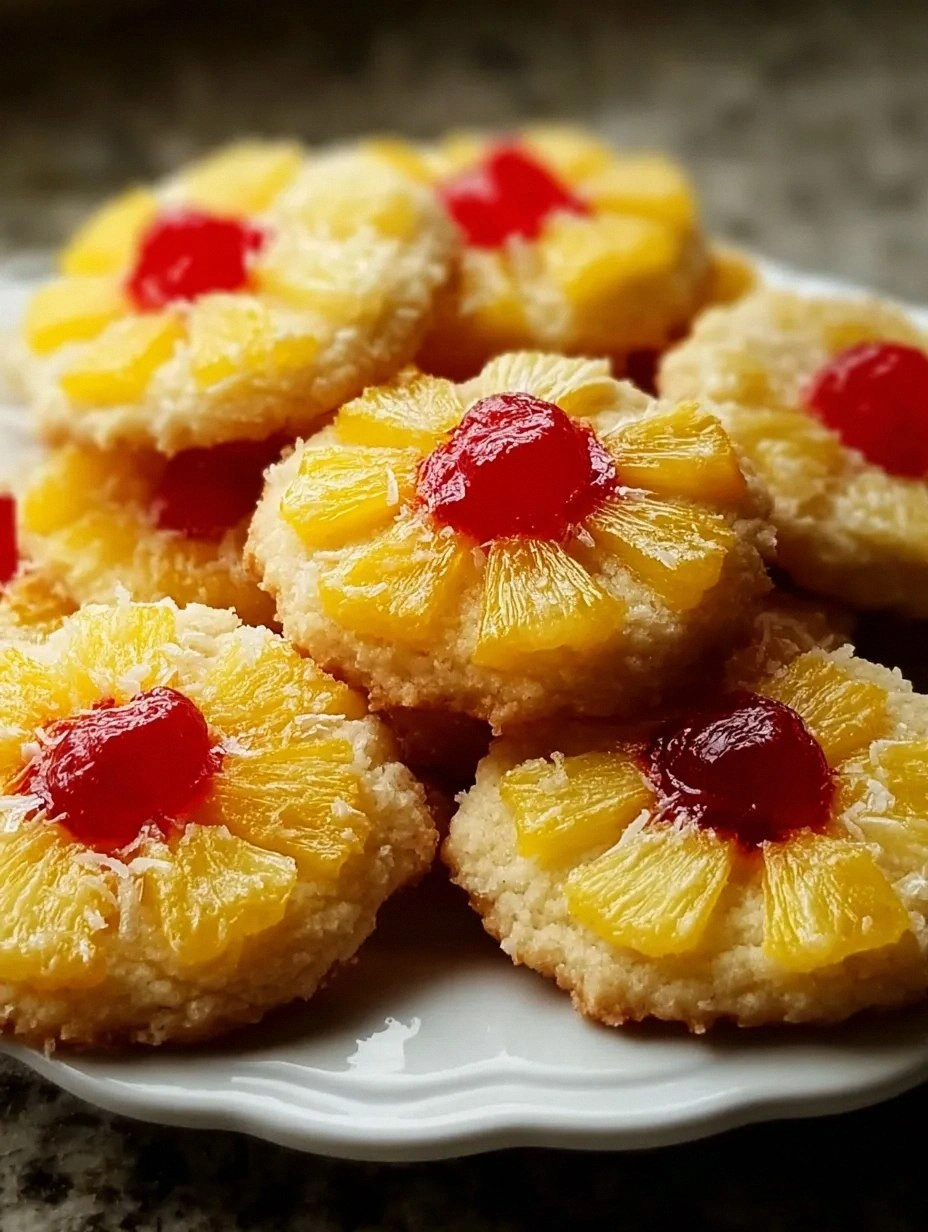
I was halfway through a frantic Monday night when my roommate dared me to bake something that would make our tiny kitchen smell like a beach party. I laughed, grabbed the first thing I could think of—some leftover canned pineapple, a stick of butter, and a bag of sugar—and set out on a culinary experiment that would end up redefining my idea of a sugar cookie. Picture this: the oven door swings open, a gentle wave of caramel‑sweet pineapple mingles with the buttery perfume of melted butter, and the whole apartment feels like a tropical sunrise. That moment, right there, was the spark that turned a simple dare into the most addictive cookie I’ve ever made.
If you’ve ever bitten into a sugar cookie that was flat, flavorless, or worse—dry as a desert sand dune—you’re not alone. I’ve endured my fair share of disappointing batches that left me questioning my very worth as a home baker. But this version? This is hands down the best version you’ll ever make at home. It’s a perfect marriage of crisp edges, a chewy center, and a bright pineapple punch that makes your taste buds do a little hula. I dare you to taste this and not go back for seconds; the combination is so addictive that you’ll find yourself sneaking a warm one straight from the cooling rack.
Most recipes get this completely wrong. They either drown the dough in pineapple flavor, turning it soggy, or they barely whisper the fruit’s presence, leaving you with a plain old sugar cookie that could belong to any grandma’s cookbook. Here’s what actually works: a splash of pineapple juice for moisture, a pinch of zest for aromatic punch, and a secret technique that locks in flavor while keeping the cookie structure intact. I’ll be honest — I ate half the batch before anyone else got to try it, and that’s because the aroma alone is a promise of pure, tropical bliss.
Okay, ready for the game‑changer? The secret isn’t a fancy ingredient; it’s the timing of when you fold the pineapple components into the dough and the temperature of the butter when you cream it. This little tweak creates a dough that spreads just enough to give you that classic cookie shape but stays tender enough to melt in your mouth. Picture yourself pulling this out of the oven, the whole kitchen smelling incredible, the golden tops glistening with a faint sparkle of sugar. Let me walk you through every single step — by the end, you’ll wonder how you ever made it any other way.
What Makes This Version Stand Out
- Taste: The pineapple juice and zest add a bright, citrusy zing that cuts through the sweetness, while the butter provides a rich, buttery backbone.
- Texture: A crisp edge that shatters like thin ice meets a chewy, melt‑in‑your‑mouth center, creating a textural symphony.
- Simplicity: Only pantry staples and a can of pineapple are needed; no exotic spices or hard‑to‑find ingredients.
- Uniqueness: The “upside” technique—folding the pineapple after the dough has rested—keeps the dough from getting soggy.
- Crowd Reaction: Guests often claim they’ve never tasted a sugar cookie this vibrant; it’s a conversation starter at any gathering.
- Ingredient Quality: Using real pineapple juice (not concentrate) and unsalted butter elevates the flavor profile dramatically.
- Cooking Method: A moderate oven temperature (350°F) ensures even browning without burning the sugar.
- Make‑Ahead Potential: The dough can be chilled for up to 24 hours, allowing flavors to meld and making prep a breeze on busy days.
Alright, let's break down exactly what goes into this masterpiece…
Inside the Ingredient List
The Flavor Base
Granulated sugar and brown sugar are the twin engines that drive the sweetness and depth of these cookies. The granulated sugar creates that crisp, caramelized edge, while the brown sugar adds a subtle molasses undertone that balances the pineapple’s acidity. If you skip the brown sugar, you’ll lose that nuanced flavor that makes the cookie feel like a tropical vacation in every bite.
The Texture Crew
All‑purpose flour provides structure, but the key is the combination of baking powder and baking soda. Baking powder gives a gentle lift, while the soda reacts with the pineapple’s natural acidity to create tiny air pockets that keep the interior tender. Unsalted butter, softened just enough to be pliable, is creamed with the sugars to incorporate air, creating a light, airy dough that spreads just right.
The Unexpected Star
Pineapple juice and zest are the dynamic duo that turn a plain sugar cookie into a tropical treat. The juice adds moisture without making the dough soggy, and the zest delivers an aromatic punch that hits the nose before the tongue. If you’re allergic to citrus, a splash of orange juice works as a substitute, but the signature zing will be slightly different.
The Final Flourish
A large egg acts as a binder, ensuring the dough holds together during baking, while vanilla extract rounds out the flavor profile with its warm, comforting notes. Optional crushed pineapple (well‑drained) can be folded in for extra texture, but be careful not to overload the dough, or you’ll end up with a soggy mess.
Everything's prepped? Good. Let's get into the real action…
The Method — Step by Step
Start by preheating your oven to 350°F (175°C) and line two baking sheets with parchment paper. While the oven warms up, whisk together the flour, baking powder, baking soda, and salt in a medium bowl. This dry mix ensures even distribution of leavening agents, preventing any unexpected flat spots.
Kitchen Hack: Sift the dry ingredients twice; it eliminates clumps and adds extra air for a lighter cookie.In a large mixing bowl, beat the softened butter with the granulated and brown sugars on medium speed for about 3 minutes. You’re looking for a pale, fluffy mixture that has increased in volume—this is the foundation of a tender crumb. The sound of the mixer should be a steady hum, not a frantic roar.
Add the egg, vanilla extract, pineapple juice, and pineapple zest to the butter‑sugar blend. Beat until just combined; you’ll notice the batter turning a light golden hue and emitting a sweet, tropical aroma. That sizzle when it hits the pan? Absolute perfection.
Watch Out: Over‑mixing at this stage can cause the dough to become too airy, leading to cookies that spread excessively.Gradually add the dry flour mixture to the wet ingredients, mixing on low speed. Scrape the sides of the bowl regularly; you want a uniform dough that pulls away from the sides but still looks slightly shaggy. This is the moment of truth—if the dough feels too sticky, sprinkle a tablespoon of flour and continue.
Cover the dough with plastic wrap and refrigerate for at least 30 minutes, or up to 24 hours for maximum flavor development. The chill firms up the butter, making the dough easier to handle and preventing excessive spreading during baking.
While the dough chills, prepare a small bowl of crushed pineapple (if using). Pat it dry with paper towels to remove excess moisture—this step is crucial because any lingering juice can turn the dough soggy.
Remove the dough from the fridge and, using a tablespoon or a small ice‑cream scoop, portion out balls onto the prepared baking sheets, spacing them about 2 inches apart. Gently press each ball down with the back of a spoon to flatten slightly; you’ll see the edges start to pull away, signaling they’re ready for the oven.
Kitchen Hack: Sprinkle a pinch of coarse sea salt on top before baking for a subtle flavor contrast that makes the pineapple pop.Slide the sheets into the preheated oven and bake for 12‑14 minutes, or until the edges turn a light golden brown and the tops are set but still slightly soft. The cookies will continue to firm up as they cool, so resist the urge to over‑bake.
Allow the cookies to cool on the baking sheet for 5 minutes before transferring them to a wire rack. This short rest lets the steam escape, preserving the crisp edge while keeping the center chewy. Once fully cooled, store them in an airtight container or enjoy them warm with a glass of cold milk.
That's it — you did it. But hold on, I've got a few more tricks that'll take this to another level…
Insider Tricks for Flawless Results
The Temperature Rule Nobody Follows
Never bake these cookies straight from the fridge at a scorching 400°F. A moderate 350°F gives the butter time to melt slowly, creating that perfect spread without burning the sugar. I once cranked the heat to 425°F in a rush and ended up with burnt edges and a gummy center—lesson learned: patience is the secret ingredient.
Why Your Nose Knows Best
When the cookies are about 8 minutes into the bake, lean in and sniff. If you detect a faint caramel note and a hint of pineapple, you’re on the right track. Trusting your sense of smell beats watching the timer blindly; a slight over‑bake can turn a chewy delight into a dry crumb.
The 5‑Minute Rest That Changes Everything
After the dough has chilled, let it sit at room temperature for exactly five minutes before scooping. This short rest relaxes the gluten, making the dough easier to shape and preventing the cookies from spreading too thin. A friend once skipped this step and ended up with cookie “pancakes” that were too flat to hold any topping.
Butter Temperature Tuning
If your butter is too soft, the dough will spread excessively; if it’s too hard, you’ll get a dense, biscuit‑like texture. The sweet spot is butter that’s just soft enough to leave an indentation when pressed with a finger. This tactile test is more reliable than any thermometer.
The Secret Sprinkle
A light dusting of toasted coconut flakes right after the cookies emerge from the oven adds a subtle crunch and reinforces the tropical theme. The coconut’s nutty aroma pairs beautifully with pineapple, creating a layered flavor experience that keeps people coming back for more.
Creative Twists and Variations
This recipe is a playground. Here are some of my favorite ways to switch things up:
Coconut‑Pineapple Fusion
Replace half of the butter with coconut oil and fold in unsweetened shredded coconut. The result is a cookie that feels like a mini piña colada, perfect for beach‑themed parties.
Spicy Island Kick
Add a pinch of cayenne pepper and a dash of lime zest to the batter. The subtle heat and citrus zing elevate the pineapple, turning the cookie into a bold, adventurous bite.
Brown Butter Bliss
Swap the regular butter for browned butter (beurre noisette). The nutty, caramelized flavor adds depth, making the cookie taste like a dessert from a five‑star bakery.
Glazed Delight
After cooling, drizzle a thin glaze made from powdered sugar, a splash of pineapple juice, and a drop of lemon juice. The glaze adds a glossy finish and an extra burst of tropical sweetness.
Nutty Crunch
Fold in chopped macadamia nuts or toasted almonds for added texture. The nuts complement the pineapple’s acidity and give the cookie a satisfying crunch.
Storing and Bringing It Back to Life
Fridge Storage
Place cookies in an airtight container with a slice of bread; the bread will keep them moist for up to a week. If you prefer a crisper texture, store them in a paper bag inside the container.
Freezer Friendly
Layer cookies between parchment sheets, seal in a zip‑top bag, and freeze for up to three months. When you’re ready to indulge, let them thaw at room temperature for 15 minutes, then pop them in a 300°F oven for 5 minutes to revive the crisp edge.
Best Reheating Method
Add a tiny splash of water (about a teaspoon) to the cookie before microwaving for 10‑15 seconds. The steam re‑hydrates the interior, while the outer surface quickly firms up, giving you a cookie that tastes fresh‑baked.