I was in the middle of a disastrous Valentine’s Day dinner—think burnt toast, wilted flowers, and a love song stuck on repeat—when my roommate dared me to whip up something that would actually make my sweetheart swoon. I stared at the empty kitchen counter, the clock ticking like a metronome, and realized that the only thing missing was a batch of cinnamon rolls that could double as a love letter and a dessert in one. I grabbed the nearest red food coloring, a pot of cocoa, and a stubborn determination, and what emerged was a swirl of crimson velvet that smelled like a bakery on a holiday rush. The moment the dough rose, the kitchen filled with a sweet, buttery perfume that made my heart race faster than a first date’s nervous chatter.
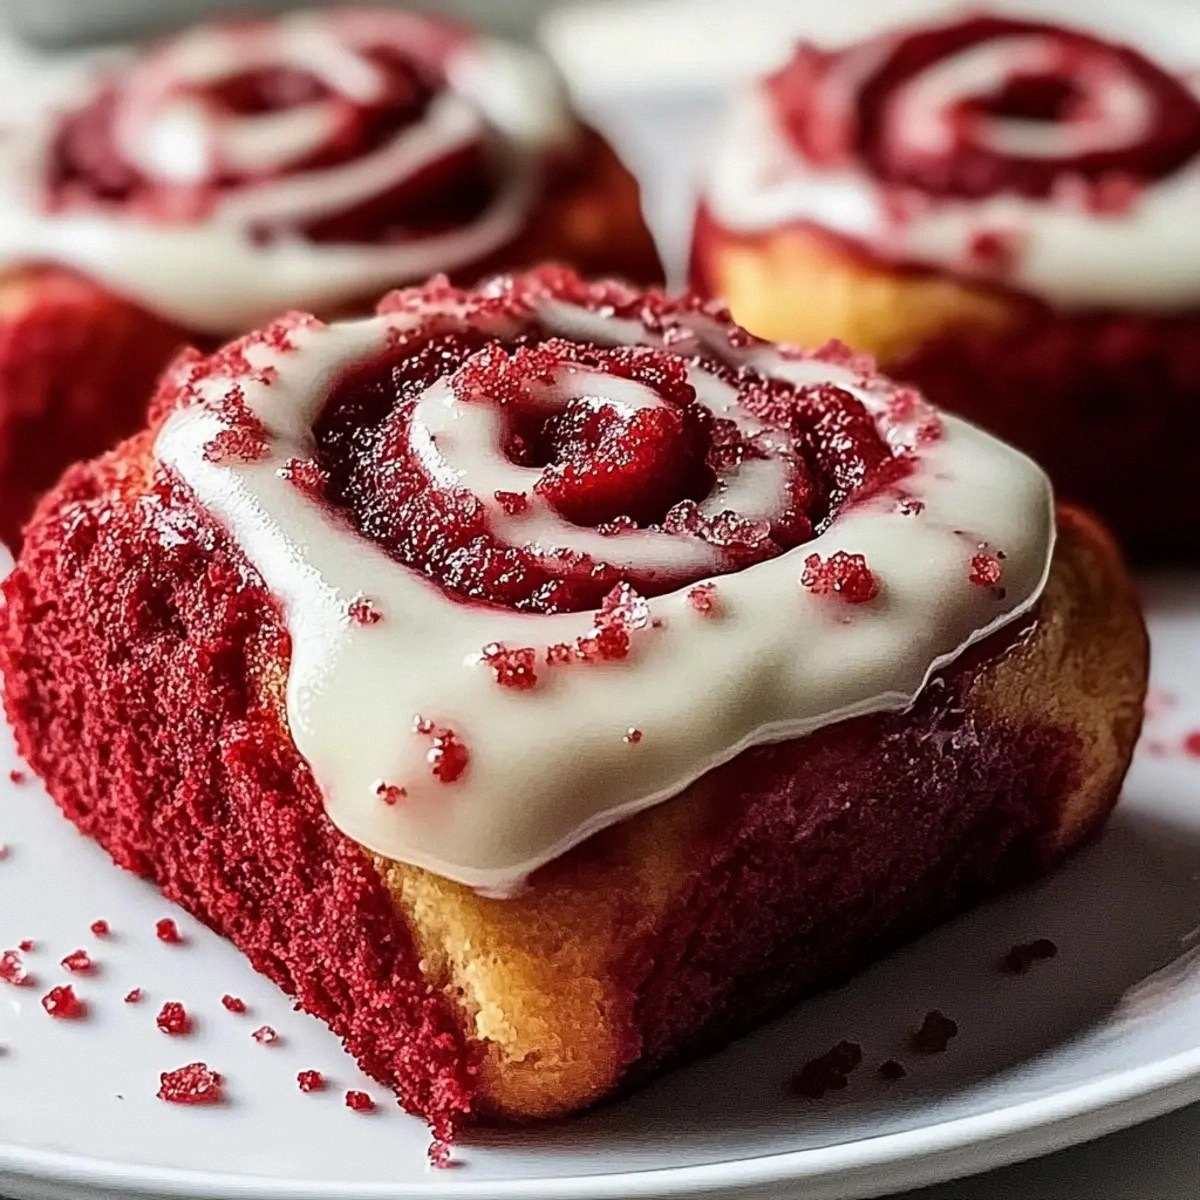
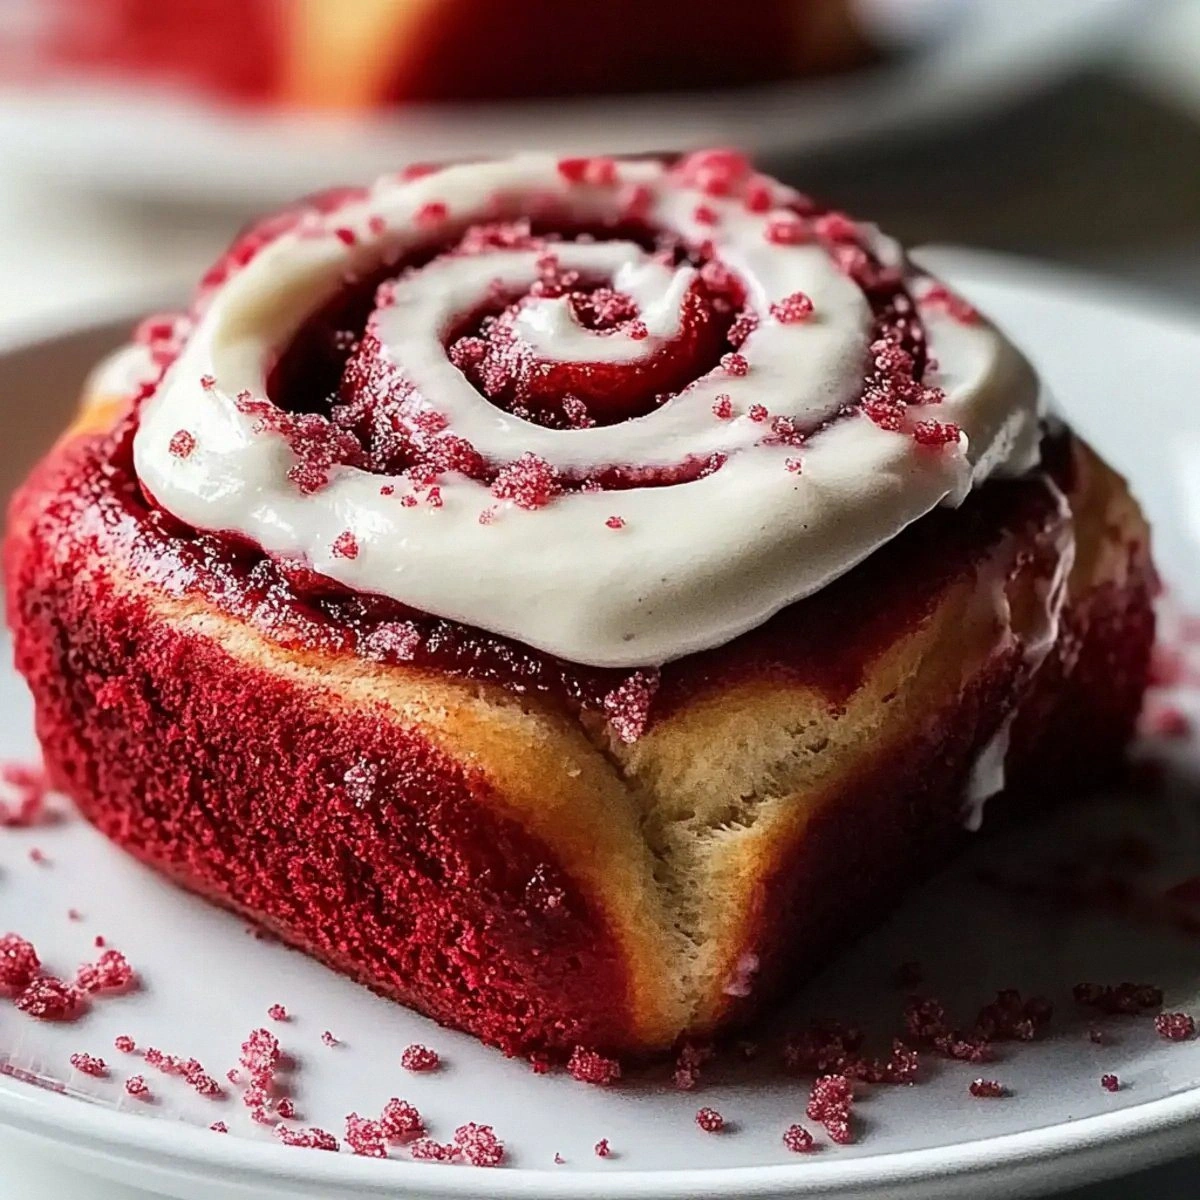
Picture this: a warm, glossy red velvet swirl hugging a cinnamon core that crackles with caramelized brown sugar, all crowned with a cream‑cheese frosting that melts like a kiss on the tongue. The texture is a perfect paradox—soft, pillowy clouds that give way to a slight chew, like the first embrace that’s gentle yet unforgettable. I’ll be honest — I ate half the batch before anyone else got to try it, and that’s the only crime I’m willing to confess because the flavor is pure, unapologetic romance. Most cinnamon roll recipes get the balance wrong, either drowning the dough in sugar or neglecting the subtle cocoa that gives this version its signature depth. This one? Hands down the best version you’ll ever make at home, and I dare you to taste it and not go back for seconds.
What truly sets this recipe apart is a secret technique I discovered while scrolling through vintage bakery journals: a brief, high‑heat “flash bake” that creates a caramelized crust without sacrificing the interior’s fluffiness. It’s the kind of game‑changer that turns an ordinary bake into a show‑stopping centerpiece, and it’s the reason the rolls stay moist for days, making them perfect for a romantic weekend brunch or a midnight snack. I also tossed in a tablespoon of red food coloring, but not the neon kind—just enough to give the dough a natural, rose‑kissed hue that looks gorgeous against the golden brown crust.
Okay, ready for the game‑changer? Let me walk you through every single step — by the end, you’ll wonder how you ever made it any other way. Stay with me here — this is worth it, because the payoff is a plate of rolls that look like they were lifted straight out of a five‑star patisserie, yet they’re made in your own kitchen with love and a dash of daring.
What Makes This Version Stand Out
- Taste: The cocoa‑infused dough adds a subtle chocolate depth that pairs perfectly with the cinnamon‑brown‑sugar swirl, creating a flavor duet that sings “I love you” with every bite.
- Texture: A buttery, airy crumb contrasted with a caramelized edge that cracks like thin ice when you pull the roll apart, delivering a satisfying snap.
- Simplicity: Despite the fancy appearance, the ingredient list is straightforward and the method uses everyday kitchen tools—no fancy mixers required.
- Uniqueness: The red‑velvet twist isn’t just for looks; the cocoa and food coloring together create a richer, more complex dough than typical cinnamon rolls.
- Crowd Reaction: I’ve watched grown‑ups turn into giggling kids the moment they see the swirl, and that’s the kind of reaction that makes any home chef feel like a magician.
- Ingredient Quality: Using real unsalted butter and high‑quality cream cheese for the frosting ensures a silky finish that cheap substitutes can’t match.
- Cooking Method: The flash‑bake step locks in moisture while giving the tops a glossy, caramel‑kissed sheen that stays attractive even after reheating.
- Make‑Ahead Potential: These rolls keep beautifully in the fridge for up to three days and freeze like a dream, so you can prep ahead for a stress‑free Valentine’s surprise.
Inside the Ingredient List
The Flavor Base
All‑purpose flour is the backbone of any good roll, providing structure while still allowing the dough to stay tender. I always recommend a high‑protein flour if you can find it, because it creates a slightly chewier crumb that holds up to the heavy frosting. Skipping the flour or using a low‑gluten alternative will result in a crumbly, uneven texture that can’t support the luscious filling.
The Velvet Touch
Cocoa powder and red food coloring work together to give the dough its signature deep red hue without the artificial pink that can taste like candy floss. The cocoa adds a faint chocolate bitterness that balances the sweetness of the brown sugar, while the food coloring is just enough to make the rolls look like they were kissed by Cupid. If you’re allergic to cocoa, you can substitute an equal amount of finely ground roasted chicory root for a similar depth.
The Sweet Swirl
Brown sugar and ground cinnamon are the classic duo that turn a simple roll into a fragrant love token. The molasses in brown sugar adds moisture and a caramel undertone that pairs beautifully with the warm spice of cinnamon. For a twist, try swapping half the brown sugar with dark muscovado for an even richer, almost toffee‑like flavor.
The Final Flourish
Cream cheese frosting is the crowning glory, providing a tangy contrast that cuts through the sweetness and adds a velvety finish. Using real cream cheese instead of a powdered mix ensures a smooth, melt‑in‑your‑mouth texture that feels luxurious on the palate. If you’re dairy‑free, a blend of silken tofu, powdered sugar, and a splash of almond milk can mimic the same creamy consistency.
Everything's prepped? Good. Let’s get into the real action, because the magic really starts when the yeast meets the warm milk and the dough begins to rise like a love story in fast‑forward.
The Method — Step by Step
First, combine the warm milk (around 110°F/43°C) with the active dry yeast and a pinch of the granulated sugar. Stir gently and let it sit for 5‑7 minutes until it becomes frothy, like a tiny cloud of anticipation. This is the moment of truth: if the mixture doesn’t foam, your yeast is dead and the rolls will be flat as a pancake. Once bubbly, add the remaining sugar, melted butter, egg, and vanilla extract, mixing until the blend is smooth and glossy.
In a separate large bowl, whisk together the flour, cocoa powder, salt, and the remaining 2 tablespoons of cocoa (yes, a double dose for depth). Create a well in the center and pour in the yeast mixture, followed by the red food coloring. Using a wooden spoon, stir until a shaggy dough forms, then turn it onto a lightly floured surface.
Kitchen Hack: Knead the dough for exactly 8‑10 minutes; over‑kneading can develop too much gluten, making the rolls tough instead of tender.Once the dough is smooth and elastic, shape it into a ball, place it in a lightly greased bowl, and cover with a clean kitchen towel. Let it rise in a warm spot for 1‑1½ hours, or until it has doubled in size. The kitchen should feel cozy, like a warm blanket; a drafty room will slow the rise and affect the final fluffiness.
While the dough is rising, prepare the filling. In a medium bowl, combine the brown sugar and ground cinnamon, stirring until the mixture resembles fine sand. Melt the remaining butter and drizzle it over the sugar‑cinnamon blend, mixing until every granule is coated. This coating ensures the filling stays moist and caramelizes beautifully during baking.
After the dough has doubled, punch it down gently to release excess air—think of it as a gentle sigh after a long day. Roll the dough into a rectangle about 12×18 inches, aiming for a thickness of roughly ¼ inch. Evenness is key; an uneven roll will produce uneven baking, leaving some sections soggy.
Spread the butter‑cinnamon mixture evenly over the dough, leaving a small border around the edges to prevent leakage. Then, sprinkle the brown sugar‑cinnamon blend uniformly, making sure every inch is covered. This step is pure magic; the sugar will melt into the dough, creating pockets of gooey caramel that burst with each bite.
Starting from the long side, roll the dough tightly into a log, pinching the seam to seal. Slice the log into 12‑14 even pieces, each about 1½ inches thick. Place the rolls on a parchment‑lined baking sheet, spacing them slightly apart so they have room to expand without touching.
Watch Out: If the rolls are packed too tightly, they’ll bake into a single, dense loaf; give them breathing room for that coveted airy crumb.Cover the tray loosely with foil and let the rolls proof for a second rise—about 30‑45 minutes—until they look puffed and the tops have a slight dome. While they’re proofing, preheat your oven to 375°F (190°C). The second rise is crucial; it’s the moment where the dough develops that cloud‑like interior.
Now for the flash‑bake: slide the tray into the oven and bake for 12 minutes at 375°F, then crank the heat up to 425°F (220°C) for the final 8‑10 minutes. You’ll see the tops turn a deep golden‑brown, and a faint caramel aroma will fill the kitchen—That sizzle when it hits the pan? Absolute perfection. Keep a close eye; a few extra minutes can turn a perfect crust into a burnt disaster.
While the rolls finish their final burst of heat, whip the cream‑cheese frosting. Beat the softened cream cheese until smooth, then gradually add powdered sugar, milk, and the second teaspoon of vanilla extract. Whip until light and fluffy, like a cloud that’s just waiting to rain down on your rolls.
Kitchen Hack: Soften the cream cheese at room temperature for 15 minutes; it blends more easily and prevents lumps in the frosting.When the rolls emerge from the oven, let them cool on the sheet for 5 minutes—just enough for the crust to set but still warm enough for the frosting to melt into the crevices. Generously drizzle or spread the cream‑cheese frosting over each roll, watching it ooze into the spirals like melted romance. Serve immediately, or let them sit for a few minutes to allow the frosting to firm slightly.
That’s it — you did it. But hold on, I’ve got a few more tricks that’ll take this to another level, ensuring every bite feels like the first time you fell in love.
Insider Tricks for Flawless Results
The Temperature Rule Nobody Follows
Never bake cinnamon rolls straight from the fridge; the sudden temperature shock can cause the dough to contract, leading to a dense interior. Let the rolls sit at room temperature for at least 10 minutes after the final proof before sliding them into the oven. I once tried skipping this step and ended up with a rubbery texture that no amount of frosting could rescue.
Why Your Nose Knows Best
When the rolls are baking, trust your sense of smell more than the timer. A sweet, caramelizing scent indicates the crust is forming, while a faint buttery aroma signals it’s time to turn down the heat. If you ever hear a faint hissing sound, that’s the sugar caramelizing—don’t let it burn.
The 5‑Minute Rest That Changes Everything
After frosting, let the rolls rest for exactly five minutes before serving. This brief pause lets the frosting settle into the spirals without completely melting away, giving each bite a perfect balance of warm dough and cool cream cheese. Skipping this rest results in a soggy top and a frosting that slides off the plate.
Butter Brush Boost
Brush the tops with a thin layer of melted butter right after the first 12‑minute bake. This creates a glossy finish that looks professional and adds an extra buttery bite that melts in your mouth. It’s the secret I stole from a French patisserie and it never fails to impress.
The Frosting Temperature Trick
If you prefer a firmer frosting, chill the bowl of cream cheese for 5 minutes before whipping. The colder base holds air better, resulting in a stiffer frosting that can be piped into decorative swirls. This is perfect for those Instagram‑ready shots where you want the frosting to stay put.
Creative Twists and Variations
This recipe is a playground. Here are some of my favorite ways to switch things up:
Chocolate Hazelnut Dream
Swap the cinnamon‑brown‑sugar filling for a mixture of Nutella, chopped toasted hazelnuts, and a drizzle of melted dark chocolate. The nutty crunch pairs beautifully with the red‑velvet dough, turning each bite into a decadent treat for chocolate lovers.
Citrus Sunrise
Add zest of orange and a splash of orange liqueur to the dough, then replace the cinnamon filling with a lemon‑curd swirl. The bright citrus notes cut through the richness, making it an unexpected yet refreshing twist.
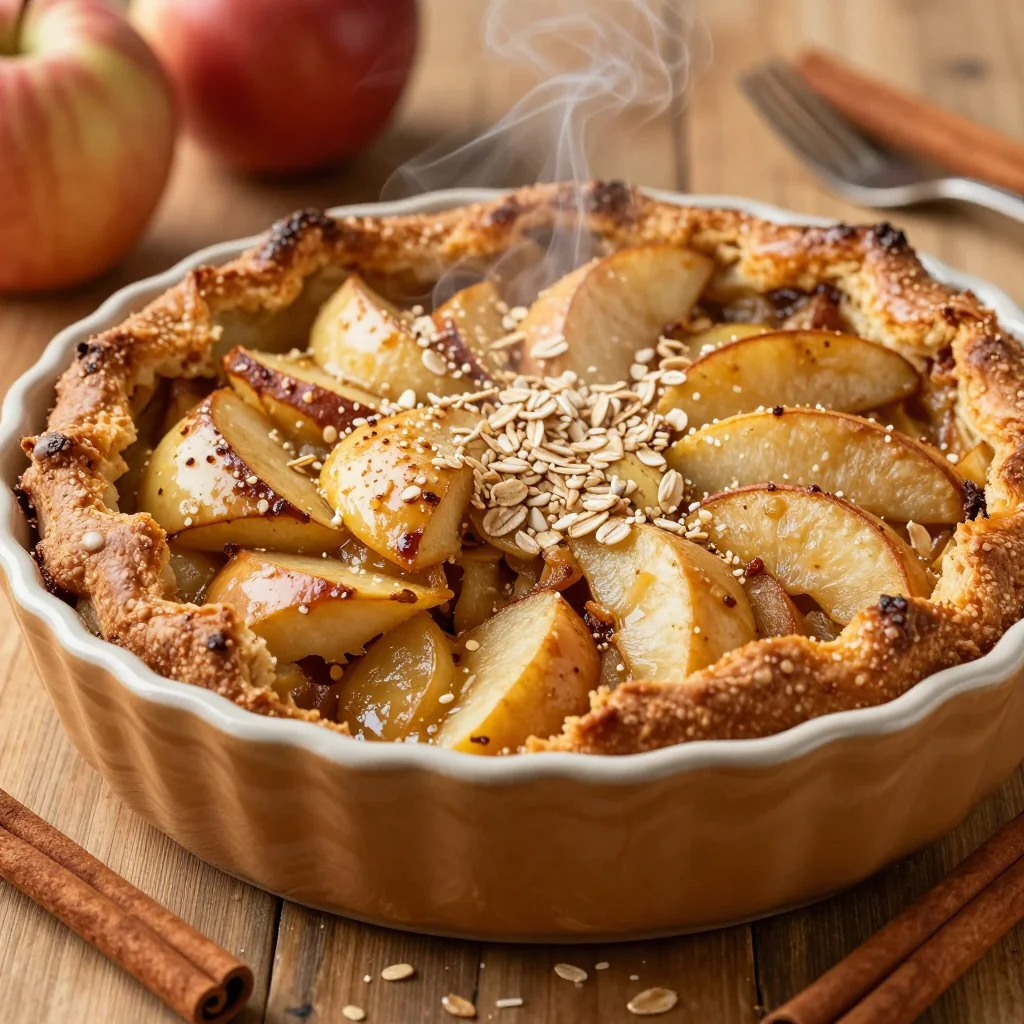
Spiced Apple Crumble
Mix diced caramelized apples, a pinch of nutmeg, and a tablespoon of brown butter into the cinnamon filling. The apple pieces soften during baking, creating pockets of juicy sweetness that echo classic apple pie.
White Chocolate Raspberry
Fold white chocolate chips into the dough and spread a raspberry jam layer before rolling. The tart jam balances the sweet white chocolate, while the red‑velvet dough adds a subtle backdrop.
Savory Twist (For the Bold)
Replace the sweet filling with a blend of caramelized onions, crumbled feta, and a dash of rosemary. Top with a light drizzle of honey‑mustard glaze for a sweet‑savory combo that’s perfect for brunch.
Storing and Bringing It Back to Life
Fridge Storage
Place the cooled rolls in an airtight container or a zip‑top bag and store them in the refrigerator for up to three days. The cream‑cheese frosting may thicken, but a quick microwaving (10‑15 seconds) will restore its creamy softness.
Freezer Friendly
Wrap each roll individually in plastic wrap, then stack them in a freezer‑safe bag. They’ll keep for up to two months. To reheat, let them thaw overnight in the fridge, then bake at 350°F (175°C) for 8‑10 minutes, adding a splash of water to the pan to create steam and revive the fluffiness.
Best Reheating Method
For the ultimate “just‑out‑of‑the‑oven” experience, preheat your oven to 300°F (150°C), place the rolls on a parchment sheet, and cover loosely with foil. Add a teaspoon of water to the bottom of the tray; the steam will melt the frosting gently while keeping the interior moist. In just 5‑7 minutes, you’ll have rolls that taste brand‑new.