Picture this: I was standing in the middle of a kitchen that smelled like a burnt pancake and a forgotten casserole, and my friend dared me to create something that would make even the most skeptical foodie swoon. I rolled up my sleeves, grabbed two boneless, skinless chicken breasts, and whispered, “This is going to be the best version you'll ever make at home.” The moment the chicken hit the pan, the sizzle was like a drumbeat of destiny, and the air filled with the promise of something unforgettable. I could almost hear the neighbors calling for a taste, and I knew I was onto something special. Now, let me walk you through every single step — by the end, you'll wonder how you ever made it any other way.
First, I let the chicken marinate in a buttermilk bath infused with Cajun seasoning, because nothing says “flavor explosion” like a tangy, spicy soak. The buttermilk not only tenderizes the meat but also creates a silky coating that holds the spices in place, ensuring each bite bursts with heat. I dare you to taste this and not go back for seconds; the seasoning is so balanced that it feels like a perfectly choreographed dance on your tongue. The kitchen smelled like a summer barbecue, but the heat was mild enough to keep you from burning your eyebrows. Trust me, if you’ve ever struggled to get that perfect crunch, you’re not alone — and I’ve got the fix.
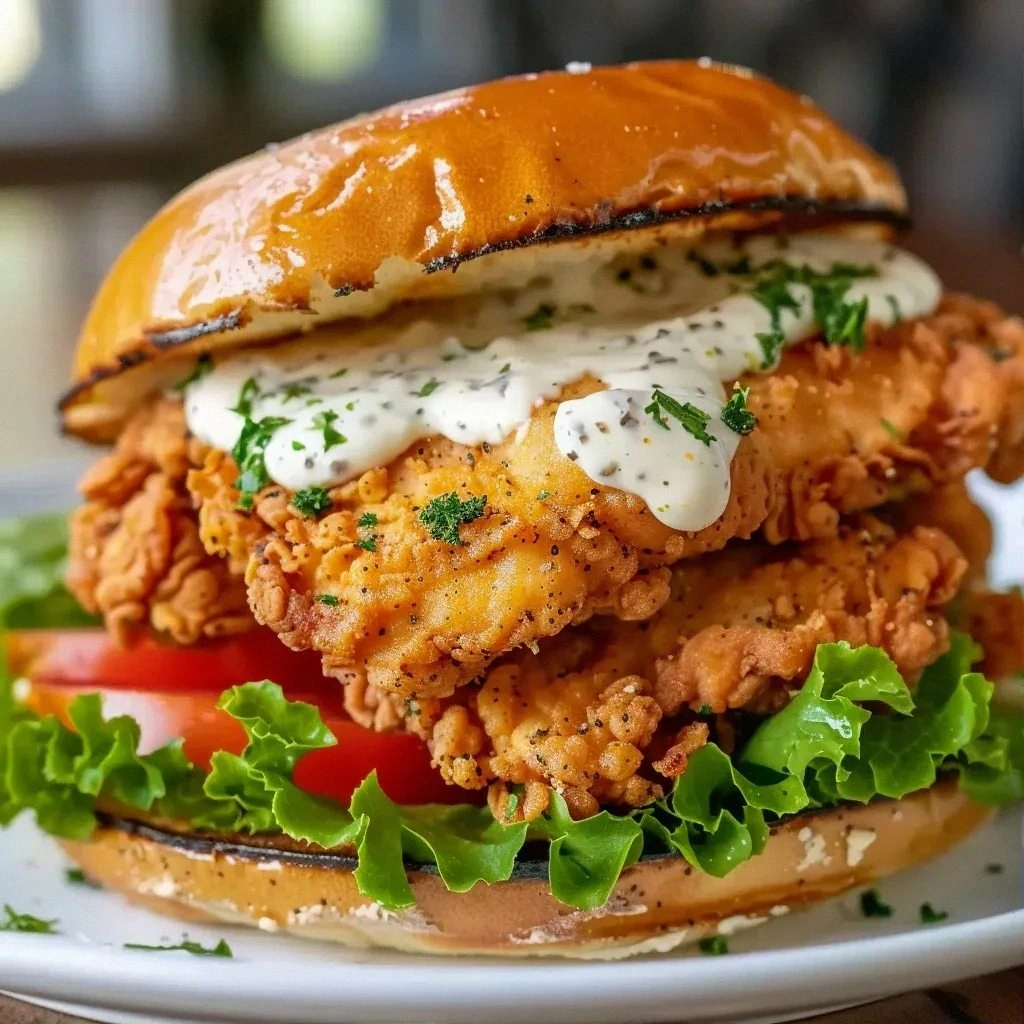
Most recipes get this completely wrong by using plain flour or too much oil, resulting in soggy, flavorless chicken. Here, I use a blend of all-purpose flour, paprika, garlic powder, onion powder, and a touch of salt and pepper, creating a crisp, golden crust that shatters like thin ice when you bite into it. The result is a sandwich that feels like a crunchy, spicy hug wrapped in a soft brioche bun, with lettuce and tomato adding a fresh, crisp counterpoint. The aioli, a simple mix of mayo, minced garlic, lemon juice, salt, and pepper, coats the chicken like velvet, sealing in moisture and adding a bright, citrusy zing. Picture yourself pulling this out of the oven, the whole kitchen smelling incredible, and knowing you’ve just made a masterpiece.
I’ll be honest — I ate half the batch before anyone else got to try it, and they begged for the recipe. The secret to that juicy interior is in the marination time and the precise frying temperature, which I’ll walk you through step by step. You’ll learn how to keep the oil at the right heat, how to flip the chicken at the perfect moment, and how to finish it with a final burst of flavor that will have you reaching for seconds. This next part? Pure magic. And now the fun part.
What Makes This Version Stand Out
- Flavor: The Cajun seasoning is blended with paprika and garlic powder, creating a smoky, spicy depth that lingers on the palate. The buttermilk soak tenderizes the chicken while adding a subtle tang that balances the heat.
- Texture: The flour coating, seasoned to perfection, forms a crisp, golden crust that shatters with a satisfying snap. The brioche bun remains soft and slightly sweet, providing a delightful contrast to the savory filling.
- Simplicity: With only a handful of pantry staples, this sandwich can be whipped up in under an hour, making it ideal for weeknight meals or spontaneous gatherings.
- Uniqueness: The garlic aioli adds a velvety richness that sets this sandwich apart from the usual fried chicken offerings.
- Crowd Reaction: Friends and family often ask for the recipe after the first bite, and I’ve seen people go from “I don’t like spicy” to “I need this in my life” in a single chew.
- Make‑Ahead Potential: The chicken can be marinated and even pre‑fried a day ahead, allowing you to assemble the sandwich quickly when you’re ready to eat.
- Ingredient Quality: Using fresh, high‑quality chicken and real‑garlic aioli ensures the sandwich tastes like a gourmet creation without the fuss.
- Cooking Method: The combination of a buttermilk bath, seasoned dredge, and controlled oil temperature guarantees a juicy interior and a crispy exterior that is hard to replicate elsewhere.
Inside the Ingredient List
The Flavor Base
The foundation of this sandwich starts with buttermilk and a Cajun seasoning blend that includes paprika, garlic powder, onion powder, salt, and pepper. The buttermilk’s acidity not only tenderizes the chicken but also creates a subtle tang that balances the heat from the Cajun mix. If you skip the buttermilk, the chicken will still be tasty, but it will lack the moist, buttery interior that makes each bite memorable. Swapping the Cajun seasoning for a regular spice rub will reduce the punch, so keep the original blend if you want that signature kick.
The Texture Crew
All-purpose flour, seasoned with paprika, garlic powder, onion powder, salt, and pepper, forms the crispy coating that delivers a satisfying crunch. The flour’s fine texture allows the spices to cling, creating a uniform crust that doesn’t crumble. Using whole wheat or corn flour will alter the flavor profile and give a denser bite; if you prefer a lighter crunch, stick with regular flour. A pinch of baking powder added to the flour can make the crust even fluffier.
The Unexpected Star
The garlic aioli is a game‑changing sauce that adds richness and a citrusy lift. Made from mayonnaise, minced garlic, lemon juice, salt, and pepper, it coats the chicken like velvet, sealing in moisture and providing a bright contrast to the savory crust. If you’re on a low‑fat diet, replace mayo with Greek yogurt or a dairy‑free alternative; the flavor will remain robust, though slightly tangier. A dash of smoked paprika in the aioli can add an extra layer of smokiness that complements the Cajun coating.
The Final Flourish
Leafy romaine lettuce, sliced tomatoes, and soft brioche buns bring freshness, crunch, and a hint of sweetness to the sandwich. The lettuce adds a crisp bite that contrasts the fried chicken, while the tomatoes provide juiciness and a burst of acidity that cuts through the richness. Brioche buns, with their buttery crumb, complement the savory filling without overpowering it. If you prefer a gluten‑free option, use a high‑quality gluten‑free bun or a sturdy ciabatta roll.
Everything's prepped? Good. Let's get into the real action.
The Method — Step by Step
- First, lay the chicken breasts on a cutting board and gently pound them with a meat mallet until they’re an even 1/2 inch thick. This ensures uniform cooking and a tender bite. Keep the thickness consistent so every piece fries at the same rate. I always use a ruler to double‑check the thickness for precision. The even surface also helps the flour coating adhere better.
- In a bowl, whisk together the buttermilk, Cajun seasoning, paprika, garlic powder, onion powder, salt, and pepper until the mixture is smooth. The spices should be evenly distributed so every morsel tastes balanced. Add a splash of apple cider vinegar for a subtle tang that helps tenderize the meat even further. Let the chicken soak for at least 30 minutes, or up to 2 hours if you’re in a hurry.
- While the chicken marinates, prepare your dredge: combine all-purpose flour, paprika, garlic powder, onion powder, salt, and pepper in a shallow dish. The flour should be seasoned to match the buttermilk bath; this ensures a consistent flavor profile. Shake out any excess flour before dipping the chicken to keep the coating light and crisp. The flour’s fine texture helps the spices stick, creating a uniform crust.
- Heat about 2 inches of vegetable oil in a heavy skillet over medium‑high heat until it reaches 350°F (175°C). A good way to test is by dropping a small piece of bread; it should sizzle and brown in about 30 seconds. Maintain the temperature by adjusting the flame; too hot and the coating will burn, too cool and the chicken will absorb oil. Use a thermometer for accuracy, but a steady sizzle is a reliable indicator. Remember, the oil must be hot enough to crisp the coating instantly.
- Remove the chicken from the buttermilk, letting the excess drip off, then coat it thoroughly in the seasoned flour. Shake off any excess flour to avoid clumps. Place the coated chicken in the hot oil and fry for 3–4 minutes on each side, or until the internal temperature reaches 165°F (74°C). The crust should be golden brown and crackling. Flip only once to preserve the crust’s integrity.
- Let the fried chicken rest on the rack for 5 minutes. This short rest allows the juices to redistribute, keeping the meat moist and preventing it from drying out when you bite. If you’re short on time, a quick 2‑minute rest is still better than none. The rest also helps the coating set, making it less likely to fall off during assembly.
- While the chicken rests, whisk together mayonnaise, minced garlic, lemon juice, salt, and pepper until smooth. This garlic aioli will coat the chicken like velvet, sealing in moisture and adding a bright, citrusy zing. If you prefer a thinner sauce, add a splash of water or a little more lemon juice. The aioli should be creamy but not too runny; it will cling to the chicken and the bun.
- Toast the brioche buns lightly in a pan or toaster until they’re golden on the inside. Spread a generous layer of aioli on each bun, then add a handful of fresh romaine lettuce, a couple of tomato slices, and the hot chicken. Press gently to combine all the flavors. Serve immediately while the chicken is still warm and the buns are crisp.
That’s it — you did it. But hold on, I’ve got a few more tricks that'll take this to another level.
Insider Tricks for Flawless Results
The Temperature Rule Nobody Follows
Many cooks think 350°F is enough for frying, but the ideal temperature for a crisp, golden crust is actually 375°F (190°C). This higher heat ensures the coating sets instantly, preventing the chicken from absorbing excess oil. Keep a thermometer in the pan; a quick dip in the oil will show the correct temperature. If the oil is too hot, the crust will burn before the interior cooks; if too cool, the chicken will become soggy.
Why Your Nose Knows Best
Before you flip the chicken, listen for the sound of the crust sizzling and popping. A steady, gentle pop indicates the coating is crisping properly. If you hear a hissing sound, the oil is too hot and may burn the exterior. Trust your senses; the aroma of toasted flour is a reliable indicator of success. A faint, nutty smell means the coating is nearing perfection.
The 5-Minute Rest That Changes Everything
Many people skip the rest period, leading to dry, overcooked chicken. By letting the chicken sit on a wire rack for five minutes, the juices redistribute, keeping the meat moist. The rest also allows the coating to firm up, making it less likely to crumble when you bite. If you’re in a rush, a two-minute rest still improves the texture significantly.
The Oil Swap Trick
If you’re looking to cut calories, swap vegetable oil for a high‑smoke‑point oil like avocado or peanut. These oils can handle the high temperatures needed for frying without breaking down. The flavor profile changes slightly, but the crispiness remains. Just remember to keep the temperature steady to avoid a greasy finish.
The Quick Slice Method
When assembling the sandwich, slice the chicken into thin, even strips before placing it on the bun. This technique creates a more uniform bite and allows the aioli to coat every piece. A single large piece can feel heavy and may overwhelm the bun. Thin slices also make the sandwich easier to eat on the go.
The Aioli Freshness Hack
If you’re preparing the aioli ahead of time, add a splash of fresh lemon juice right before serving. The acidity prevents the mayo from separating and keeps the sauce silky. Store the aioli in an airtight container in the refrigerator; it will stay fresh for up to a week. A quick stir before use restores the creamy texture.
Creative Twists and Variations
Smoky Chipotle Chicken Sandwich
Swap the Cajun seasoning for a chipotle‑infused spice blend and add a drizzle of chipotle aioli. The smoky heat pairs beautifully with the crisp crust, giving the sandwich a bold, Southwestern flair. Serve with a side of avocado slices to balance the spice.
Southern Fried Chicken with Honey Mustard
Replace the garlic aioli with a honey mustard sauce made from Dijon, honey, and a touch of vinegar. The sweet‑savory glaze complements the spicy crust, creating a classic Southern comfort. Pair with a crunchy coleslaw for extra texture.
Mediterranean Grilled Chicken with Tzatziki
Grill the marinated chicken instead of frying, then top with a cool tzatziki sauce and fresh cucumber slices. The Mediterranean herbs in the seasoning bring a fragrant twist, while the yogurt sauce keeps the sandwich light. This version is perfect for a summer lunch.
Vegan Crispy Tofu Version
Use firm tofu marinated in the same buttermilk substitute (soy milk and lemon) and seasoned flour. Fry until golden, then assemble with vegan aioli and fresh greens. This plant‑based take offers the same crunch and flavor profile without the chicken.
Breakfast Crunch with Fried Egg
Add a sunny‑side‑up egg on top of the chicken for a hearty breakfast sandwich. The runny yolk adds richness and the egg’s texture contrasts with the crispy coating. Serve with a side of hash browns for a complete morning meal.
Storing and Bringing It Back to Life
Fridge Storage
Store assembled sandwiches in an airtight container for up to 2 days. Keep the buns separate until ready to eat to prevent them from getting soggy. If you need to keep the chicken and buns separate, wrap the chicken in foil and the buns in parchment paper.
Freezer Friendly
The fried chicken can be frozen for up to 3 months. Wrap tightly in plastic wrap and place in a freezer bag. Reheat in the oven at 350°F (175°C) for 10 minutes, then toast the buns fresh for the best texture.
Best Reheating Method
To revive the crunch, reheat the chicken in a skillet over medium heat for 2–3 minutes on each side. Add a splash of water to the pan to create steam, then cover for 30 seconds. This technique steams the chicken back to perfection while preserving the crispy coating.