It started on a rainy Tuesday when I was halfway through a batch of store‑bought cinnamon rolls that had somehow turned into soggy, unappetizing lumps. I stared at the oven and muttered, “If only there was a way to turn this mess into something that actually tastes like a pastry.” That moment sparked a frantic search through my pantry and a hunch that the answer might lie in a simple, yet surprisingly bold, combination of cherries and a few pantry staples. I discovered a recipe that promised a crispy, caramelized crust and a jam‑like center that would melt in your mouth, and I couldn’t resist trying it.
The kitchen smelled of sweet cherries and buttery dough as I measured out flour, butter, and the secret ingredient: cornstarch. The sound of the dough being kneaded was a comforting, rhythmic thud that reminded me of childhood mornings spent watching the family cook. The sight of the cherries glistening in the bowl felt like a promise of bright, fruity joy. The anticipation of biting into a perfectly baked, golden‑brown treat was almost too good to be true. I dare you to taste this and not go back for seconds.
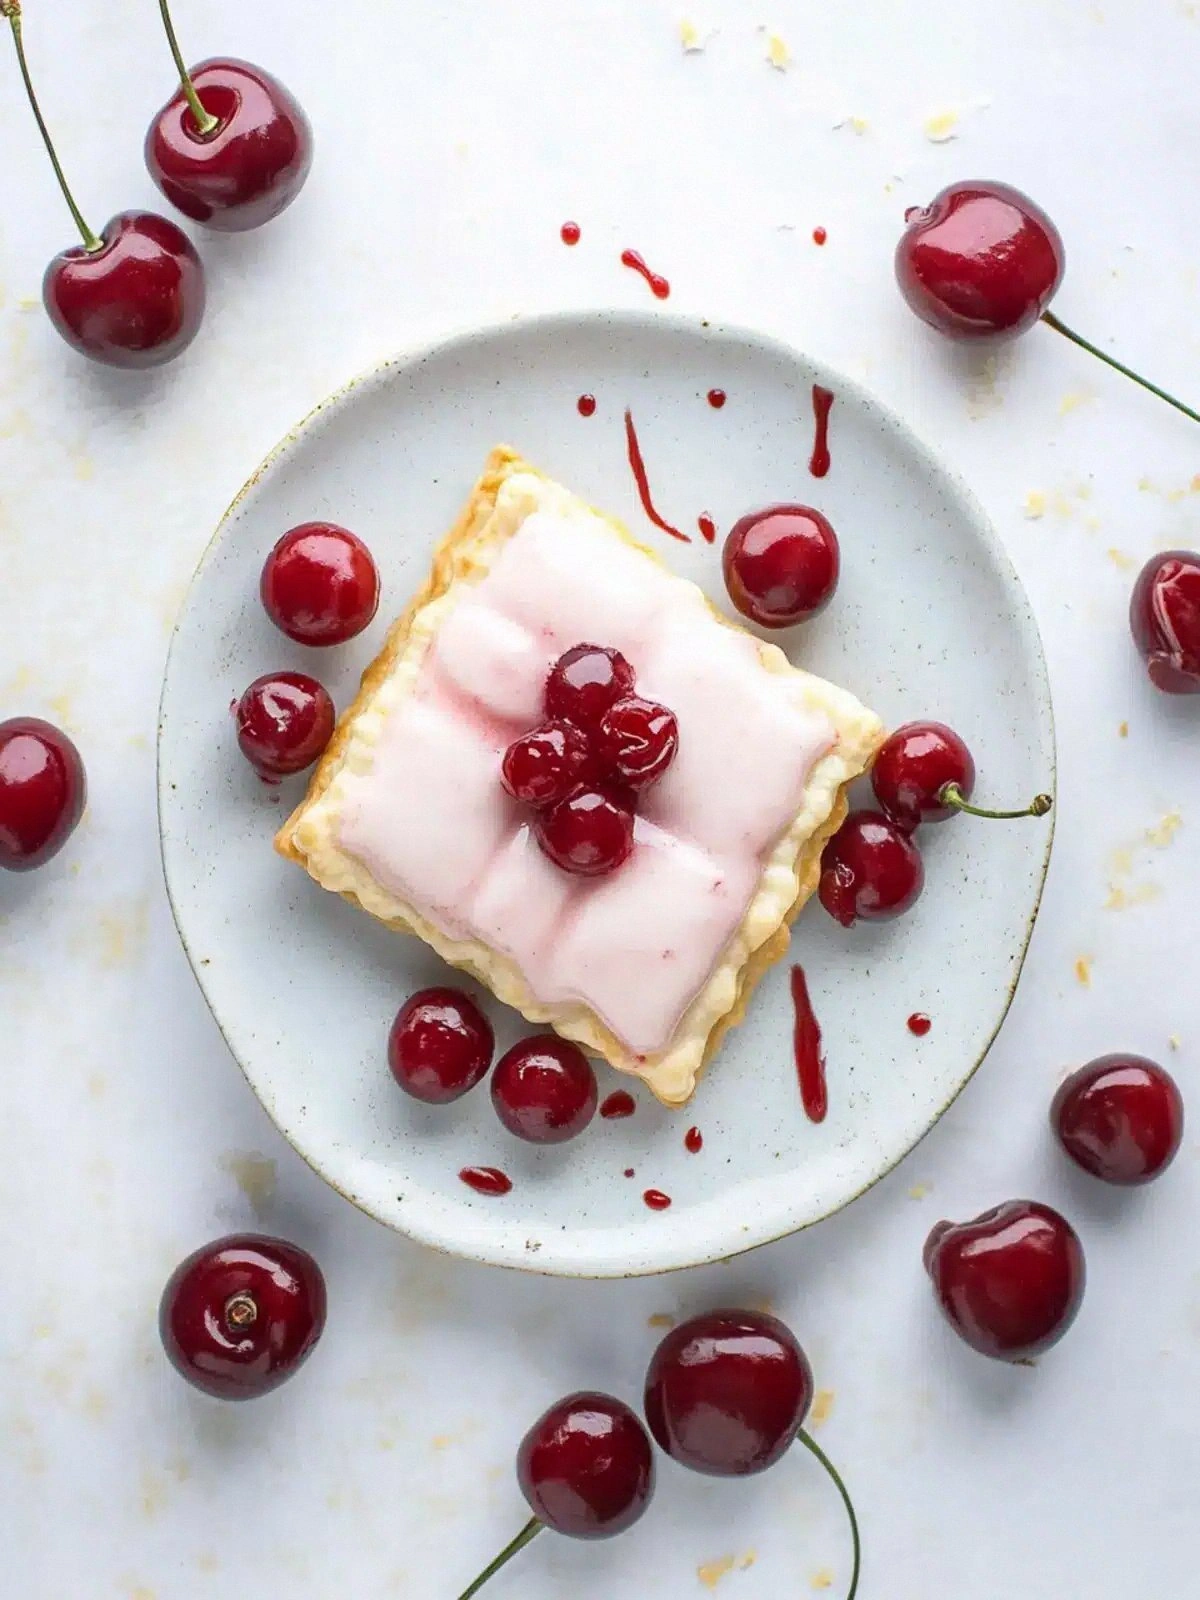
What sets this version apart from the usual pop‑tart clones is the balance of sweetness and texture. The cornstarch thickens the cherry filling just enough to keep it from oozing, while the almond extract gives a subtle nutty undertone that elevates the flavor profile. The dough’s buttery richness creates a flaky, almost flaky, crust that crackles when you bite into it, like a tiny, buttery explosion. This is hands down the best version you'll ever make at home, and it’s not just about the taste; it’s about the experience. Picture yourself pulling this out of the oven, the whole kitchen smelling incredible, and the first bite sending a wave of nostalgia and delight through your senses.
I’m about to walk you through every single step, and by the end, you’ll wonder how you ever made it any other way. I’ll share micro‑challenges, bold claims, and the little tricks that turn a simple recipe into a showstopper. I’ll also confess that I ate half the batch before anyone else got to try it, which is a testament to how irresistible this is. If you've ever struggled with making homemade pop‑tarts, you're not alone — and I've got the fix. Let’s dive into the details that make this recipe sing.
What Makes This Version Stand Out
- Flavor: The cherry filling is thick, sweet, and packed with real fruit flavor, unlike the watery center of many store‑bought versions.
- Texture: The dough achieves a buttery, flaky crumb that crisps beautifully while remaining tender inside.
- Simplicity: Only 16 ingredients, all common pantry staples, mean you can whip this up on a whim.
- Uniqueness: The subtle almond extract adds depth, giving this recipe a signature twist that sets it apart.
- Crowd Reaction: Friends and family who taste these at gatherings instantly ask for the recipe, proving its crowd‑pleasing power.
- Ingredient Quality: Using fresh or high‑quality frozen cherries and real butter elevates the overall taste.
- Cooking Method: The method of layering the dough, filling, and glaze is straightforward but yields professional results.
- Make‑Ahead Potential: You can bake the pop‑tarts a day ahead and reheat them to near‑freshness.
Alright, let’s break down exactly what goes into this masterpiece…
Inside the Ingredient List
The Flavor Base
The 2 cups of frozen cherries are the star of the show. They provide the natural tartness that balances the sweetness of the sugars. If you prefer a less intense cherry flavor, you can substitute a mix of fresh and frozen cherries. Skipping this ingredient will leave you with a bland, almost syrupy center.
The Texture Crew
The 2 cups of all‑purpose flour and 1/2 cup of unsalted butter form the backbone of the crust. The flour gives structure, while the butter adds richness and flakiness. If you use low‑fat butter, the crust will be less tender and may crack during baking. For a gluten‑free version, try a blend of rice and tapioca starch, but note the texture will differ.
The Unexpected Star
Cornstarch, used in a 2‑tablespoon blend with water, thickens the cherry filling. This tiny amount prevents the filling from sliding off the pastry during baking. If you omit it, the filling will ooze, ruining the bite. A substitute could be arrowroot powder, but the flavor profile will shift slightly.
The Final Flourish
The glaze, made from confectioners’ sugar, milk, maraschino cherry juice, and a hint of vanilla, adds a sweet, glossy finish. The maraschino cherry juice gives a subtle cherry undertone that ties the glaze to the filling. If you’re sensitive to the sweetness, reduce the confectioners’ sugar by a quarter cup. Skipping the glaze will leave the pop‑tarts dry and less visually appealing.
Everything's prepped? Good. Let's get into the real action...
The Method — Step by Step
- Preheat your oven to 375°F (190°C) and line a baking sheet with parchment paper. In a medium bowl, whisk together the flour, cornstarch, and salt until evenly combined. The flour mixture should look like fine sand, not clumpy. This step ensures the dough will have a uniform crumb. The aroma of dry flour will begin to mingle with the buttery scent that follows.
- Cut the cold butter into small cubes and add it to the flour mixture. Use a pastry cutter or your fingertips to blend the butter until the mixture resembles coarse crumbs. The goal is to keep small butter pieces visible; they will create pockets of steam during baking. If you overmix, the dough will become tough. Keep the dough chilled until the next step.
- In a separate bowl, whisk the egg with the tablespoon of milk until frothy. Gently fold the wet mixture into the dry dough, adding just enough to bring the dough together. The dough should be soft but not sticky; if it’s too dry, add a splash of cold water. The dough’s consistency will dictate how flaky the crust becomes. Let the dough rest for 10 minutes on the counter.
- While the dough rests, prepare the filling. Combine the frozen cherries, 1/4 cup granulated sugar, 1 teaspoon vanilla, and 1/4 teaspoon almond extract in a saucepan over medium heat. Stir until the cherries release their juices and the mixture thickens slightly. Add the cornstarch slurry (cornstarch mixed with 2 tablespoons water) and stir until the filling reaches a jam-like consistency. This thickened filling will hold its shape when baked. Set aside to cool.
- Roll out the dough on a lightly floured surface to a 12x12-inch square. Cut the dough into 16 equal squares using a pizza cutter or a sharp knife. The squares should be uniform for even baking. Place each square on the prepared baking sheet. The uniformity ensures consistent rise and color.
- Spoon a generous amount of the cherry filling onto the center of each dough square, leaving a small border. Fold each square over to form a triangle and press the edges together with a fork to seal. The sealing creates a crisp edge that holds the filling. Make sure not to overfill, or the filling may spill during baking. The aroma of warm cherries will start to fill the kitchen.
- Bake the pop‑tarts for 20–22 minutes, or until the edges are golden brown and the filling bubbles. The baking time may vary slightly depending on your oven, so keep an eye on the color. When the tops start to brown, the crust is ready. Let them cool on the sheet for 5 minutes before transferring to a wire rack. Cooling allows the filling to set properly.
- While the pop‑tarts cool, whisk the confectioners’ sugar, 2 tablespoons milk, 2 tablespoons maraschino cherry juice, and 1/2 teaspoon vanilla in a small bowl until smooth. The glaze should be pourable but not too runny. Drizzle the glaze over the warm pop‑tarts, letting it seep into the corners. The glaze will set into a glossy sheen as it cools. This final touch adds sweetness and visual appeal.
That’s it — you did it. But hold on, I've got a few more tricks that'll take this to another level. The glaze can be flavored with a splash of lemon zest for a bright twist, or you can dust the finished pop‑tarts with powdered sugar for an extra sweet finish. The key is to keep the dough chilled throughout, as warm dough leads to a dense, soggy result. I also recommend letting the pop‑tarts sit for an hour before serving; the flavors meld beautifully. Enjoy the experience of biting into that first flaky bite and watching the cherry filling burst.
Insider Tricks for Flawless Results
The Temperature Rule Nobody Follows
Many bakers bake at 350°F, but this recipe thrives at 375°F, giving the crust a crisp golden edge. The higher temperature caramelizes the sugars faster, creating a delightful crunch. If you lower the temperature, the crust will be pale and soft. Keep the oven preheated; a cold oven can cause uneven baking. The difference in temperature may seem small, but it transforms the final product.
Why Your Nose Knows Best
During the filling stage, pause when the cherries release their juices. Your nose can detect when the mixture has reached the right thickness. The aroma of caramelized cherries is a sign that the filling is ready. If it still smells raw, let it cook a bit longer. Trusting your senses saves you from undercooked centers.
The 5-Minute Rest That Changes Everything
After baking, let the pop‑tarts rest on the sheet for exactly five minutes. This pause allows steam to redistribute, preventing sogginess. The dough will firm up slightly, making it easier to transfer to a rack. Skipping this step can leave the edges undercooked. The five minutes are worth the extra effort.
Seal the Edges Like a Pro
Press the edges with a fork, but do not press too hard; you want a seal, not a crumpled crust. The fork’s tines create small ridges that hold the filling. This technique also gives the pop‑tarts a classic, decorative look. If you seal too loosely, the filling may leak. A tight seal ensures a clean, finished product.
Cooling on a Wire Rack
Once the pop‑tarts have cooled enough to handle, transfer them to a wire rack. The rack allows air to circulate, keeping the crust from becoming soggy. If you stack them on a plate, steam can accumulate and soften the bottom. Use a rack with wide gaps for optimal cooling. This simple step preserves the texture.
Creative Twists and Variations
This recipe is a playground. Here are some of my favorite ways to switch things up:
Chocolate‑Cherry Fusion
Add a tablespoon of cocoa powder to the cherry filling for a mocha‑like flavor. The chocolate deepens the berry notes and adds a velvety texture. Serve with a dusting of cocoa powder for an elegant finish. This variation appeals to chocolate lovers who want a fruity twist.
Almond‑Glazed Delight
Replace the maraschino cherry juice in the glaze with almond milk for a nutty undertone. The glaze becomes slightly thicker, giving a richer mouthfeel. Top with slivered almonds for crunch. This version is ideal for those who enjoy nutty desserts.
Minty Fresh Pop‑Tarts
Add a teaspoon of fresh mint leaf puree to the cherry filling. The mint provides a cooling contrast to the sweet cherries. Garnish with a few mint leaves for a fresh look. This twist is perfect for warm summer afternoons.
Sour‑Sweet Surprise
Incorporate a tablespoon of lemon zest into the glaze. The citrus sharpness balances the sweetness. The pop‑tarts feel lighter and more refreshing. This variation suits those who prefer a tangy finish.
Nutella Swirl
Swirl a few spoonfuls of Nutella into the cherry filling before sealing. The chocolate spread adds a decadent richness. The result is a layered, indulgent treat. This version is a hit with kids and adults alike.
Citrus‑Infused Glaze
Replace the maraschino cherry juice with orange juice for a zesty glaze. The orange flavor complements the cherries, creating a bright, tropical vibe. Add a pinch of sea salt for depth. This twist is great for brunch or afternoon snacks.
Storing and Bringing It Back to Life
Fridge Storage
Store pop‑tarts in an airtight container at room temperature for up to 3 days. The crust will stay crisp, and the filling remains moist. If the crust softens, place the container in the fridge; the cooler environment preserves the texture. Avoid stacking them to prevent crushing. A small silicone mat helps keep them from sticking.
Freezer Friendly
Wrap each pop‑tart individually in plastic wrap, then place them in a freezer bag. They can be frozen for up to 2 weeks. When ready to enjoy, thaw at room temperature for 15 minutes. The crust stays flaky, and the filling retains its flavor. Freezing is ideal for meal prep or parties.
Best Reheating Method
Reheat pop‑tarts in a preheated oven at 350°F for 5 minutes. This method revives the crispness without drying out the filling. Alternatively, microwave on low for 15 seconds if you’re in a hurry. Add a tiny splash of water before reheating; it steams back to perfection. Serve immediately for the best experience.