Love this? Pin it for later! 📌
I discovered this recipe during a rainy weekend when my niece was visiting, and we wanted something special without the fuss of individual cookies. What started as a lazy baking session turned into our most-requested family dessert. Now, every birthday, game night, or "just because" moment calls for this skillet cookie. It's become our tradition to gather around the skillet, spoons in hand, sharing stories while the cookie is still warm enough to melt the vanilla ice cream we dollop on top.
The beauty of this recipe lies in its simplicity and the way it brings people together. No scooping, no rotating pans, no waiting for multiple batches—just one glorious, shareable dessert that's ready in under 30 minutes. The edges get slightly crispy while the center stays lusciously soft, creating that perfect textural contrast that makes each bite interesting.
Why This Recipe Works
- One Pan Wonder: Everything bakes in a single cast-iron skillet, meaning minimal cleanup and maximum flavor from the seasoned pan
- Melt-in-Your-Mouth Texture: The perfect ratio of brown sugar to white sugar creates that coveted soft center with slightly chewy edges
- Customizable: Swap chocolate chips for your favorite mix-ins or add a sprinkle of flaky salt for gourmet flair
- Ready in 30 Minutes: From craving to serving in half an hour—perfect for unexpected guests or late-night cravings
- Social Dessert: Designed for sharing straight from the skillet with spoons, creating memorable moments
- Professional Results: Using browned butter and room temperature ingredients ensures bakery-quality results every time
- Make-Ahead Friendly: The dough can be prepared up to 3 days in advance for instant gratification
Ingredients You'll Need
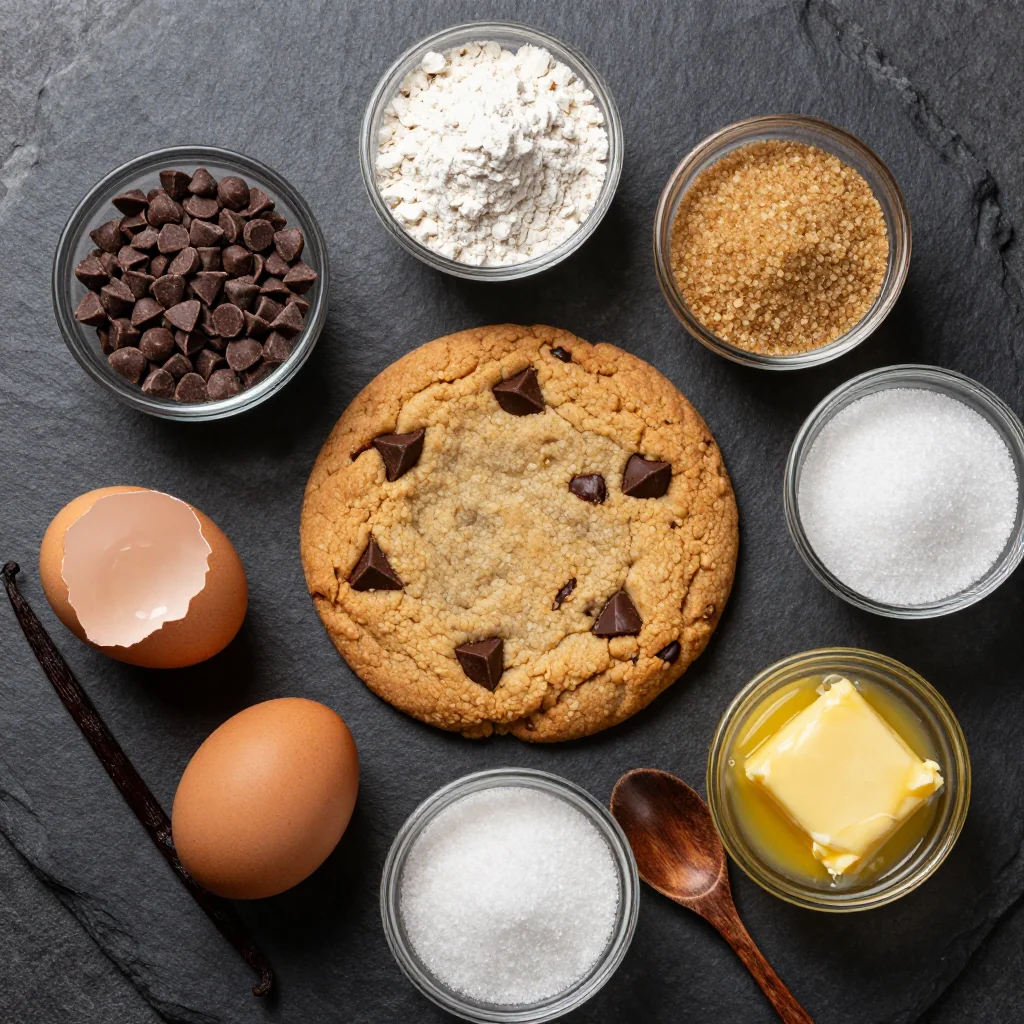
The secret to an exceptional skillet cookie lies in the quality of your ingredients. Each component plays a crucial role in creating that perfect texture and depth of flavor that will have everyone asking for your recipe.
Unsalted Butter (10 tablespoons): I always use European-style butter with a higher fat content for richer flavor. Browning the butter first adds nutty, caramel notes that elevate this from good to unforgettable. If you're in a hurry, you can use regular melted butter, but trust me—taking the extra 5 minutes to brown it is worth every second.
Light Brown Sugar (3/4 cup): The molasses in brown sugar contributes to that soft, chewy texture we all crave. Pack it firmly when measuring, and make sure it's fresh—if it's hardened into a rock, microwave it with a damp paper towel for 30 seconds to soften.
Granulated Sugar (1/2 cup): This helps create those slightly crisp edges that provide textural contrast to the soft center. I prefer organic cane sugar for its cleaner flavor, but regular white sugar works perfectly.
Large Egg (1) + Egg Yolk (1): The extra yolk is my secret weapon for richness and that bakery-style texture. Make sure your eggs are at room temperature—they incorporate more easily and create better structure in the cookie.
Pure Vanilla Extract (2 teaspoons): Never use imitation vanilla here. I splurge on Madagascar bourbon vanilla for its complex, floral notes that complement the chocolate beautifully.
All-Purpose Flour (1 1/4 cups): Spoon and level your flour—never scoop directly from the bag, or you'll end up with a dense cookie. For the most tender results, I use a lower-protein flour like King Arthur's.
Cornstarch (1 teaspoon): This is my trick for achieving that melt-in-your-mouth tenderness. It interferes with gluten development, ensuring your cookie stays soft even after cooling.
Baking Soda (1/2 teaspoon): Just enough to give the cookie lift without making it cakey. Make sure it's fresh—if it's been open more than 6 months, replace it.
Salt (3/4 teaspoon): Don't skip this! Salt enhances all the other flavors and balances the sweetness. I use fine sea salt for even distribution.
Chocolate Chips (1 cup): Use a mix of semisweet and bittersweet for complexity. I'm partial to Ghirardelli or Guittard. For the ultimate experience, use chocolate chunks from a high-quality bar—they create those gorgeous melty pockets throughout.
How to Make Melt in Your Mouth Chocolate Chip Skillet Cookie
Brown the Butter
Place your skillet over medium heat and add the butter. Swirl constantly as it melts and begins to foam. After 3-4 minutes, you'll notice nutty aromas and see brown specks forming at the bottom. Once the butter turns golden brown and smells like toasted nuts, immediately remove from heat and pour into a heatproof bowl. This stops the cooking process and prevents burning. Let it cool for 10 minutes while you prepare other ingredients.
Prepare Your Skillet
While the butter cools, lightly grease your 10-inch cast-iron skillet with butter or baking spray. Even if your skillet is well-seasoned, this ensures effortless release. If you don't have cast-iron, a heavy oven-safe stainless steel pan works, but avoid non-stick as it prevents proper browning. Preheat your oven to 350°F (175°C) at this point.
Cream Butter and Sugars
In a large bowl, whisk the cooled browned butter with both sugars until well combined and slightly glossy. This should take about 2 minutes of vigorous whisking. The mixture will look like wet sand at first, then transform into a smooth, caramel-colored paste. Don't rush this step—proper creaming incorporates air for lift.
Add Eggs and Vanilla
Beat in the whole egg until fully incorporated, about 30 seconds. Add the egg yolk and vanilla, whisking until the mixture becomes lighter in color and slightly thickened. The batter should fall off your whisk in ribbons. If your eggs were cold, the mixture might look slightly curdled—don't worry, it'll come together when you add the dry ingredients.
Combine Dry Ingredients
In a separate bowl, whisk together flour, cornstarch, baking soda, and salt. This ensures even distribution of leavening agents and prevents salt pockets. Add the dry ingredients to the wet mixture all at once. Using a rubber spatula, fold gently until just combined. Stop as soon as you see no more dry flour—overmixing develops gluten and creates a tough cookie.
Fold in Chocolate Chips
Reserve 2 tablespoons of chocolate chips for the top, then fold the rest into the dough. The dough will be soft and slightly shiny from the browned butter. Don't worry if it seems too soft—it firms up as the butter cools. For extra gooey centers, use half chocolate chips and half chopped chocolate bar.
Transfer to Skillet
Scrape the dough into your prepared skillet, spreading it evenly to the edges. The dough should be about 3/4-inch thick. Press gently with your fingertips to create small indentations—these will become little pools of melted chocolate. Sprinkle the reserved chocolate chips on top for that Instagram-worthy finish.
Bake to Perfection
Bake for 18-22 minutes, rotating halfway through. The edges should be golden brown and slightly pulled away from the pan, while the center still looks slightly underbaked with a gentle wobble. This ensures that coveted gooey center as it continues cooking from residual heat. If you prefer a firmer cookie, bake an additional 3-4 minutes, but be careful not to overbake.
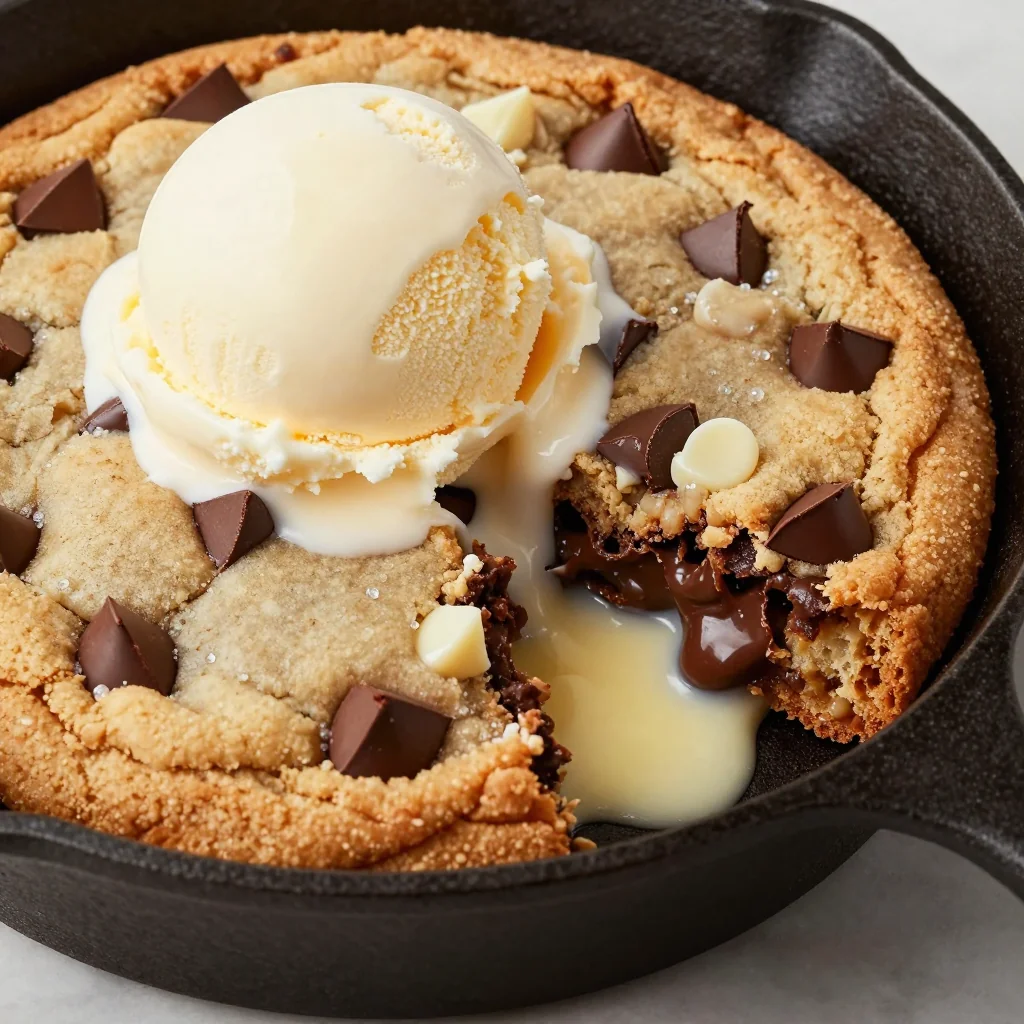
Cool and Serve
Let the cookie rest for 10 minutes—this is crucial for the centers to set properly. The cookie will continue cooking from residual heat, achieving that perfect soft-set texture. Serve warm directly from the skillet with spoons, or cut into wedges like a pie. Top with vanilla ice cream for the ultimate experience—the contrast between hot cookie and cold ice cream is sublime.
Expert Tips
Temperature Matters
Room temperature ingredients blend more easily, creating a smoother, more homogenous dough. Cold eggs can cause the butter to seize, resulting in a greasy cookie. Take ingredients out 30 minutes before baking for best results.
Don't Overbake
The cookie will look underdone when you pull it out—that's perfect! It continues cooking in the hot skillet for 5-10 minutes. A toothpick inserted 2 inches from the edge should come out with just a few moist crumbs.
Browning Butter Safely
Use a light-colored pan so you can see the color change. The butter goes from browned to burnt quickly, so stay attentive. As soon as you see amber-colored milk solids, remove from heat immediately.
Skillet Size Matters
A 10-inch skillet creates the perfect cookie thickness. Using a smaller pan results in a doughy center; larger makes it too thin. If you only have a 12-inch skillet, increase recipe by 50% for best results.
Ice Cream Trick
For perfectly melted ice cream, place scoops on a parchment-lined plate and freeze for 15 minutes before serving. This prevents it from melting too quickly on the hot cookie, giving you that gorgeous ice cream river.
Make-Ahead Magic
The dough can be mixed up to 3 days ahead and stored covered in the refrigerator. Let it sit at room temperature for 30 minutes before baking for best texture and even cooking.
Variations to Try
S'mores Version
Replace half the chocolate chips with mini marshmallows and crushed graham crackers. Broil for 1 minute at the end to toast the marshmallows. Drizzle with chocolate syrup before serving.
Peanut Butter Lover's
Substitute 1/4 cup butter with creamy peanut butter. Add 1/2 cup peanut butter chips along with the chocolate chips. Top with chopped peanuts for crunch.
Salted Caramel
Swirl 1/4 cup caramel sauce into the dough before baking. Sprinkle with flaky sea salt immediately after removing from oven. The sweet-salty combination is addictive!
Double Chocolate
Replace 2 tablespoons flour with cocoa powder for a chocolate cookie base. Use white chocolate chips for contrast, or go all-in with triple chocolate using milk, dark, and white chips.
Oatmeal Cookie Twist
Replace 1/4 cup flour with old-fashioned oats. Add 1/2 teaspoon cinnamon and 1/4 teaspoon nutmeg. Raisins or dried cranberries make excellent additions for a grown-up version.
Gluten-Free Option
Substitute the all-purpose flour with a 1:1 gluten-free baking blend. Add 1/4 teaspoon xanthan gum if your blend doesn't include it. The texture is just as amazing!
Storage Tips
Refrigerator Storage
Cover the cooled skillet tightly with plastic wrap or transfer to an airtight container. Refrigerate for up to 5 days. To reheat, microwave individual portions for 20-30 seconds or warm the entire skillet in a 300°F oven for 10 minutes.
Freezer Instructions
The baked cookie freezes beautifully for up to 3 months. Cut into wedges and wrap each piece in plastic wrap, then place in a freezer bag. Thaw overnight in the refrigerator or at room temperature for 2 hours. Warm in the microwave for 30-45 seconds before serving.
Make-Ahead Dough
The dough can be mixed and stored in the refrigerator for up to 3 days or frozen for up to 3 months. Shape into a disk, wrap tightly in plastic wrap, and place in a freezer bag. Thaw overnight in the refrigerator before pressing into your skillet and baking as directed.
Frequently Asked Questions
Yes, but results vary. A heavy stainless steel or ceramic baking dish works, but avoid non-stick as it prevents proper browning. If using a glass pie dish, reduce temperature to 325°F and add 5-10 minutes to baking time. The key is using something heavy that retains heat well.
Overbaking is the usual culprit. Remember, the cookie continues cooking in the hot skillet after removal. Also, check your flour measurement—too much flour creates a cakier texture. Make sure you're spooning and leveling, not scooping directly from the bag.
Absolutely! Use a 12-inch skillet and increase all ingredients by 50%. Baking time increases to 25-30 minutes. For even larger groups, you can use a 9x13 pan, but the texture will be slightly different—more like cookie bars than a skillet cookie.
This usually happens when the butter is too hot when mixed with other ingredients, causing it to separate. Let your browned butter cool for 10-15 minutes until it's still liquid but not hot to the touch. Also, make sure your eggs are room temperature to prevent seizing.
Yes, but you'll miss the incredible nutty flavor. If you're short on time, simply melt the butter and let it cool for 10 minutes. The cookie will still be delicious, just with a more traditional flavor profile. Add 1/2 teaspoon butterscotch extract to mimic some of the browned butter notes.
The edges should be golden brown and slightly pulled away from the pan sides. The center will look set but still soft and slightly puffy. A toothpick inserted 2 inches from the edge should come out with moist crumbs, not wet batter. When you gently shake the skillet, the center should jiggle slightly like gelatin.
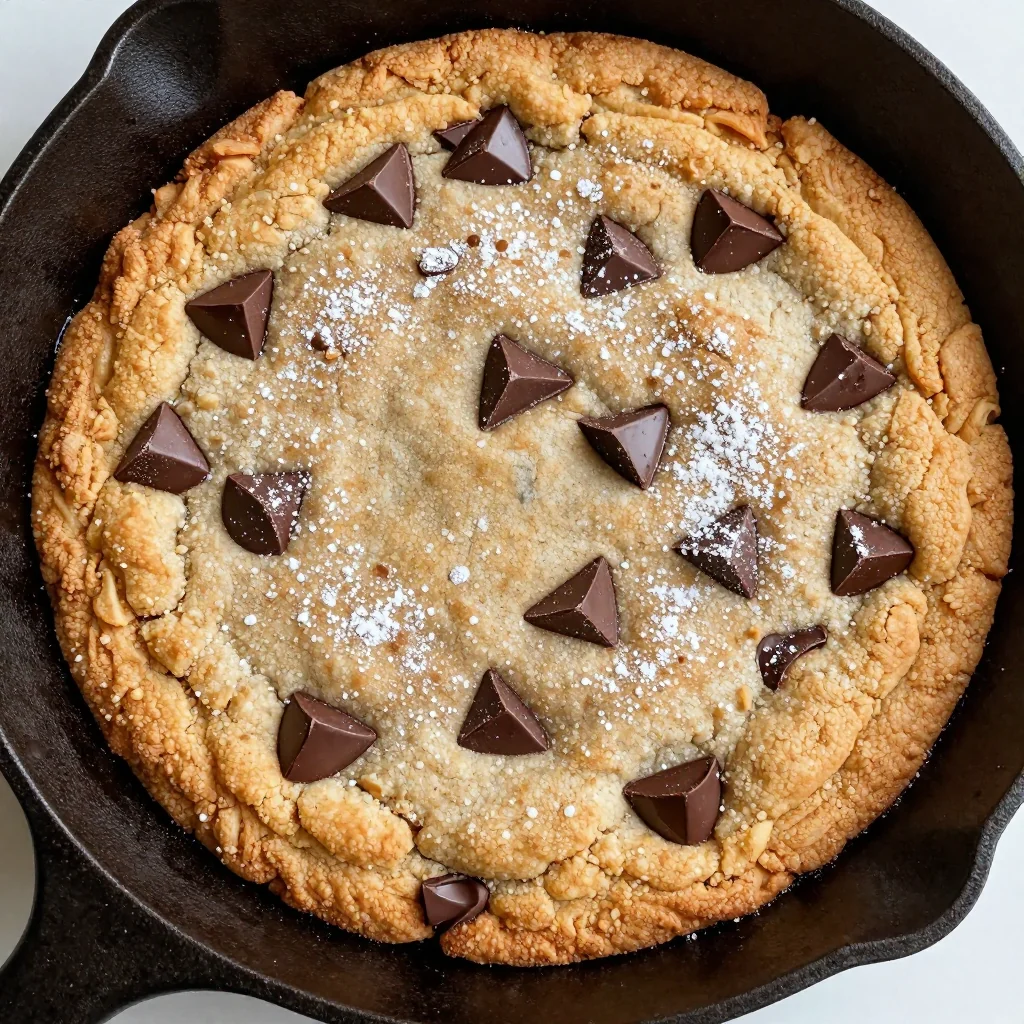
Melt in Your Mouth Chocolate Chip Skillet Cookie
Ingredients
Instructions
- Brown the butter: In a skillet over medium heat, melt butter until it turns golden brown and smells nutty, about 5 minutes. Pour into a bowl and cool for 10 minutes.
- Preheat oven: Set to 350°F (175°C). Lightly grease a 10-inch cast-iron skillet.
- Make dough: Whisk cooled browned butter with both sugars until combined. Beat in egg and egg yolk, then vanilla. Fold in flour, cornstarch, baking soda, and salt until just combined. Gently fold in chocolate chips.
- Bake: Press dough into prepared skillet. Bake for 18-22 minutes until edges are golden and center is still slightly soft.
- Cool and serve: Let cool for 10 minutes before serving. Serve warm with vanilla ice cream if desired.
Recipe Notes
Don't overbake! The cookie will continue cooking in the hot skillet after removal. For the ultimate gooey center, remove when the edges are golden but the center still jiggles slightly. Serve with spoons straight from the skillet for the most authentic experience.