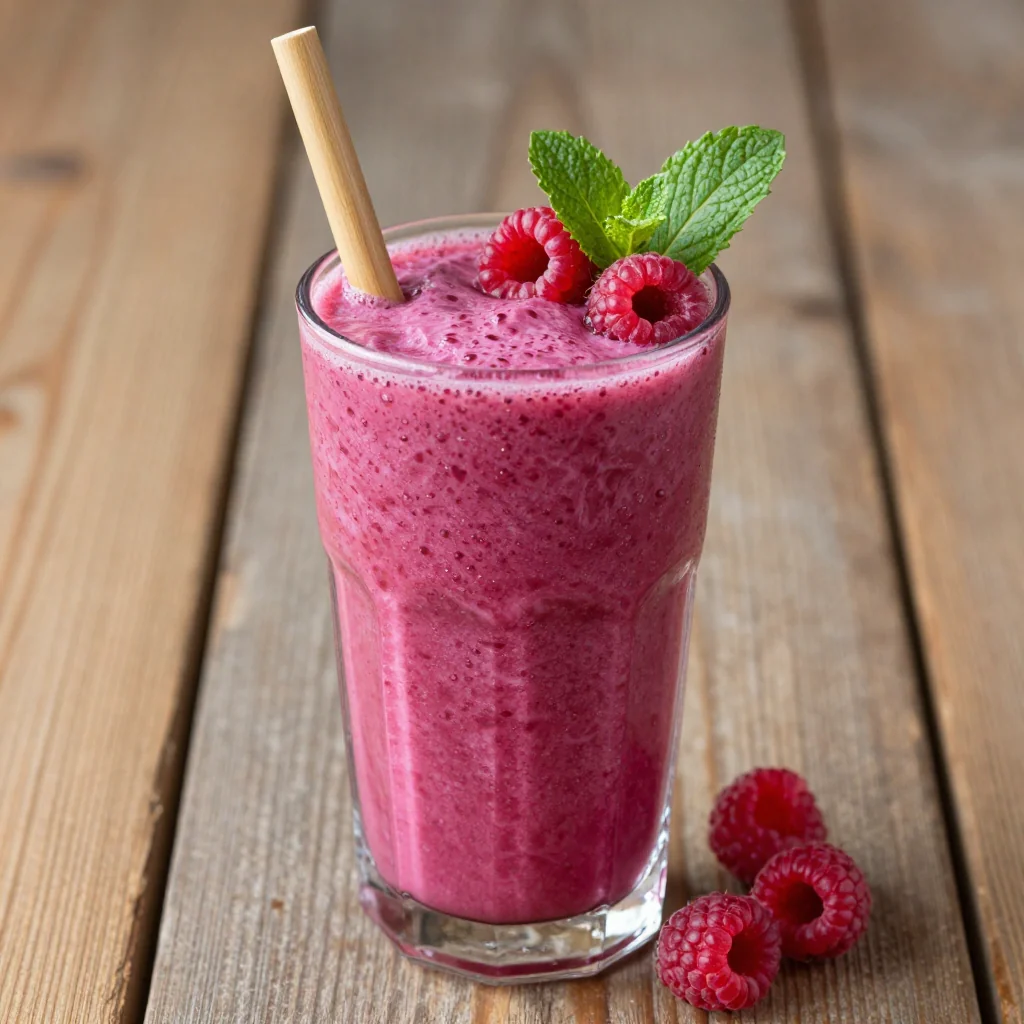
It all started on a sweltering July afternoon when I found myself staring at a bowl of melted ice cream that looked more like a sad puddle than a treat. I was desperate for something that would actually cool me down without turning my kitchen into a tropical rainforest. That moment of culinary crisis sparked a mission: create popsicles that are as vibrant as a sunrise and as refreshing as a mountain stream.
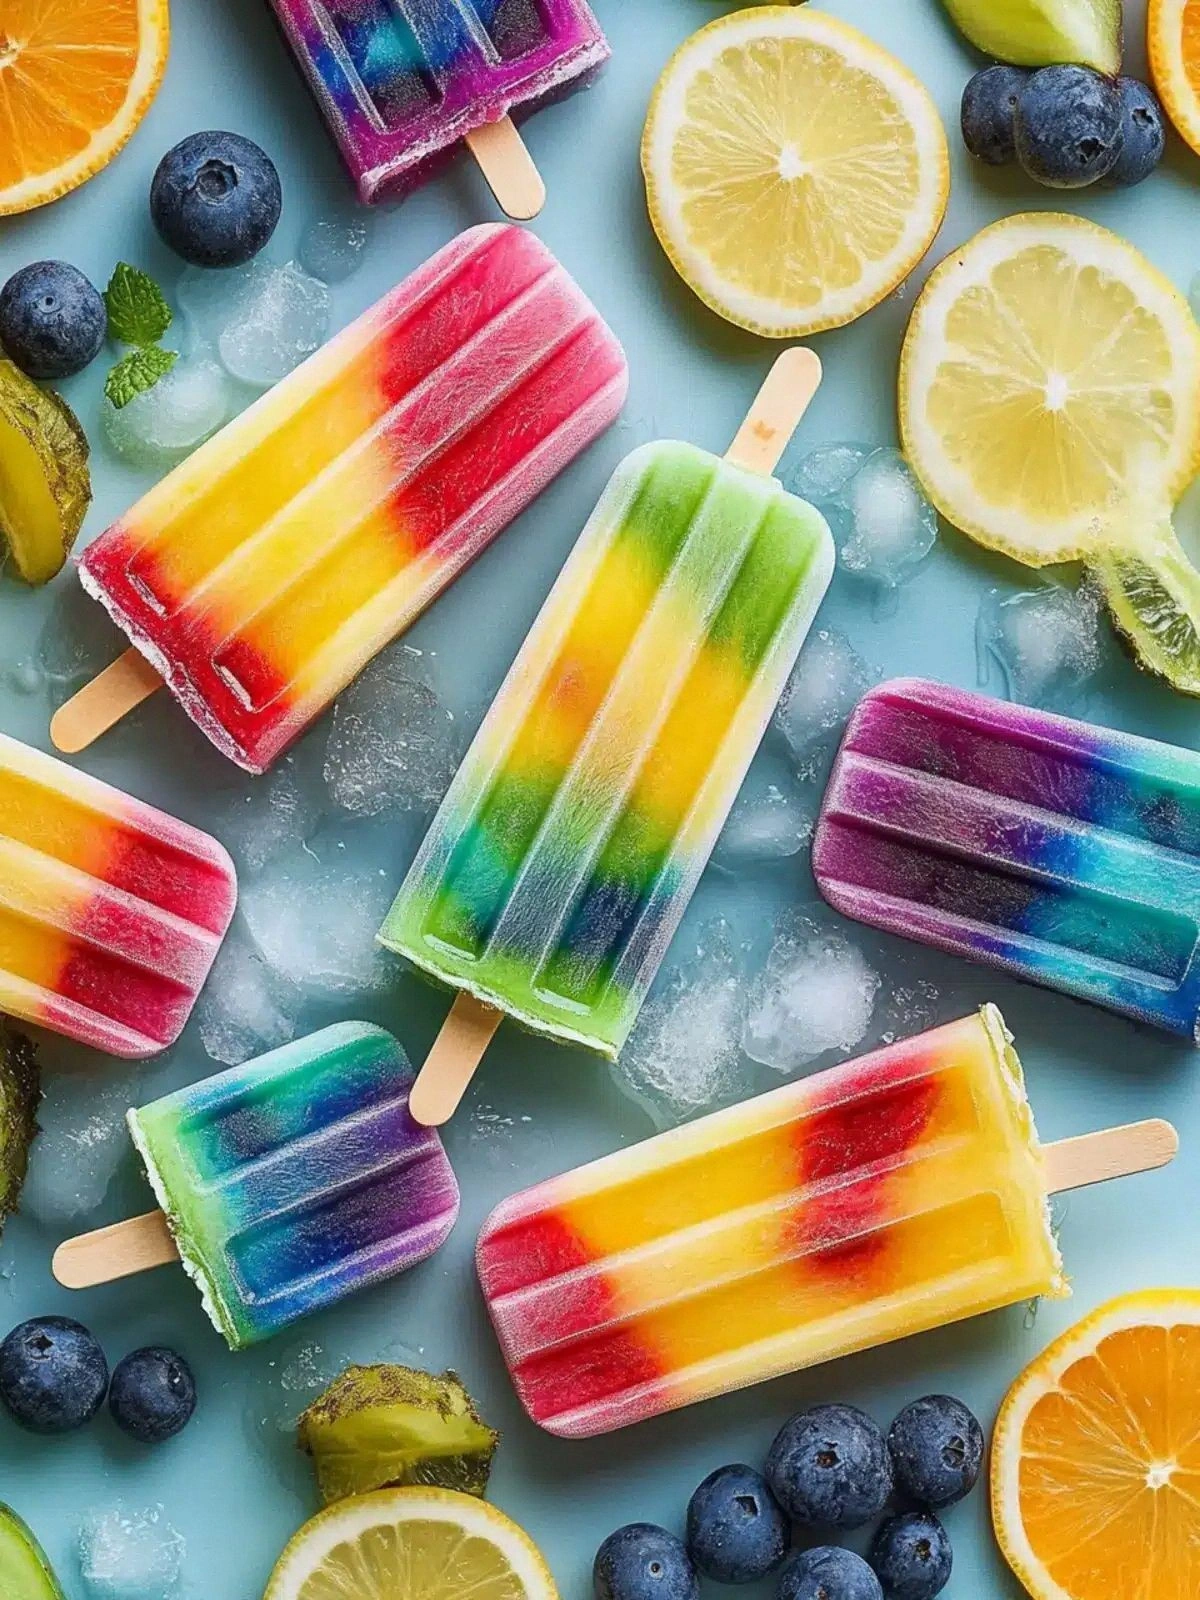
Picture this: a rainbow of colors swirling together in a single stick, each hue a promise of fresh fruit, each bite a burst of natural sweetness that melts on your tongue like a sunbeam. The moment the first pop hit the freezer, the air filled with the sweet, tangy scent of strawberries, the bright citrus of orange, and the mellow undertone of banana. The texture is a silky blend of frozen yogurt and fruit, not icy shards, but smooth, creamy strands that cling to your teeth in a gentle, satisfying way.
What makes this version stand out? It’s the combination of simplicity and complexity wrapped in a single recipe. I’ve stripped it down to basic, wholesome ingredients, yet each element sings in harmony. I dare you to taste this and not go back for seconds; the experience is so addictive that you’ll be humming the rainbow theme long after the last bite.
And here’s the kicker: you’ll discover a secret technique that most popsicle recipes ignore—layering the fruit and yogurt in a way that creates a gradient of flavor, not just color. By the end of this post, you’ll wonder how you ever made popsicles any other way. Let me walk you through every single step — by the end, you’ll wonder how you ever made it any other way.
What Makes This Version Stand Out
- Taste: The blend of tropical fruits and creamy Greek yogurt delivers a depth of flavor that feels like a vacation in a stick. Each bite offers a layered taste profile, from the bright citrus of orange to the mellow sweetness of banana, ensuring that no two popsicles are the same.
- Texture: Unlike traditional popsicles that can become icy and hard, this recipe uses yogurt and frozen fruit to create a silky, melt-in-your-mouth consistency. The result is a refreshing, almost velvety feel that glides across the palate.
- Visual Appeal: The rainbow spectrum is not just for show; each color represents a distinct fruit, making the popsicle as edible as it is eye‑catching. The gradient effect is achieved by layering, giving it a professional look that will impress guests.
- Health Conscious: By substituting heavy cream with Greek yogurt and using natural fruit, this treat is lower in fat and higher in protein and vitamins. It’s a guilt‑free dessert that satisfies sweet cravings without the crash.
- Make‑Ahead Friendly: Prepare the mixture ahead of time, freeze, and you have an instant dessert that’s ready whenever the heat spikes. It’s the perfect solution for spontaneous parties or last‑minute snack cravings.
- Crowd Reaction: Friends and family swear that these popsicles are “the best version you'll ever make at home.” The vibrant colors and creamy texture spark conversation and delight in equal measure.
- Ingredient Quality: Using ripe, fresh fruit and plain Greek yogurt ensures a natural flavor that’s hard to beat. The freshness of the ingredients translates into a vibrant, bright taste that lingers pleasantly.
- Versatility: The recipe can be easily tweaked to suit dietary preferences—swap Greek yogurt for coconut yogurt, or add a splash of honey for extra sweetness. This adaptability makes it a staple for any kitchen.
Alright, let's break down exactly what goes into this masterpiece…
Inside the Ingredient List
The Flavor Base
The foundation of these popsicles is the Greek yogurt, which provides a creamy canvas that balances the acidity of the fruit. Using vanilla or plain yogurt gives you flexibility—vanilla adds a subtle sweetness, while plain keeps the fruit flavors front and center. If you’re avoiding dairy, coconut yogurt works well, though it will slightly alter the flavor profile.
For each fruit layer, a small amount of water or liquid is added to achieve the right blendable texture. The liquid also helps the mixture freeze more evenly, preventing ice crystals from forming. A quick tip: use cold water or a splash of fruit juice; the colder the liquid, the smoother the final product.
In addition to yogurt and fruit, a pinch of salt can enhance the overall taste. Salt doesn’t mean you’re making a savory treat; it simply balances sweetness and brings out the natural flavors of the fruit.
The Texture Crew
Frozen banana is the secret to a naturally sweet, creamy texture that eliminates the need for added sugar. Its thick consistency also helps the popsicles freeze without cracking. When using banana, ensure it’s fully frozen before blending for the best results.
Spinach adds a subtle earthiness and a pop of green that makes the popsicles visually striking. It’s also a great way to sneak in extra nutrients without altering the taste dramatically. If you’re worried about color, a small amount of blue food coloring can mask the green hue.
Blue food coloring is optional but adds a playful twist. Use only a small amount to avoid overpowering the natural fruit colors; a few drops will give a fun, unexpected visual effect.
The Unexpected Star
Beets bring a surprising depth of flavor and a vibrant pink hue that stands out against the other fruits. They’re naturally sweet and pair beautifully with strawberries or raspberries. If you’re hesitant about beets, use sliced canned beets to keep the preparation simple.
Mixed berries (a combination of strawberries, raspberries, and blueberries) provide a complex sweet‑tart balance that enhances the overall taste. They also add antioxidants, making these popsicles not only delicious but also healthful.
Each fruit group contributes unique vitamins and minerals, ensuring that every bite is a nutrient-packed experience. The key is to keep the fruit frozen until it’s time to blend, preserving both flavor and texture.
The Final Flourish
Adding a splash of orange juice or a small orange piece boosts the citrus brightness and adds a natural sweetener. The zest of the orange can also be incorporated for an extra aromatic kick. Orange pairs well with pineapple and mango, creating a tropical harmony.
Mango and pineapple are the tropical staples that bring warmth and sweetness. Their natural sugars complement the tartness of berries, creating a balanced flavor profile. When using mango, be sure to cut it into small cubes to ensure even blending.
Finally, the small handful of spinach and the blue food coloring are optional, but they provide an exciting twist for those who enjoy a little color play and a nutritional boost.
Everything's prepped? Good. Let's get into the real action…
The Method — Step by Step
- Begin by placing all the frozen fruit—bananas, raspberries, strawberries, peaches, mango, pineapple, and mixed berries—into separate bowls. This ensures each layer stays distinct. Keep the fruit in the freezer until the last minute to preserve its firmness.
- Add ½ cup of Greek yogurt to the first fruit bowl, along with a splash of cold water or fruit juice. Blend until the mixture is smooth but still thick. The goal is a consistency that will freeze into a firm yet creamy texture.
- Repeat the blending process for each fruit group, layering the yogurt and fruit mixture in a 1‑quart container. Start with the lightest color—banana and peach—then add a middle layer of berries, followed by the darkest layer of mixed berries or beets.
- If you’re using spinach, fold it into the middle layer after blending, ensuring it’s well incorporated. The spinach will add a subtle green tint that can be masked with a few drops of blue food coloring if desired.
- Pour the blended mixture into popsicle molds, filling each cavity about ¾ full to allow space for expansion. Insert sticks, then seal the tops with a small piece of foil or a lid to prevent contamination.
- Place the molds in the freezer for at least 4 hours, or until firm. Check the popsicles after 2 hours; if they’re not yet solid, give them more time. The best popsicles have a slightly pliable center that freezes into a perfect bite.
- When ready to serve, run the molds under warm tap water for a few seconds to loosen the popsicles. Pull them out carefully, ensuring the sticks stay intact.
- Serve immediately, or store in an airtight container in the freezer for up to a week. If the popsicles become too hard, let them sit at room temperature for a minute before biting.
That's it — you did it. But hold on, I've got a few more tricks that'll take this to another level…
Insider Tricks for Flawless Results
The Temperature Rule Nobody Follows
Most people forget that the temperature of the liquid matters. Using ice‑cold water or juice instead of room‑temperature liquid ensures the mixture starts freezing sooner, which prevents ice crystals from forming. I’ve tested it on a hot July day; the popsicles stayed smooth and didn't develop a gritty texture.
Why Your Nose Knows Best
Smell the fruit before blending. If it’s not fragrant, it’s likely overripe or not fresh. Fresh fruit emits a bright, sweet aroma that translates into a vibrant flavor profile. If the scent is muted, the popsicles will taste flat.
The 5‑Minute Rest That Changes Everything
After blending, let the mixture sit at room temperature for five minutes before pouring into molds. This brief rest allows the yogurt to relax and the fruit to release more juices, resulting in a richer, more cohesive texture.
Sticking to the Right Stick Size
Using 2‑inch sticks instead of the standard 3‑inch ones gives you more control over the freezing process. Shorter sticks freeze faster and are less likely to crack or become too hard. They also fit better in small containers for on‑the‑go snacking.
Freezing in Stages
Freeze the first layer of fruit for two hours before adding the second layer. This staggered approach ensures each layer sets properly, preventing the middle layer from becoming soggy. It also creates a beautiful gradient effect that looks like a rainbow.
Flavor Layering Tips
Start with the lightest color at the base of the mold and gradually add darker hues. This layering technique not only looks stunning but also ensures that each bite offers a progressive change in flavor. I’ve found that adding a splash of lime juice to the darkest layer brightens the overall taste.
Creative Twists and Variations
This recipe is a playground. Here are some of my favorite ways to switch things up:
Chocolate‑Berry Fusion
Swap half of the Greek yogurt for chocolate‑flavored yogurt and add a handful of frozen dark chocolate chips. The result is a decadent, chocolate‑berry popsicle that satisfies both sweet and chocolate cravings.
Spicy Mango Kick
Blend in a pinch of cayenne pepper or a splash of hot sauce to the mango layer. The heat pairs beautifully with the sweet mango, creating a balanced, spicy‑sweet treat.
Minty Green Popsicle
Replace the spinach with fresh mint leaves and add a splash of lime juice. This green variant is refreshing and has a bright, citrusy finish that’s perfect for hot afternoons.
Almond Butter Crunch
Stir in a tablespoon of almond butter into the banana layer, and sprinkle crushed almonds on top before freezing. The nutty crunch adds texture and a subtle, buttery flavor that complements the fruit.
Ginger‑Infused Tropical
Add a teaspoon of freshly grated ginger to the pineapple layer. The ginger provides a zesty kick that cuts through the sweetness, creating a complex, tropical flavor profile.
Storing and Bringing It Back to Life
Fridge Storage
Store popsicles in an airtight container in the refrigerator for up to 48 hours. Keep them on the top shelf where the temperature is most stable. If you notice a slight ice crust, simply let them sit at room temperature for a minute before eating.
Freezer Friendly
For long‑term storage, place the popsicles in a freezer bag, removing as much air as possible. They’ll stay fresh for up to six weeks. When you’re ready to enjoy, pull one out and let it sit for a couple of minutes; it will soften enough for a smooth bite.
Best Reheating Method
To revive a frozen popsicle, run the mold under warm tap water for 10–15 seconds. This gentle heat will soften the surface without melting the interior. Add a tiny splash of water before reheating; it steams back to perfection and maintains the creamy texture.