When I first opened the fridge that rainy Thursday, I was staring at a single loaf of bread that had somehow turned into a mystery box of disappointment. The crust was as brittle as a dry biscuit, the crumb was dry as a desert, and the whole thing tasted like it had been baked by a robot that forgot the sugar. I stared at the recipe card, felt the frustration, and then I whispered a dare to myself: “I’ll turn this into the softest, sweetest loaf anyone’s ever tasted.” That moment, that promise, is the spark that launched this recipe into the kitchen.
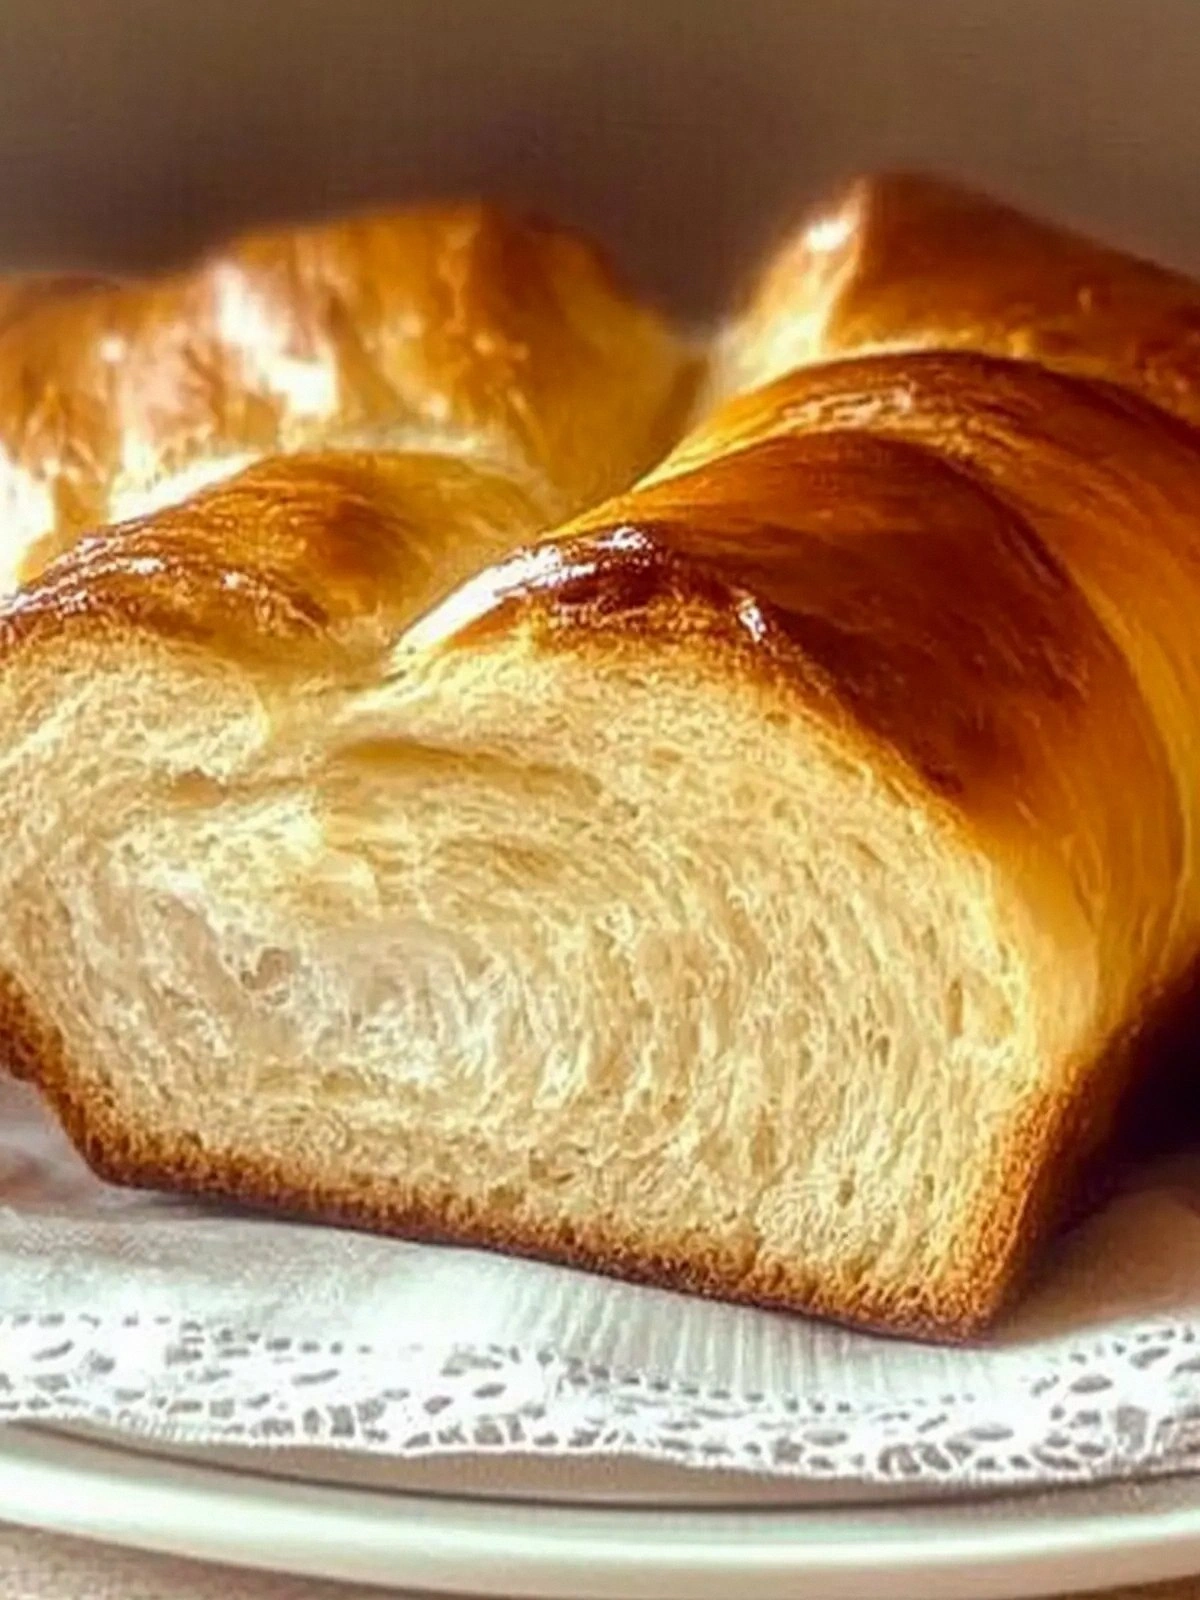
Imagine a loaf that rises like a cloud on a sunny afternoon, its surface a golden‑brown halo that glistens with a subtle sheen of butter. Picture the aroma drifting out of the oven—warm milk, sweetened condensed milk, and a hint of vanilla—like a comforting hug from your grandma. When you break the crust, the sound is a gentle crack, not a brittle snap, and the first bite is a melt‑in‑your-mouth experience, velvet‑soft inside with a faint caramel sweetness that lingers. I swear, that first bite is a revelation; it’s the kind of moment that makes you want to share the recipe with everyone you know.
I’ve tried countless variations of bread over the years—whole wheat, sourdough, rye, even gluten‑free—but none have managed to hit that sweet spot of softness, flavor, and ease. That’s why this version stands out: it uses a surprisingly simple trick—sweetened condensed milk—to lock in moisture and create a tender crumb that stays fresh for days. Most recipes get this completely wrong, treating condensed milk as a gimmick, but here it’s the star that gives the bread its signature texture. Picture the loaf as a cloud of buttered sugar, with a crust that’s crisp enough to bite but soft enough to melt.
Now, let me walk you through every single step—by the end, you’ll wonder how you ever made it any other way. I promise you, this loaf is hands down the best version you’ll ever make at home. I dare you to taste this and not go back for seconds. If you’ve ever struggled with bread that turns out dry or heavy, you’re not alone—and I’ve got the fix. Picture yourself pulling this out of the oven, the whole kitchen smelling incredible, and knowing you’ve just made a masterpiece.
What Makes This Version Stand Out
- Taste: The sweetened condensed milk adds a subtle caramel depth that balances the savory yeast notes, creating a flavor profile that’s both comforting and indulgent.
- Texture: The crumb is luxuriously airy yet moist, thanks to the combination of milk and condensed milk, which trap steam and keep the bread tender.
- Ease: No complex techniques—just mix, knead, rise, bake. Even a novice can achieve bakery‑quality results.
- Uniqueness: Using condensed milk as a moisture enhancer is a rare twist that sets this loaf apart from traditional recipes.
- Crowd‑pleaser: Whether you’re feeding a family or hosting a brunch, this bread wins over everyone, even the pickiest eaters.
- Ingredient Quality: Fresh, high‑quality butter and whole‑milk sweetened condensed milk make all the difference in flavor and texture.
- Make‑ahead: The dough can be refrigerated overnight, allowing you to bake a fresh loaf in the morning with minimal effort.
- Versatility: Serve it plain, with butter, or as a base for savory or sweet toppings—every use is a delight.
Inside the Ingredient List
The Flavor Base
At the heart of this loaf is the sweetened condensed milk—about ⅓ cup. It’s not just a sweetener; it’s a moisture binder that keeps the crumb tender for days. If you skip it, the loaf will be dry and crumbly, like a forgotten cookie. Swap it with honey or maple syrup for a different sweet profile, but expect a slightly denser texture. When choosing condensed milk, look for a brand with no added artificial flavors; the purer the better.
The Texture Crew
All‑purpose flour provides the structure, while the instant yeast is the engine that makes the dough rise. The yeast’s rapid fermentation releases carbon dioxide, creating those airy pockets we love. The ½ teaspoon of salt not only seasons the bread but also strengthens the gluten network, giving the loaf its chew. If you’re gluten‑free, you can use a 1:1 blend of rice flour and xanthan gum, but the results will differ in mouthfeel.
The Unexpected Star
The ½ cup warm milk is a classic bread ingredient, but here it works in tandem with the condensed milk to create a rich, silky crumb. Warm milk softens the flour, enabling gluten development, while the condensed milk adds sweetness and moisture. If you prefer a lighter loaf, reduce the milk slightly and increase the yeast to compensate for the extra moisture.
The Final Flourish
Butter, sugar, egg, and an extra tablespoon of milk tie everything together. The butter adds flavor and tenderness, the sugar feeds the yeast for a gentle rise, and the egg enriches the dough, giving it a glossy crust. The final splash of milk helps achieve a golden‑brown finish. If you’re looking for a savory twist, replace the sugar with a pinch of rosemary or thyme.
Everything's prepped? Good. Let's get into the real action.
The Method — Step by Step
- Start by whisking the warm milk, condensed milk, and sugar in a small bowl until the sugar dissolves completely. The mixture should feel silky, not gritty. I keep a timer on my phone to ensure I don’t over‑whisk and create a frothy texture that could affect the dough’s rise. This step is critical because the sugars feed the yeast, giving the loaf its gentle lift.
- In a large mixing bowl, combine the all‑purpose flour, instant yeast, and salt. Stir them together with a wooden spoon until evenly distributed. The instant yeast is already activated, so you don’t need a separate proofing step. This mixture will form the base of our dough, and the salt will help control fermentation.
- Add the milk mixture to the dry ingredients and stir with a dough hook or your hands until a shaggy dough forms. The dough should be slightly sticky but manageable. Let it rest for 5 minutes; this allows the flour to fully hydrate and gluten strands to begin aligning. This resting period is essential for achieving that tender crumb.
- Transfer the dough onto a floured surface and knead for about 8–10 minutes, until it becomes smooth and elastic. Feel the dough’s elasticity like a rubber band that stretches but returns to shape. A good test is the windowpane test—stretch a small piece thin; if it’s translucent, you’re done. This kneading step is where the gluten network forms, giving the loaf its structure.
- Place the dough in a lightly greased bowl, cover with a damp towel, and let it rise in a warm spot for about 1 hour, or until doubled in size. The rise should be steady, not explosive. I keep a small bowl of warm water nearby to maintain humidity. Watch out: if the dough rises too quickly, it may collapse, resulting in a dense loaf.
- After the dough has doubled, punch it down gently to release excess air. Then shape it into a loaf by rolling the dough into a tight cylinder. Place it in a greased loaf pan, seam side down. This shaping step helps the loaf rise evenly and gives it a classic silhouette.
- Cover the loaf again and let it rise for a final 30–45 minutes. During this time, the dough will expand slightly, creating that classic loaf volume. While it’s rising, preheat the oven to 375°F (190°C). The oven should be fully heated before baking to ensure a crisp crust.
- Just before baking, dot the top of the loaf with small pieces of butter and drizzle a tablespoon of milk. This will give the crust a glossy finish and a subtle buttery flavor. If you prefer a darker crust, brush a little melted butter over the top.
- Slide the loaf into the oven and bake for 25–30 minutes, or until the crust turns golden brown and the internal temperature reaches 190°F (88°C). The aroma should fill the kitchen, a sweet, buttery scent that makes your mouth water. Once done, remove the loaf and let it rest on a wire rack for 10 minutes before slicing.
That's it — you did it. But hold on, I've got a few more tricks that'll take this to another level. These small adjustments will elevate the loaf from good to unforgettable.
Insider Tricks for Flawless Results
The Temperature Rule Nobody Follows
Many bakers think room temperature is fine, but the secret is to use water at 105–110°F (40–43°C) when activating yeast. This temperature range activates yeast without killing it, ensuring a steady rise. I keep a thermometer handy and check the temperature before mixing. A quick tip: if your kitchen is cool, place the dough in a warm spot like an oven with the light on.
Why Your Nose Knows Best
During the first rise, smell the dough. A pleasant yeasty aroma means the yeast is active. If it smells off or sour, the dough may be overproofed or the yeast is dead. I use this olfactory cue to decide when to shape the loaf. Trusting your nose is a simple yet powerful hack that saves countless failed loaves.
The 5-Minute Rest That Changes Everything
After shaping, let the loaf rest for exactly 5 minutes before the final rise. This brief pause allows the gluten to relax, making the loaf rise more evenly. I’ve seen loaves that were shaped and baked immediately become unevenly baked. A 5‑minute rest is a small time investment for a dramatic texture improvement.
Butter, Butter, Butter
Adding butter in two stages—once in the dough and once on top—creates a double layer of richness. The butter in the dough melts during baking, creating steam that keeps the crumb moist. The top butter forms a shiny crust. If you’re watching calories, replace half the butter with olive oil for a lighter version.
Keep It Moist After Baking
Once the loaf is out of the oven, cover it loosely with a clean kitchen towel while it cools. This traps steam and prevents the crust from drying out too quickly. I leave it for 10 minutes; the towel helps maintain moisture without making the crust soggy. When you slice it, the crumb should still feel airy and soft.
Let the Dough Rest Overnight
If you’re in a hurry the next day, you can refrigerate the shaped loaf for up to 24 hours. The slow fermentation in the fridge adds depth of flavor and makes the bread even softer. Just bring it back to room temperature for 30 minutes before baking.
Creative Twists and Variations
This recipe is a playground. Here are some of my favorite ways to switch things up:
Nutty Delight
Fold in ½ cup chopped walnuts or pecans into the dough before the first rise. The nuts add crunch and a buttery flavor that complements the sweet bread. A sprinkle of sea salt on top before baking gives a delightful contrast.
Chocolate Chip Bliss
Stir in ¾ cup dark chocolate chips into the dough after the first rise. The chocolate melts slightly during baking, creating pockets of molten sweetness. Serve with a dusting of powdered sugar for a decadent touch.
Herbed Savory
Replace the sugar with a teaspoon of dried oregano and a pinch of crushed red pepper. The savory herbs give the loaf an Italian‑style flavor, perfect for sandwiches or as a side to soup.
Maple Glaze
Brush the loaf with a mixture of 2 tablespoons maple syrup and 1 tablespoon melted butter before baking. The glaze caramelizes, giving a golden crust with a hint of maple. This version is ideal for brunch.
Vegan Version
Swap the egg for a tablespoon of flaxseed meal mixed with 3 tablespoons water (let it sit for 5 minutes). Use a plant‑based butter alternative and a dairy‑free sweetened condensed milk. The texture stays soft, and the flavor remains delicious.
Gluten‑Free Twist
Use a 1:1 blend of rice flour and xanthan gum in place of all‑purpose flour. Keep the rest of the recipe unchanged. The loaf will have a slightly different crumb but will still be moist and flavorful.
Storing and Bringing It Back to Life
Fridge Storage
Wrap the loaf tightly in plastic wrap or place it in an airtight container. Store in the refrigerator for up to 5 days. The condensed milk keeps the bread moist, so you’ll still enjoy a fresh crumb.
Freezer Friendly
Slice the loaf before freezing if you plan to use it later. Wrap each slice in plastic wrap, then place them in a freezer bag. Freeze for up to 3 months. Thaw at room temperature for 30 minutes before reheating.
Best Reheating Method
For a crisp crust and soft interior, warm slices in a preheated oven at 350°F (175°C) for 5–7 minutes. Add a tiny splash of water to the oven tray to create steam, which steams the bread back to perfection. Avoid microwaving, which can make the bread rubbery.