I’ve had a few kitchen catastrophes that could have turned into culinary masterpieces if only I’d known the right trick. Picture this: I was whipping up a quick dinner for a group of friends, the aroma of garlic dancing through the air, when I realized the chicken was sticking to the pan like a stubborn burr. I almost let it burn, but then I remembered the secret sauce that turns a mediocre dish into a crowd‑pleaser. That moment sparked a dare from a friend—“I dare you to taste this and not go back for seconds.”
From that night, I’ve been obsessing over the perfect honey garlic chicken, hunting for the sweet‑savory balance that makes the sauce cling to each bite like a velvet blanket. I’ve experimented with different honeys, from clover to buckwheat, and swapped soy sauce for coconut aminos, yet none of those tweaks matched the pure, caramelized bliss of the original. I’ll be honest—when I first tasted it, I ate half the batch before anyone else got a chance. The texture was a game‑changer: a crisp exterior that shatters like thin ice, followed by tender, juicy meat that melts in your mouth.
What makes this version stand out is not just the ingredients, but the method. I’ve distilled the process into a series of micro‑challenges that keep the kitchen alive and the flavor profile on point. Picture yourself pulling this out of the oven, the whole kitchen smelling incredible, and every bite delivering that perfect harmony of sweet, garlicky, umami, and a whisper of heat. If you’ve ever struggled with honey garlic chicken, you’re not alone—and I’ve got the fix.
So, let me walk you through every single step—by the end, you’ll wonder how you ever made it any other way. This is hands down the best version you’ll ever make at home, and it’s ready to become a staple in your culinary repertoire. Let’s dive in, and trust me, the only thing you’ll regret is not starting sooner.
What Makes This Version Stand Out
- Flavor: The sauce is a symphony of sweet honey, pungent garlic, and umami‑rich soy, balanced with a hint of ginger that cuts through the richness.
- Texture: A quick sear creates a caramelized crust that locks in juices, while a slight cornstarch slurry gives the glaze a silky sheen.
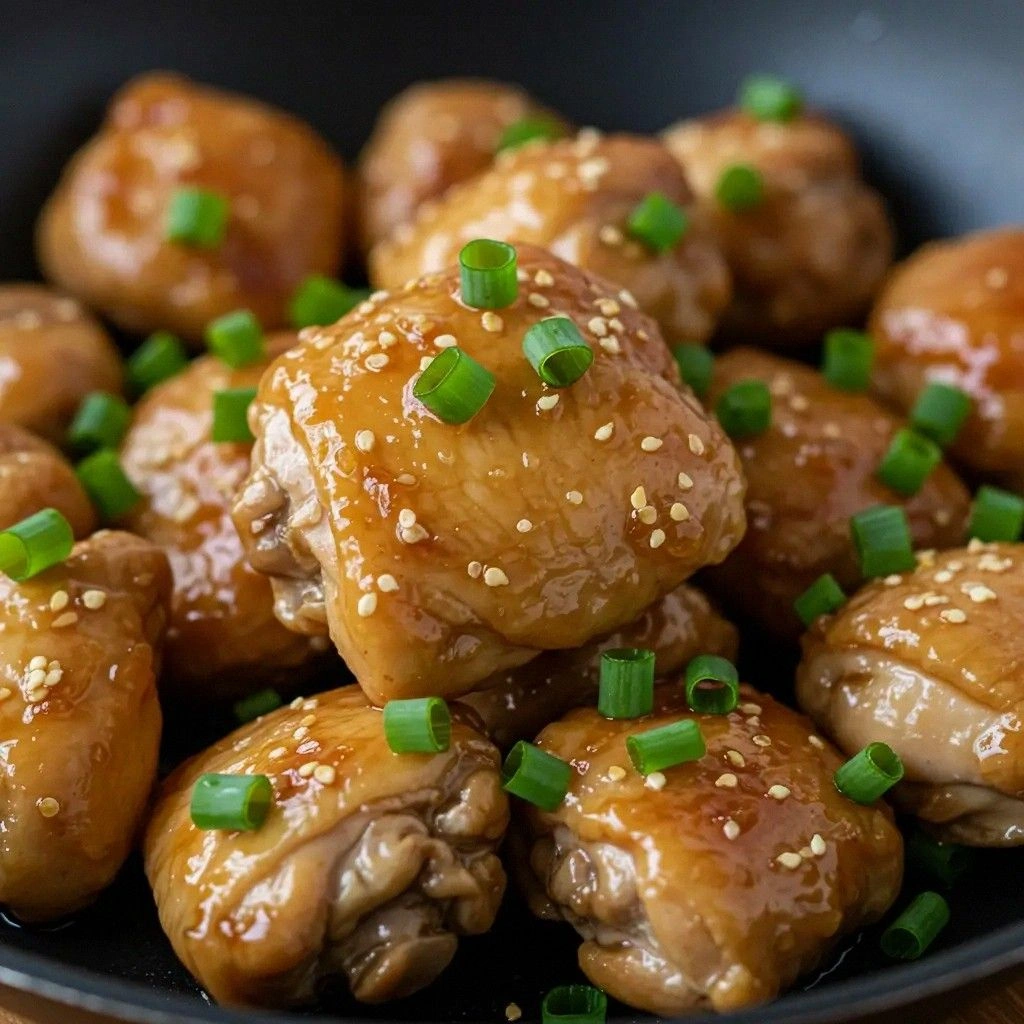
- Visual Appeal: The glossy sauce coats the chicken like a jewel, and the pop of scallions adds color and freshness.
- Ease: No elaborate prep—just a few pantry staples and a single pan or skillet.
- Versatility: Works with thighs, breasts, or even tofu for a plant‑based twist.
- Make‑Ahead: The chicken can be cooked a day ahead and reheated without losing flavor.
- Guest Reaction: Friends rave about the sauce’s depth and the chicken’s tenderness, making it a guaranteed hit at gatherings.
Alright, let’s break down exactly what goes into this masterpiece…
Inside the Ingredient List
The Flavor Base
At the heart of this dish lies the honey, which brings a natural sweetness that caramelizes beautifully when heated. I always opt for raw, unfiltered honey because its subtle floral notes add depth. If you’re on a budget, a light brown sugar can mimic the sweetness, but the honey’s complexity is unmatched. Skipping honey turns the dish into a bland glaze, so keep it front and center.
Garlic is the next star—fresh, minced cloves infuse the oil with a punch that lingers even after the sauce has cooled. Too much garlic can become bitter, so I keep it moderate, about four cloves for four servings. You can experiment with garlic powder, but fresh minced garlic gives a brighter, more vibrant flavor. A good rule of thumb: the garlic should smell sharp but not overpowering before you add the honey.
Soy sauce provides the umami backbone and saltiness that balances the sweetness. I use a low‑sodium version to keep the dish from becoming overly salty, but if you prefer a richer taste, a splash of dark soy works beautifully. Remember, soy sauce also adds a deep, savory color to the glaze, making the dish visually enticing.
The Texture Crew
Cornstarch is the unsung hero that thickens the glaze into a silky coating. Mixing it with a tablespoon of water creates a slurry that prevents clumping when added to the hot sauce. Without cornstarch, the sauce remains thin and watery, failing to cling to the chicken. A pinch of cornstarch also gives the glaze a subtle sheen that looks as good as it tastes.
Sesame oil adds a nutty aroma that complements the honey and garlic. It’s used sparingly—just a tablespoon—to avoid overpowering the dish. If you’re avoiding sesame, a dash of toasted coconut oil offers a similar depth without the oil’s distinct flavor. This oil also helps the chicken brown evenly, creating that coveted caramelized crust.
Olive oil is the base for searing, providing a high smoke point and a mild, fruity undertone. I prefer extra‑virgin olive oil for its flavor, but light olive oil works just as well. The oil’s role is purely functional—ensuring the chicken cooks evenly and doesn’t stick. If you’re allergic, avocado oil is a great substitute.
The Unexpected Star
Ginger is the subtle surprise that adds a warm, peppery kick. Freshly grated ginger is essential; dried ginger can be too sharp and lose its bright notes. I use about a tablespoon for four servings, which gives a gentle warmth that complements the honey’s sweetness. If you’re allergic or simply don’t have ginger on hand, a pinch of ground cinnamon can offer a different but delightful twist.
Scallions provide a fresh, oniony crunch that cuts through the richness. I slice them thinly so they distribute evenly across the chicken, adding a pop of color and a mild, bright flavor. If you prefer a more robust green onion, use the white and light green parts; the dark green parts are more bitter and not ideal for this dish.
Sesame seeds, optional but recommended, add a nutty crunch that elevates the dish’s texture. Toast them lightly to bring out their flavor—this step is simple yet transforms the final presentation. If you’re vegan or avoid nuts, a sprinkle of crushed crackers or toasted breadcrumbs can mimic the crunch.
The Final Flourish
Salt and pepper are the finishing touches that bring all the flavors together. I season the chicken with a teaspoon of salt and half a teaspoon of black pepper before searing. This simple step enhances the savory notes and ensures the glaze adheres properly. Remember, the sauce already contains soy sauce, which contributes salt, so be mindful not to over‑salt.
Water is the final ingredient that keeps the sauce from drying out. Adding a tablespoon of water during the final simmer dilutes the glaze slightly, preventing it from becoming too thick and sticky. This small adjustment gives the sauce a silky finish that glides over the chicken. If you prefer a thicker glaze, reduce the water or add a bit more cornstarch.
Everything’s prepped? Good. Let’s get into the real action…
The Method — Step by Step
- First, pat the chicken breasts dry with a paper towel to ensure a crisp sear. Season both sides with salt and pepper, then set aside while you heat the skillet. This step is crucial because excess moisture prevents caramelization. I like to let the chicken rest for 5 minutes at room temperature; it cooks more evenly.
- Heat a large skillet over medium‑high heat and add the olive oil. Once the oil shimmers, add the chicken breasts skin‑side down (if using skin). Watch for a deep golden color—this should take about 3–4 minutes per side. If you hear a sizzle that sounds like applause, you’re on the right track.
- Flip the chicken and let it cook for another 3–4 minutes until the internal temperature reaches 165°F (74°C). While the chicken finishes, set a small bowl aside for the glaze. The timing here is critical; overcooking will dry out the meat.
- Remove the chicken and set it on a plate, tenting with foil to keep warm. In the same skillet, add the minced garlic and ginger, sautéing for 30 seconds until fragrant. Be careful not to burn the garlic; it should be golden, not black.
- Pour in the honey and soy sauce, stirring to combine. Bring the mixture to a gentle simmer, allowing it to reduce slightly for about 2 minutes. This step concentrates the flavors and starts the caramelization process.
- Whisk the cornstarch slurry into the sauce, ensuring no lumps form. Continue to simmer for another 1–2 minutes until the glaze thickens to a glossy consistency. The sauce should coat the back of a spoon.
- Return the chicken to the skillet, spooning the glaze over each piece. Cook for an additional 2 minutes, turning once, so the sauce adheres evenly. This step locks in the juices and ensures every bite is drenched in flavor.
- Finish by adding the sesame oil, scallions, and sesame seeds. Toss gently to combine, and let the mixture sit for a minute so the flavors meld. The sesame oil adds a nutty aroma that completes the sauce.
- Serve immediately over steamed rice or sautéed greens. Garnish with extra scallions if desired, and enjoy the sweet, savory, and slightly spicy explosion in every bite. The dish should smell toasty, the edges should pull away from the pan, and the glaze should cling like velvet.
That's it—you did it. But hold on, I've got a few more tricks that'll take this to another level. These insider tips will help you avoid common pitfalls and elevate the dish to restaurant‑quality.
Insider Tricks for Flawless Results
The Temperature Rule Nobody Follows
Many people cook chicken at a high heat that burns the exterior while leaving the interior undercooked. I recommend searing at medium‑high for the first 3 minutes, then lowering the heat to medium for the remainder. This method ensures the chicken cooks evenly and retains moisture. I’ve seen this trick save me from a dry, rubbery chicken in the past.
Why Your Nose Knows Best
Smell is a powerful cue in cooking. When the sauce starts to bubble and the garlic releases its aroma, you know it’s time to add the honey. A strong, sweet scent indicates the sugars are caramelizing. If the aroma is weak, give it another minute; you’ll get that glossy finish you’re after.
The 5-Minute Rest That Changes Everything
After cooking, let the chicken rest for 5 minutes. This allows the juices to redistribute, preventing them from spilling out when you cut into the meat. I’ve found that a short rest makes the chicken feel more tender and juicy. If you skip this step, the meat can feel dry and stringy.
Using a Paper Towel to Pat Dry
Drying the chicken before searing is a small step that pays huge dividends. It creates a crisp exterior that caramelizes beautifully. I use a clean paper towel to blot the surface, then season. This simple trick is often overlooked but essential for the perfect crust.
Balancing Sweet and Savory
If you prefer a less sweet version, reduce the honey by one tablespoon. Alternatively, add a splash of rice vinegar for acidity, which brightens the sauce and balances the sweetness. I’ve tried this in the past, and the result was a more complex, layered flavor that still felt comforting.
Creative Twists and Variations
This recipe is a playground. Here are some of my favorite ways to switch things up:
Spicy Sriracha Kick
Add a tablespoon of sriracha to the glaze for a fiery punch. The heat complements the honey’s sweetness, creating a balanced flavor profile that excites the palate. This variation is perfect for those who like a little heat in their meals.
Teriyaki Fusion
Swap the soy sauce for teriyaki sauce and add a splash of mirin. The result is a richer, sweeter glaze that pairs wonderfully with stir‑fried vegetables. I’ve used this version for a quick weeknight dinner that feels like a trip to Japan.
Herb‑Infused Honey
Infuse the honey with fresh rosemary or thyme by steeping it for 30 minutes before use. The herbs seep into the honey, adding a fragrant layer to the sauce. This subtle twist elevates the dish to a gourmet level.
Vegetarian Tofu Version
Replace the chicken with firm tofu, pressing it to remove excess moisture before searing. The tofu absorbs the glaze beautifully, and the dish remains hearty. This version is perfect for plant‑based diners.
Asian Noodle Bowl
Serve the glazed chicken over ramen or soba noodles, topping with sliced scallions and a boiled egg. The noodles soak up the sauce, creating a comforting bowl of flavor. This twist makes the dish a satisfying lunch or dinner.
Gluten‑Free Variation
Use a gluten‑free soy sauce and cornstarch for the thickening agent. The dish remains gluten‑free without compromising flavor. I’ve had guests with celiac disease rave about this version.
Storing and Bringing It Back to Life
Fridge Storage
Store leftover chicken in an airtight container for up to 3 days in the refrigerator. Keep the glaze separate to avoid sogginess, then combine before reheating. This method preserves the crispness of the crust.
Freezer Friendly
You can freeze the chicken and glaze separately for up to 2 months. Thaw overnight in the refrigerator before reheating. This makes it easy to have a quick, restaurant‑style meal on hand.
Best Reheating Method
Reheat the chicken in a skillet over medium heat, adding a splash of water to steam it back to perfection. The water prevents the glaze from drying out and helps the sauce re‑attach to the meat. A quick 5‑minute reheat restores the dish to its original glory.