I remember the night I was supposed to host a friends’ dinner and my kitchen was a chaotic mess of flour, sugar, and a stubborn oven that wouldn’t preheat. I stared at the clock, feeling the pressure mount, when my phone buzzed with a recipe suggestion that promised a quick, fluffy treat: Mexican Sopaipillas. I laughed, thinking, “I dare you to taste this and not go back for seconds.” But the aroma that hit me as the dough began to rise was a revelation—sweet, buttery, and with a hint of cinnamon that made my taste buds dance. That moment, the kitchen turning from a battlefield into a sanctuary of flavor, is why I’m obsessed with this version. The secret? A dash of lard that gives the dough a crisp, golden edge, and a whisper of vanilla that lifts the entire flavor profile. If you’ve ever struggled to make a quick appetizer that feels like a treat, you’re not alone—and I’ve got the fix. Let me walk you through every single step — by the end, you’ll wonder how you ever made it any other way.
What Makes This Version Stand Out
- Flair: The dough’s airy interior is achieved with a precise balance of baking powder and cold butter, creating pockets of steam that puff up like clouds.
- Texture: The combination of lard for frying and a splash of milk keeps the exterior crisp while the inside stays tender and slightly sweet.
- Flavor: A subtle vanilla infusion and a dusting of cinnamon sugar transform a simple dough into a caramelized delight.
- Speed: From mixing to frying, the process takes less than 30 minutes, making it the perfect last‑minute crowd‑pleaser.
- Versatility: Serve them warm with honey or as a base for tacos—this recipe adapts to sweet or savory palettes.
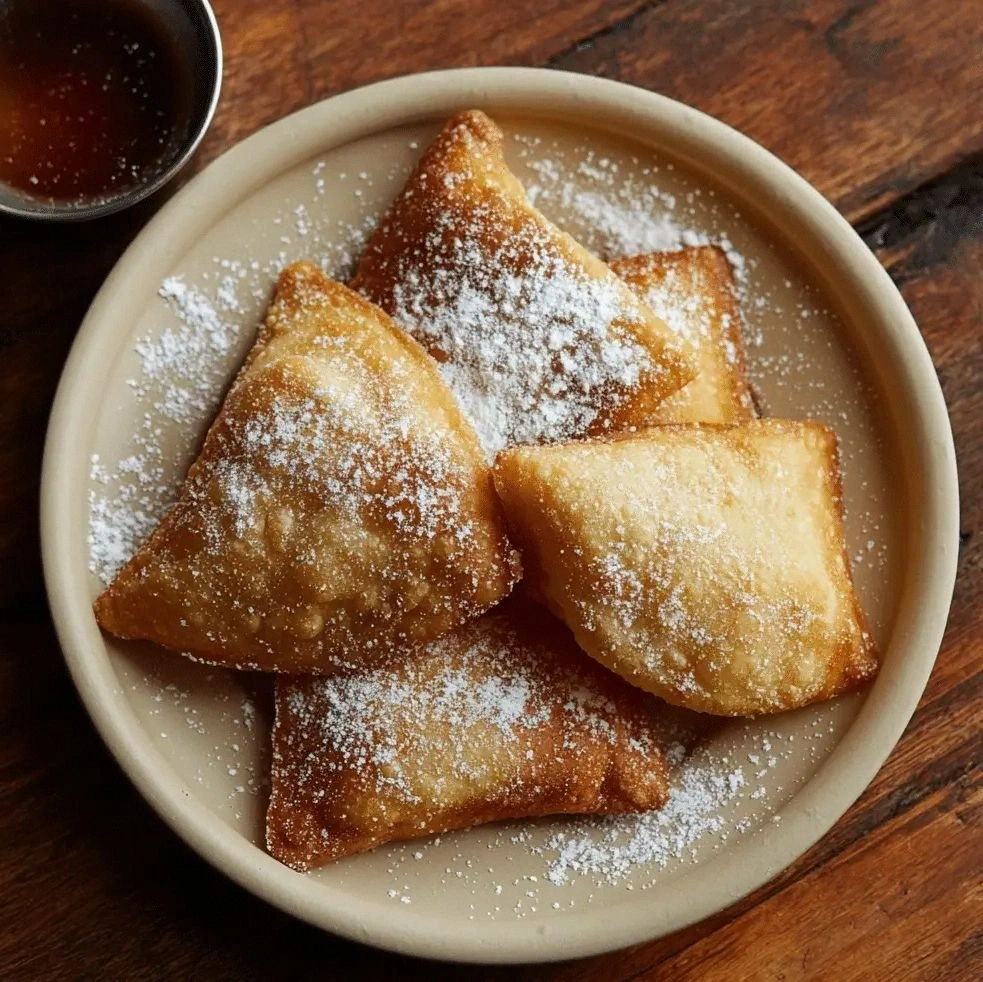
- Presentation: The golden, puffy shapes are as Instagram‑worthy as they are delicious, with a sprinkle of powdered sugar that catches the light.
- Health: Using a modest amount of lard and a small pinch of sugar keeps the calorie count manageable while delivering maximum flavor.
Alright, let's break down exactly what goes into this masterpiece…
Inside the Ingredient List
The Flavor Base
At the heart of every great sopaipilla is the flour—2 cups of all‑purpose flour provide the structure that holds the dough together while giving it the right amount of chew. The flour’s protein content determines how much gluten forms; too much, and the dough becomes tough; too little, and it collapses. If you’re experimenting, try a mix of half all-purpose and half bread flour for a slightly chewier bite.
Baking powder (1 tsp) is the leavening agent that creates those airy pockets inside the dough. It reacts with the liquid and heat, releasing carbon dioxide that expands the dough as it fries. Skipping it will result in dense, flat pastries that never rise.
A half teaspoon of salt is essential—it balances the sweetness and enhances the buttery flavor. Think of salt as the unsung hero that brings all the other flavors to the forefront. If you’re on a low‑sodium diet, you can reduce it to a quarter teaspoon, but don’t cut it entirely or the dough will taste flat.
The Texture Crew
Cold butter (0.25 cup, cubed) is the secret to a flaky exterior. When the butter melts into small pockets during frying, it creates steam that lifts the dough. If you can’t find butter, a small amount of lard or vegetable oil works, but the flavor profile shifts slightly.
Milk (0.75 cup) provides the moisture that binds the dry ingredients. The fat content of the milk also contributes to tenderness. Whole milk gives the richest flavor; skim milk will produce a slightly drier texture.
A beaten egg (1) adds structure and a glossy sheen to the finished product. It also acts as a binder, keeping the dough cohesive. If you’re vegan, a tablespoon of flaxseed meal mixed with water can serve as a suitable substitute.
The Unexpected Star
Vanilla extract (0.5 tsp) is a subtle, almost invisible star that lifts the entire flavor profile. It’s the difference between “fluffy” and “flavorful.” A dash of vanilla brings warmth that complements the cinnamon sugar dusting.
Lard or vegetable oil (2 tbsp) is reserved for frying. The type of fat you use will influence the crispness and flavor. Lard gives a classic, savory crispness; oil provides a neutral backdrop that lets the dough shine.
The Final Flourish
Cinnamon sugar (1 tbsp) and ground cinnamon (0.25 tsp) are optional but highly recommended for a sweet finish. The cinnamon sugar gives a sweet, caramelized crust, while the ground cinnamon adds depth to the aroma. If you prefer a savory route, skip these and sprinkle a pinch of sea salt instead.
Powdered sugar (0.25 cup) is the finishing touch—a dusting that adds a delicate sweetness and a visual appeal. It melts slightly into the warm dough, creating a subtle glaze. A light dusting is enough; too much will overpower the dough’s natural flavor.
Everything's prepped? Good. Let's get into the real action…
The Method — Step by Step
- In a large bowl, whisk together the flour, baking powder, salt, and sugar. The dry mix should feel slightly gritty but free of clumps. This step ensures that the leavening agent is evenly distributed, preventing any dough pockets from under‑baking.
- Add the cold butter cubes to the dry mixture. Using a pastry cutter or your fingertips, work the butter into the flour until the mixture resembles coarse crumbs. The butter should be visible in small flecks; this is crucial for a flaky texture.
- Pour in the milk and the beaten egg, then stir with a wooden spoon until a sticky dough forms. The dough should pull apart slightly when you lift the spoon, indicating it’s not too wet. If it’s too sticky, add a tablespoon of flour at a time.
- On a lightly floured surface, roll the dough into a rectangle about 1/4 inch thick. The dough should be pliable but not sticky. If it sticks, dust a little more flour on the surface.
- Using a pizza cutter or sharp knife, cut the dough into squares or diamond shapes, about 3 inches wide. The uniform size ensures even frying.
- Heat a deep skillet or pot with 2 tablespoons of lard or oil to 350°F (175°C). The oil should shimmer but not smoke. A drop of water in the oil should ripple and evaporate quickly.
- Carefully drop a few squares into the hot oil, making sure not to overcrowd the pan. Fry each side for 2–3 minutes or until golden brown and puffed. The dough should rise noticeably and develop a crisp crust.
- Remove the fried dough with a slotted spoon and place on paper towels to drain excess oil. While still hot, dust each piece with a mixture of cinnamon sugar or powdered sugar. The sugar will caramelize slightly, giving a sweet glaze.
- Serve immediately while they’re still warm and crisp. Pair them with a drizzle of honey or a spoonful of guacamole for a savory twist. The contrast of textures—crisp exterior, fluffy interior—creates a memorable bite.
That's it — you did it. But hold on, I've got a few more tricks that'll take this to another level…
Insider Tricks for Flawless Results
The Temperature Rule Nobody Follows
Many cooks assume any oil will do, but the magic happens at 350°F. If the oil is too hot, the exterior burns before the interior cooks; if too cool, the dough soaks up oil and loses crispness. Use a thermometer or the quick test: drop a small piece of dough; if it sizzles immediately and rises, you’re at the sweet spot.
Why Your Nose Knows Best
You’ve probably noticed that the first few sopaipillas smell like toasted bread with a hint of cinnamon. That aroma is the sign that the dough is achieving the perfect golden color. Trust your nose; if it smells nutty and sweet, you’re on the right track.
The 5-Minute Rest That Changes Everything
After the dough has been rolled out, let it rest on the counter for five minutes. This brief pause allows the gluten to relax, preventing the dough from shrinking when it hits the hot oil. It also lets the butter melt evenly into the dough, ensuring a consistent texture.
Folded Corners for Extra Bite
If you’re feeling adventurous, fold the corners of each square before frying. This creates a small pocket that holds a dollop of cream cheese or a spoonful of salsa, turning a simple pastry into a bite‑size meal.
Dusting Timing Is Key
Wait until the sopaipillas are out of the oil and still hot before dusting them with sugar. The heat will cause the sugar to melt slightly, creating a glossy finish that’s impossible to resist.
Cooling on a Wire Rack
Once you’ve finished frying, place the sopaipillas on a wire rack rather than paper towels. This prevents steam from building under the dough, which can make the bottom soggy.
Creative Twists and Variations
This recipe is a playground. Here are some of my favorite ways to switch things up:
Savory Taco Sopaipillas
Fill each folded square with seasoned ground beef, shredded lettuce, diced tomatoes, and a sprinkle of cheddar. Top with a drizzle of lime crema. The warm dough pairs beautifully with the cool, tangy toppings.
Chocolate‑Dipped Sopaipillas
Dip the warm dough in melted dark chocolate and let it set on parchment paper. Sprinkle with sea salt for a sweet‑savory combo that’s perfect for dessert.
Coconut‑Infused Sopaipillas
Replace half of the milk with coconut milk and add shredded coconut to the dough. After frying, dust with toasted coconut flakes for a tropical twist.
Herb‑Laced Sopaipillas
Add chopped fresh rosemary or thyme to the dough before rolling. The herbs infuse the pastry with a fragrant aroma that complements savory fillings.
Vegan Sopaipillas
Swap the butter for plant‑based butter, use a flaxseed egg, and replace milk with oat milk. The result is a fluffy, vegan-friendly version that still delivers on flavor.
Gluten‑Free Sopaipillas
Use a blend of rice flour, potato starch, and tapioca flour in place of all‑purpose flour. The dough will be slightly denser but still tender and crispy.
Storing and Bringing It Back to Life
Fridge Storage
Store leftover sopaipillas in an airtight container at room temperature for up to 3 days. The dough will keep its crispness if you avoid covering it with paper towels, which can trap moisture.
Freezer Friendly
Freeze the fried dough in a single layer on a baking sheet, then transfer to a freezer bag. They can be stored for up to 2 months. Thaw at room temperature before reheating.
Best Reheating Method
Reheat frozen sopaipillas in a 350°F oven for 8–10 minutes. Add a tiny splash of water to the bottom of the pan to create steam, which keeps the dough from drying out. The result is a fresh, crisp pastry that tastes as good as new.