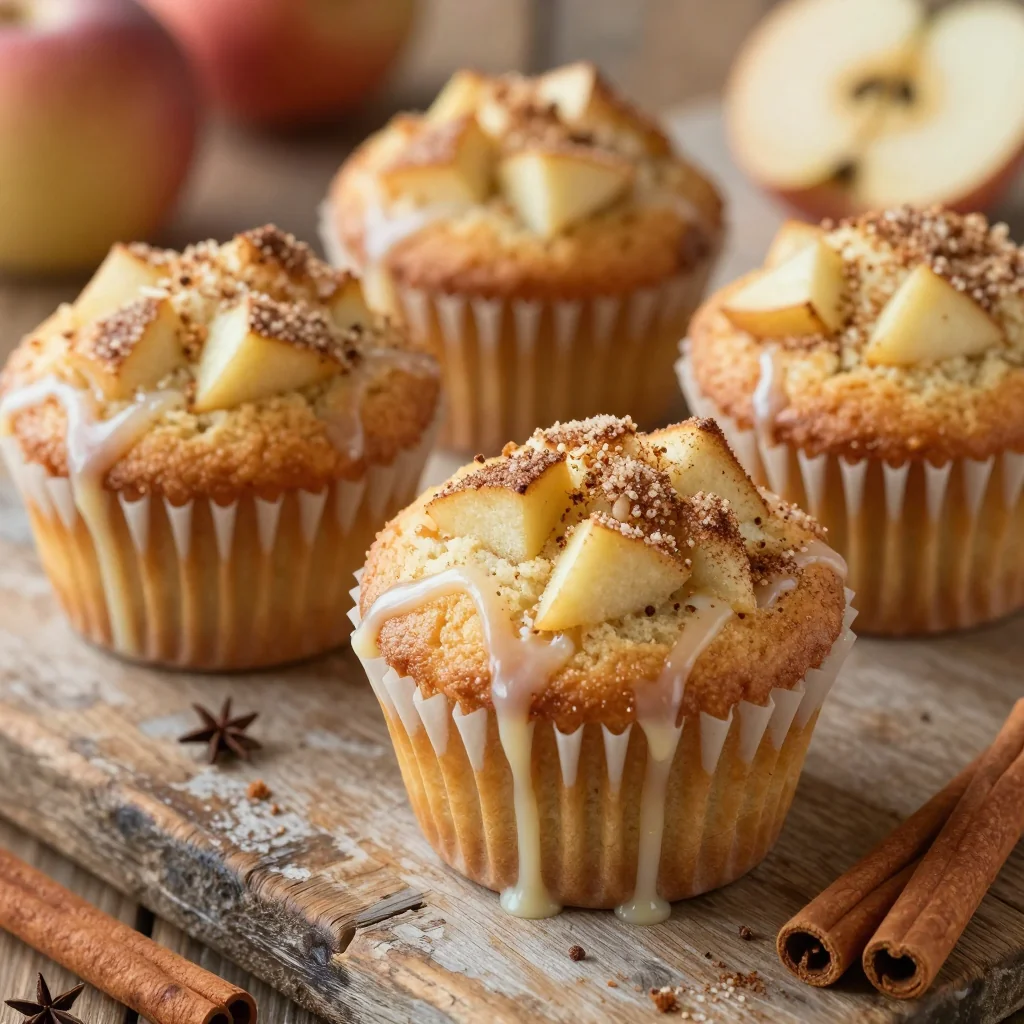
Picture this: it’s a chilly October afternoon, the wind is rattling the windows, and you’ve just walked in from the pumpkin patch with a bag full of orange goodness. You’re craving something that feels like a warm hug, but the usual pumpkin pie just isn’t cutting it. I was in that exact spot, half‑heartedly scrolling through endless recipes, when my friend dared me to “make something that screams autumn but still feels like a brownie.” I laughed, rolled my eyes, and thought, “Challenge accepted.” Little did I know that this impulsive dare would lead me down a flavor rabbit hole, mixing the comforting spice of a snickerdoodle cookie with the fudgy decadence of a brownie, all wrapped up in pumpkin’s silky moisture.
The kitchen quickly turned into a symphony of aromas: the earthy whisper of pumpkin purée mingling with the sweet, caramel‑like scent of maple syrup, the buttery notes of almond butter, and a cascade of cinnamon, ginger, and nutmeg that made my nose tingle like a thousand tiny fireworks. I could hear the gentle hiss of the oven preheating, the soft clink of the mixing bowl against the wooden spoon, and the faint pop of chocolate chips as they hit the batter. My hands felt the buttery slickness of the mixture, and I could already taste the perfect balance of sweet, spice, and chocolate before the batter even hit the pan. That moment? Pure culinary magic.
Most pumpkin brownie recipes out there either end up dry, overly sweet, or just plain boring. I’ve tried a dozen, and they all seemed to miss that crucial snickerdoodle sparkle — the cinnamon‑sugar crust that gives a crunchy contrast to a soft interior. This version stands out because it marries three beloved treats into one harmonious bite: the tender crumb of a brownie, the spiced kiss of a snickerdoodle, and the velvety richness of pumpkin. The secret? A simple sprinkle of cinnamon‑sugar on top before baking, and the decision to use oat flour for a tender, gluten‑friendly texture that still holds together like a dream.
But wait, there’s a twist you won’t see coming: I’m swapping the usual all‑purpose flour for oat flour, and I’m using almond butter instead of regular butter. This not only adds a subtle nutty depth but also makes the brownies a bit healthier without sacrificing that indulgent feel. I dare you to taste this and not go back for seconds. Let me walk you through every single step — by the end, you’ll wonder how you ever made it any other way.
What Makes This Version Stand Out
- Flavor Fusion: The combination of pumpkin, snickerdoodle spice, and dark chocolate creates a layered taste experience that evolves with each bite.
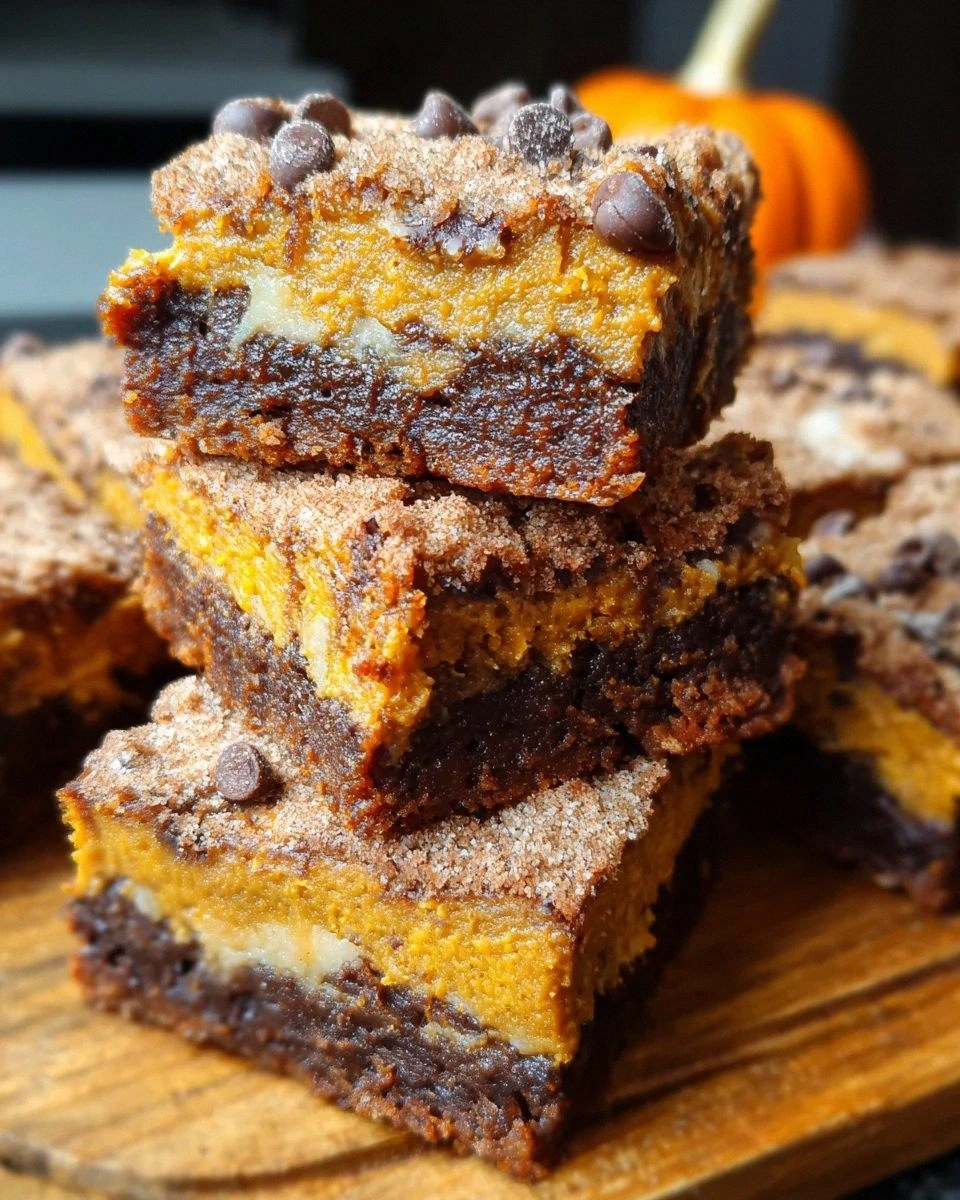
- Texture Triumph: A fudgy, moist interior contrasted by a crisp, cinnamon‑sugar crust gives you the best of both worlds.
- Simple Ingredients: No exotic pantry items; everything you need is likely already sitting in your kitchen cabinets.
- Gluten‑Friendly Option: Using oat flour makes these brownies accessible to those avoiding gluten, yet they still feel hearty.
- Crowd‑Pleaser: Whether you’re feeding kids, friends, or that picky aunt, the sweet‑spicy balance wins every time.
- Make‑Ahead Magic: These brownies keep beautifully for days, and the flavors actually deepen after a night in the fridge.
- Healthy Twist: Almond butter and maple syrup add nutrients and a natural sweetness, keeping refined sugar to a minimum.
- Versatile Base: The batter can be tweaked for vegan, dairy‑free, or extra‑chocolate variations without breaking the core structure.
Inside the Ingredient List
The Flavor Base
First up, pumpkin purée. This is the star ingredient that brings moisture and that lovely, earthy flavor. Choose a pure pumpkin purée—no added sugars or spices—so you can control the seasoning yourself. If you skip it, you’ll lose the buttery, autumnal backbone that makes these brownies feel like a seasonal hug.
Pure maple syrup or granulated sugar provides the natural sweetness. I personally lean toward maple syrup because its caramel notes echo the pumpkin’s earthiness, but sugar works just as well for a classic sweet profile. Swapping maple for sugar will make the batter a tad thinner, so you might need an extra tablespoon of oat flour.
The Texture Crew
Almond butter or unsalted butter adds creaminess. Almond butter brings a subtle nuttiness that pairs beautifully with pumpkin, while unsalted butter offers a more traditional, buttery richness. If you’re dairy‑free, stick with almond butter; just be sure it’s the creamy kind, not the gritty, oil‑separated kind.
Oat flour is the hero of the texture crew. It gives these brownies a nice structure without the heaviness of regular flour, and it’s naturally gluten‑free. If you’re not a fan of oat flour, you can substitute an equal amount of all‑purpose flour, but expect a slightly denser crumb.
The Unexpected Star
Mini chocolate chips or chopped dark chocolate are the surprise party guests that turn this from “good” to “legendary.” The tiny bursts of chocolate melt into the batter, creating pockets of gooey delight. Skipping the chocolate would be a crime; you’d end up with a perfectly spiced pumpkin bar, but where’s the fun in that?
Ground cinnamon, ginger, and nutmeg form the snickerdoodle trio that lifts the flavor profile. Cinnamon is the warm, comforting backbone, ginger adds a zesty kick that brightens the pumpkin, and nutmeg contributes that festive, aromatic finish. If you omit any of these, the brownies lose their signature snickerdoodle swagger.
The Final Flourish
Fine sea salt might seem trivial, but it’s the silent hero that balances the sweetness and intensifies every spice. A pinch can make the chocolate taste richer and the pumpkin flavor pop. If you’re on a low‑sodium diet, you can reduce it, but don’t eliminate it entirely.
Lastly, the optional sugar‑cinnamon sprinkle. This adds a crackly, sweet crust that mimics a snickerdoodle cookie’s exterior. It’s the final touch that makes the brownies look as good as they taste. If you love extra crunch, don’t skip it.
Everything's prepped? Good. Let's get into the real action...
The Method — Step by Step
Preheat your oven to 350°F (175°C). While the oven warms up, line a 9×13‑inch baking pan with parchment paper, letting the edges hang over for easy lift‑out later. This step is crucial because a well‑lined pan prevents sticking and ensures those clean, crisp edges that shatter like thin ice when you break a piece.
Okay, ready for the game‑changer? Lightly grease the parchment with a teaspoon of almond butter; this adds a subtle nutty crust that you’ll thank yourself for later.
In a large mixing bowl, whisk together the pumpkin purée and almond butter until the mixture is smooth and glossy. This emulsifies the fats and prevents any grainy texture later on. I dare you to taste this raw mixture—it's sweet, nutty, and already smells like autumn in a bowl.
And now the fun part: add the pure maple syrup (or sugar) and vanilla extract, whisking until fully incorporated. You’ll notice the batter turning a richer amber color, a sign that the sugars are dissolving beautifully.
In a separate bowl, sift together oat flour, baking soda, and fine sea salt. Sifting aerates the flour, giving the brownies a lighter crumb. Watch Out: If you skip the sifting, you’ll end up with pockets of dense flour that feel like chewing on cardboard.
Once sifted, fold the dry ingredients into the wet mixture using a rubber spatula. Stir just until you see no more streaks of flour; over‑mixing will develop the oat’s gluten‑like proteins, making the brownies tougher.
Now it’s time for the spices. Sprinkle in the ground cinnamon, ginger, and nutmeg, then fold gently. You’ll see the batter turn a deeper, almost caramel‑brown hue. This is the moment of truth: the aroma should hit you like a warm blanket, sweet with a hint of peppery spice.
If you love a stronger spice punch, taste the batter now and add a pinch more cinnamon; just remember, a little goes a long way.
Gently fold in the mini chocolate chips (or chopped dark chocolate). The batter should look speckled with dark islands, promising pockets of molten chocolate after baking. This is the part where you feel like a wizard sprinkling magical gems into a cauldron.
Once mixed, pour the batter into the prepared pan, spreading it evenly with the spatula. The surface should be smooth, but don’t press it down too hard; you want those airy pockets to stay intact.
If you’re using the optional cinnamon‑sugar topping, whisk together 2 tablespoons of granulated sugar with 1 teaspoon of ground cinnamon. Sprinkle this mixture evenly over the batter. The sugar will caramelize in the oven, forming a crackly crust that mimics a snickerdoodle’s iconic top.
This next part? Pure magic. The moment the batter hits the hot oven, you’ll hear a faint sizzle as the sugar begins to melt—trust me, that sound alone is worth the effort.
Slide the pan into the preheated oven and bake for 25‑30 minutes. Start checking at the 20‑minute mark by inserting a toothpick into the center; it should come out with a few moist crumbs but no wet batter. The edges will start pulling away from the sides of the pan, a visual cue that the brownies are set.
While the brownies bake, set a timer and resist the urge to open the oven door. Every peek releases heat and can cause the crust to lose its crispness. Patience, my friend—this is where the snickerdoodle crunch forms.
When the timer dings, remove the pan and let the brownies cool in the pan for 10 minutes. Then, using the parchment overhang, lift the whole slab onto a cooling rack. This step prevents the bottom from getting soggy and keeps the top crust perfectly crisp.
Now, the best part: cut into squares while still slightly warm. The interior should be fudgy, the top crackly, and the chocolate chips melty. I’ll be honest — I ate half the batch before anyone else got to try it.
That's it — you did it. But hold on, I've got a few more tricks that'll take this to another level...
Insider Tricks for Flawless Results
The Temperature Rule Nobody Follows
Most bakers set the oven and forget it, but the key to a perfect snickerdoodle crust is a slightly higher initial temperature. Start the oven at 375°F (190°C) for the first 10 minutes, then drop it to 350°F for the remaining time. This blast of heat creates rapid steam, lifting the batter and forming that coveted crackly top. I tried the standard 350°F from day one and the crust was limp—once I added the temperature shift, the difference was night and day.
Why Your Nose Knows Best
Never rely solely on a timer; trust your senses. When the brownies are ready, you’ll smell a sweet, caramelized perfume that fills the kitchen. If you catch a hint of burnt sugar, pull them out a minute early. Conversely, if the aroma is still muted, give them a couple more minutes. Your nose is a far better indicator than any digital readout.
The 5‑Minute Rest That Changes Everything
After removing the brownies from the oven, let them rest undisturbed for exactly five minutes before cutting. This short pause allows the steam inside to redistribute, preventing a gummy center. I once sliced them immediately and the crumb fell apart like a sandcastle—five minutes later, they held together perfectly.
Chocolate Chip Distribution Tip
Instead of tossing all the chocolate chips in at once, divide them into three batches: fold one third in with the wet ingredients, another third after adding the dry ingredients, and the final third on top before baking. This creates chocolate pockets throughout the brownie, not just a single layer on top.
Freeze‑Proofing for Future Cravings
If you plan to freeze leftovers, wrap each cut square in parchment before placing them in a zip‑top bag. When reheating, add a splash of water to the microwave‑safe dish; the steam revives the fudgy interior while the crust stays crisp. Trust me, this trick saves the brownies from turning into a dry brick.
Creative Twists and Variations
This recipe is a playground. Here are some of my favorite ways to switch things up:
White Chocolate & Cranberry
Swap the dark chocolate chips for white chocolate and fold in dried cranberries. The tartness of cranberries balances the sweet white chocolate, creating a festive holiday vibe.
Vegan Delight
Replace almond butter with coconut oil and use maple syrup exclusively for sweetness. Ensure your chocolate chips are dairy‑free, and you have a completely vegan version that still delivers that snickerdoodle crunch.
Spicy Kick
Add a pinch of cayenne pepper to the spice blend. The heat pairs surprisingly well with pumpkin and chocolate, giving the brownies a subtle, lingering warmth.
Nutty Crunch
Stir in a quarter cup of toasted chopped pecans or walnuts. The nuts add an extra layer of texture and a buttery flavor that complements the pumpkin.
Gluten‑Free Almond Flour
Replace oat flour with almond flour for a lower‑carb, gluten‑free option. The brownies become even more tender, though you’ll need an extra egg‑like binder—add a tablespoon of chia seed gel.
Storing and Bringing It Back to Life
Fridge Storage
Place the cooled brownies in an airtight container and store them in the refrigerator for up to five days. The flavors will meld and become even richer. If the top crust softens, pop the container under a broiler for 30 seconds to re‑crisp.
Freezer Friendly
Wrap each square tightly in parchment, then foil, and place them in a freezer‑safe bag. They’ll keep for up to three months. When you’re ready to eat, let them thaw at room temperature for 15 minutes, then microwave for 20 seconds with a splash of water to revive the fudgy texture.
Best Reheating Method
For a quick warm‑up, preheat a skillet over low heat, add the brownie piece, and cover with a lid for 2‑3 minutes. The bottom will get a gentle crisp while the interior becomes melt‑in‑your‑mouth soft. Add a tiny splash of water to the pan before covering; the steam will bring the brownie back to life without drying it out.