I was standing in my kitchen, eyes glued to the sizzling pan, when a sudden burst of panic hit me like a rogue soufflé that had collapsed in mid‑air. The recipe I’d been following—an over‑cooked chicken dish that tasted like a bland, forgettable casserole—was a disaster. I stared at the bland, grayish meat, the sauce looking like a sad, sticky puddle that refused to caramelize. I could almost hear the sigh of disappointment echoing through my apartment. That moment was the spark that ignited the creation of what I now call the “Sensational Honey Garlic Chick.”
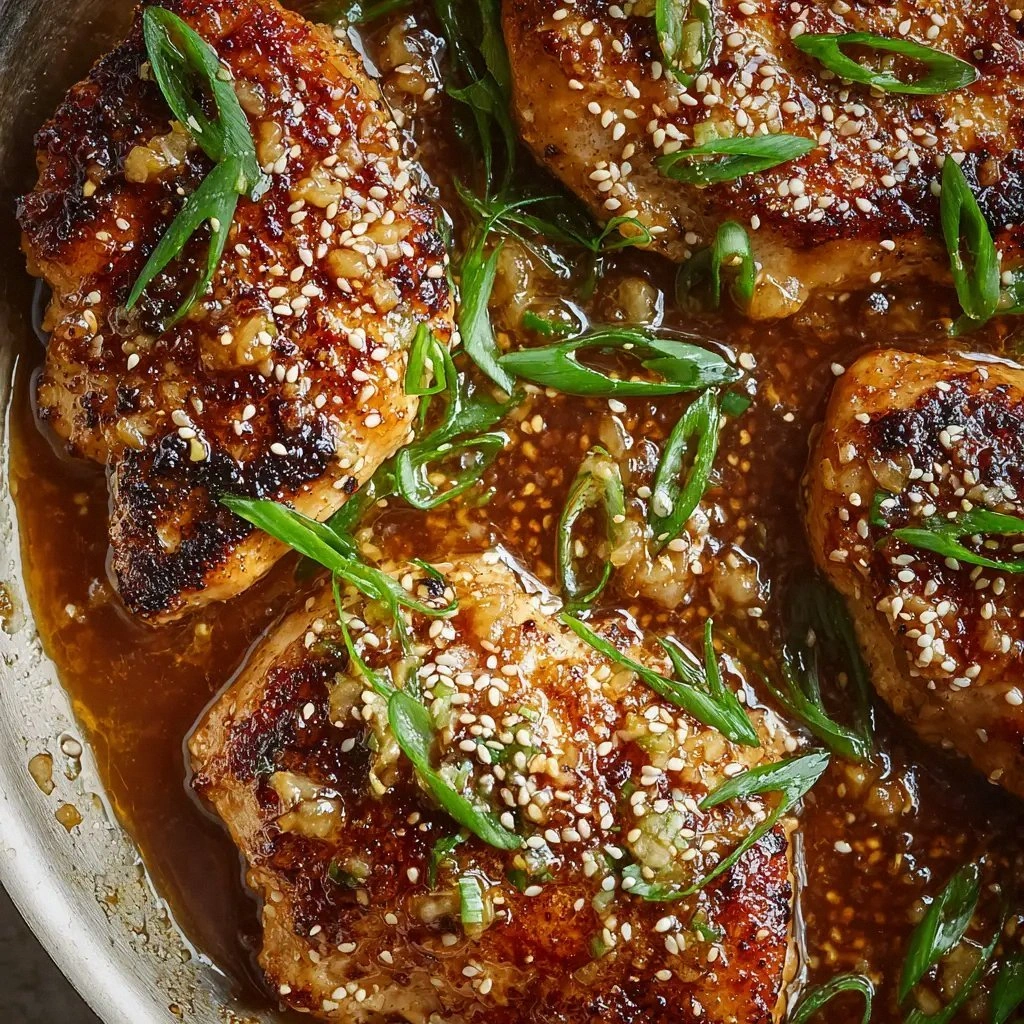
Picture this: a pan that crackles with a faint, buttery aroma, the air thick with the sweet scent of honey and the sharp tang of garlic. The sound of the chicken searing is a rhythmic drumbeat, each sizzle punctuating the anticipation in my ears. The sight of the golden edges forming, the sauce thickening into a glossy glaze that clings to the meat like a second skin—it's a visual feast that makes you stop mid‑walk and stare. The taste? Imagine a velvety, caramelized coat that bursts into a sweet‑savory explosion, followed by a subtle, peppery bite that lingers. And the texture? Tender, juicy chicken that practically melts in your mouth, contrasted with the crisp, almost caramelized exterior that shatters like thin ice when you bite in.
What sets this version apart from the endless list of honey‑garlic chicken recipes that flood the internet is the meticulous balance of flavors and the clever use of a simple cornstarch slurry to achieve that signature, clingy glaze without turning the dish into a syrupy mess. I dare you to taste this and not go back for seconds—once you try it, the craving is irresistible. The secret is a perfectly timed splash of apple cider vinegar that cuts through the sweetness, a dash of toasted sesame seeds that adds a subtle crunch, and the use of green scallions to finish with a bright, fresh note that cuts through the richness. The result is hands down the best version you'll ever make at home.
If you've ever struggled with achieving that glossy, caramelized coating without over‑cooking the chicken, you're not alone—and I've got the fix. This recipe is a masterclass in flavor layering, technique, and timing. I’ll walk you through every single step, from the moment the chicken hits the pan to the final flourish of sesame seeds and scallions. By the end, you’ll wonder how you ever made it any other way.
What Makes This Version Stand Out
- Flavor: The honey and soy sauce create a sweet‑savory base, while the apple cider vinegar adds a bright, acidic lift that prevents the sauce from becoming cloying.
- Texture: A cornstarch slurry gives the glaze a silky thickness that clings to the chicken without making it soggy.
- Simplicity: With just a handful of pantry staples and fresh garlic, you can achieve restaurant‑level flavor in under an hour.
- Uniqueness: The addition of toasted sesame seeds and green scallions gives the dish a nutty crunch and a fresh, herbal finish that sets it apart.
- Crowd Reaction: Friends and family rave about the glossy glaze and the perfectly balanced sweet‑savory profile.
- Ingredient Quality: Using high‑quality honey and low‑sodium soy sauce ensures depth of flavor without overwhelming the dish.
- Cooking Method: The pan‑searing technique locks in juices, while a quick glaze finish keeps the sauce glossy.
- Make‑Ahead Potential: The dish can be prepared ahead of time and reheated without losing its texture or flavor.
Alright, let’s break down exactly what goes into this masterpiece…
Inside the Ingredient List
The Flavor Base
The honey and soy sauce form the backbone of the sauce, delivering a deep, caramelized sweetness that pairs perfectly with the savory notes of garlic. Honey brings a natural, floral sweetness that balances the saltiness of the soy sauce, creating a harmonious profile that coats the chicken like velvet. Skipping honey would leave the sauce flat and overly salty; the result would be a dish that feels like a bland, salty glaze. If you’re looking for a healthier alternative, you can use maple syrup, but be aware that it will alter the flavor slightly, leaning more towards a subtle, earthy sweetness.
The low‑sodium soy sauce is crucial because it gives the dish its umami punch without drowning the other flavors. If you only have regular soy sauce, reduce the amount by half and add an extra pinch of salt to compensate. For a slightly smoky twist, try using tamari or a soy sauce with a hint of smoked paprika. When selecting honey, opt for a darker, full‑bodied variety like buckwheat or wildflower; these honeys provide a richer, more complex sweetness that stands up to the garlic.
The Texture Crew
Cornstarch is the unsung hero that thickens the sauce into a glossy, clingy glaze. When combined with a small amount of water or broth, it creates a slurry that, when heated, turns into a silky coating that sticks to the chicken like a second skin. If you skip cornstarch, the sauce will remain watery, and the chicken will end up soggy. A good rule of thumb is to use one tablespoon of cornstarch for every cup of liquid; in this recipe, that’s two tablespoons to thicken the combined honey, soy, and vinegar mixture.
The olive oil and butter work together to create a rich, buttery finish. Olive oil adds a fruity, peppery undertone, while butter brings a silky, creamy depth that balances the acidity of the vinegar. Together, they create a luxurious mouthfeel that elevates the dish. If you’re vegan, you can replace the butter with a plant‑based butter or coconut oil, but note that the flavor profile will shift slightly toward a nuttier, tropical note.
The Unexpected Star
Apple cider vinegar is the secret sauce that cuts through the sweetness and adds a bright, tangy punch. Its natural acidity lifts the overall flavor profile, preventing the dish from feeling heavy or cloying. If you prefer a milder acidity, try using rice vinegar or a splash of lemon juice. Just remember that each acid has a different flavor profile; rice vinegar is milder, while lemon juice adds a citrusy brightness that can change the overall taste.
The Final Flourish
Toasted sesame seeds and green scallions add both texture and flavor. The sesame seeds bring a subtle nutty crunch that contrasts beautifully with the tender chicken, while the scallions add a fresh, herbal note that cuts through the richness. If you’re allergic to sesame, you can replace them with crushed almonds or sunflower seeds for a similar crunch. The scallions can be swapped with chives or thinly sliced red onion for a different herbal kick.
Everything's prepped? Good. Let’s get into the real action…
The Method — Step by Step
- Start by patting the chicken breasts dry with paper towels; moisture is the enemy of a good sear. Season both sides with kosher salt and black pepper, letting the seasoning penetrate the meat for a minute. This simple step ensures a flavorful crust. I’ve found that letting the seasoned chicken rest for 10 minutes before cooking allows the salt to draw out excess moisture, giving a better sear.
- Heat a large skillet over medium‑high heat and add the olive oil. Once the oil shimmers, add the chicken breasts skin‑side down (if they have skin). Let them cook untouched for 5–6 minutes until a golden crust forms. Flip carefully with a spatula, and cook the other side for another 4–5 minutes. The goal is a caramelized exterior that locks in juices.
- Remove the chicken from the skillet and set aside on a plate. Keep the pan on the stove; you’ll use it for the sauce. I like to let the pan cool slightly to avoid burning the garlic later. The residual heat in the pan is perfect for developing flavor without scorching.
- Add the butter to the same pan, allowing it to melt and coat the bottom. Toss in the minced garlic, and sauté until fragrant—about 30 seconds. The garlic should release its aroma without turning brown; if it browns, it will taste bitter. This quick sauté builds the foundation of the sauce’s depth.
- Stir in the honey, soy sauce, and apple cider vinegar. Bring the mixture to a gentle simmer, letting the flavors meld for 1–2 minutes. Watch the sauce as it starts to thicken; the liquid should reduce slightly, forming a glossy sheen. This is the moment where the sauce’s character begins to crystallize.
- While the sauce simmers, whisk together the cornstarch and a splash of water to create a smooth slurry. This step is critical; a lumpy slurry will ruin the glaze’s silky texture. Slowly pour the slurry into the sauce, stirring constantly. The sauce will thicken rapidly—watch it closely. If it becomes too thick, add a teaspoon of water to reach the desired consistency.
- Return the chicken breasts to the pan, nestling them into the sauce. Cook for an additional 3–4 minutes, turning once, so the chicken is fully coated and the glaze has had time to set. The edges of the sauce should start pulling away slightly, indicating it’s thickened properly. This step ensures the chicken is fully immersed in the glossy glaze.
- Once the chicken is cooked through, sprinkle the toasted sesame seeds and thinly sliced green scallions over the top. The sesame seeds add a subtle crunch, while the scallions provide a bright, herbal finish that cuts through the richness. Let the chicken rest for 2 minutes before slicing; this allows the juices to redistribute.
- Slice the chicken into strips and arrange them on a serving platter. Drizzle any remaining sauce over the top for an extra burst of flavor. Serve immediately with steamed rice or sautéed vegetables. The dish is best enjoyed fresh, but you can store it in an airtight container for up to 2 days.
- Enjoy the moment of pure culinary bliss. The first bite should hit you with that sweet‑savory glaze, followed by a burst of tender chicken and a hint of nutty crunch. If you’re a fan of bold flavors, you’ll find this dish irresistible. And remember, the secret lies in the balance—sweet, salty, acidic, and buttery, all working in harmony.
That's it— you did it. But hold on, I've got a few more tricks that'll take this to another level.
Insider Tricks for Flawless Results
The Temperature Rule Nobody Follows
Many cooks over‑cook chicken by using high heat for too long, resulting in dry meat. The trick is to sear the chicken at medium‑high heat for the first 5–6 minutes, then lower the heat to medium for the final 4–5 minutes. This allows the interior to cook evenly without drying out. I’ve found that using a meat thermometer and aiming for 165°F inside the thickest part gives perfect juiciness every time.
Why Your Nose Knows Best
When the honey and soy sauce start to simmer, you’ll notice a sweet, caramelized aroma. That’s the cue that the sauce is developing the right depth of flavor. If the scent is flat or overly sweet, add a pinch more soy sauce or a splash of vinegar. Trust your nose; it’s the ultimate flavor sensor.
The 5‑Minute Rest That Changes Everything
After removing the chicken from the skillet, let it rest for 5 minutes before slicing. This brief pause allows the juices to redistribute, preventing them from spilling out onto the cutting board. A rested chicken will be moist, tender, and full of flavor. I’ve seen people slice right away and end up with a dry center—no thanks.
The Sesame Surprise
Toasting sesame seeds before adding them to the dish brings out a nutty aroma that elevates the entire flavor profile. Simply heat them in a dry skillet over medium heat for 2–3 minutes, shaking occasionally, until fragrant. Let them cool before sprinkling over the finished chicken. This small step transforms an ordinary glaze into a gourmet experience.
The Secret Sauce Booster
If you want an even richer glaze, finish the sauce with a splash of toasted sesame oil at the end. A few drops will add a fragrant, nutty depth that pairs beautifully with the sesame seeds. Just be careful not to overdo it—sesame oil has a strong flavor, so a little goes a long way.
Creative Twists and Variations
This recipe is a playground. Here are some of my favorite ways to switch things up:
Spicy Sriracha Kick
Add a tablespoon of Sriracha to the sauce for a spicy, tangy twist. The heat balances the sweetness, creating a bold flavor profile that’s perfect for spice lovers. Serve with a side of cool cucumber salad to cut through the heat.
Citrus Zest Finish
Stir in a teaspoon of orange zest and a splash of fresh orange juice for a bright, citrusy note. The zest adds a fragrant aroma, while the juice brightens the glaze. This variation works wonderfully with a side of quinoa or a light green salad.
Miso‑Infused Glaze
Replace half the soy sauce with white miso paste for a deeper umami flavor. The miso adds a subtle earthiness that pairs beautifully with the honey. This version is great for those who love a more complex, savory sauce.
Pineapple Sweetness
Add a handful of chopped fresh pineapple to the sauce for a tropical twist. The pineapple’s natural sugars caramelize, creating a sweet, juicy glaze. Pair this version with coconut rice for a complete island vibe.
Herb‑Infused Variation
Swap the green scallions for chopped fresh basil or mint. These herbs add a fresh, aromatic layer that complements the savory glaze. This version is ideal for a Mediterranean‑inspired dinner.
Smoky Paprika Touch
Stir in a teaspoon of smoked paprika into the sauce for a subtle smoky flavor. The paprika adds depth and a hint of earthiness that pairs well with the honey’s sweetness. Serve with roasted vegetables for a hearty meal.
Storing and Bringing It Back to Life
Fridge Storage
Store the cooked chicken and sauce separately in airtight containers. The chicken should keep for up to 2 days in the refrigerator. When reheating, add a splash of water or broth to the sauce to restore its glossy sheen.
Freezer Friendly
You can freeze the chicken and sauce separately for up to 3 months. Thaw in the refrigerator overnight before reheating. When reheating, use a low‑heat setting and stir frequently to prevent the sauce from separating.
Best Reheating Method
Reheat on the stovetop over low heat, adding a splash of water or broth to keep the sauce from drying out. Stir gently until warmed through. Alternatively, microwave on medium power, stirring halfway through, and finish with a splash of water.