Love this? Pin it for later! 📌
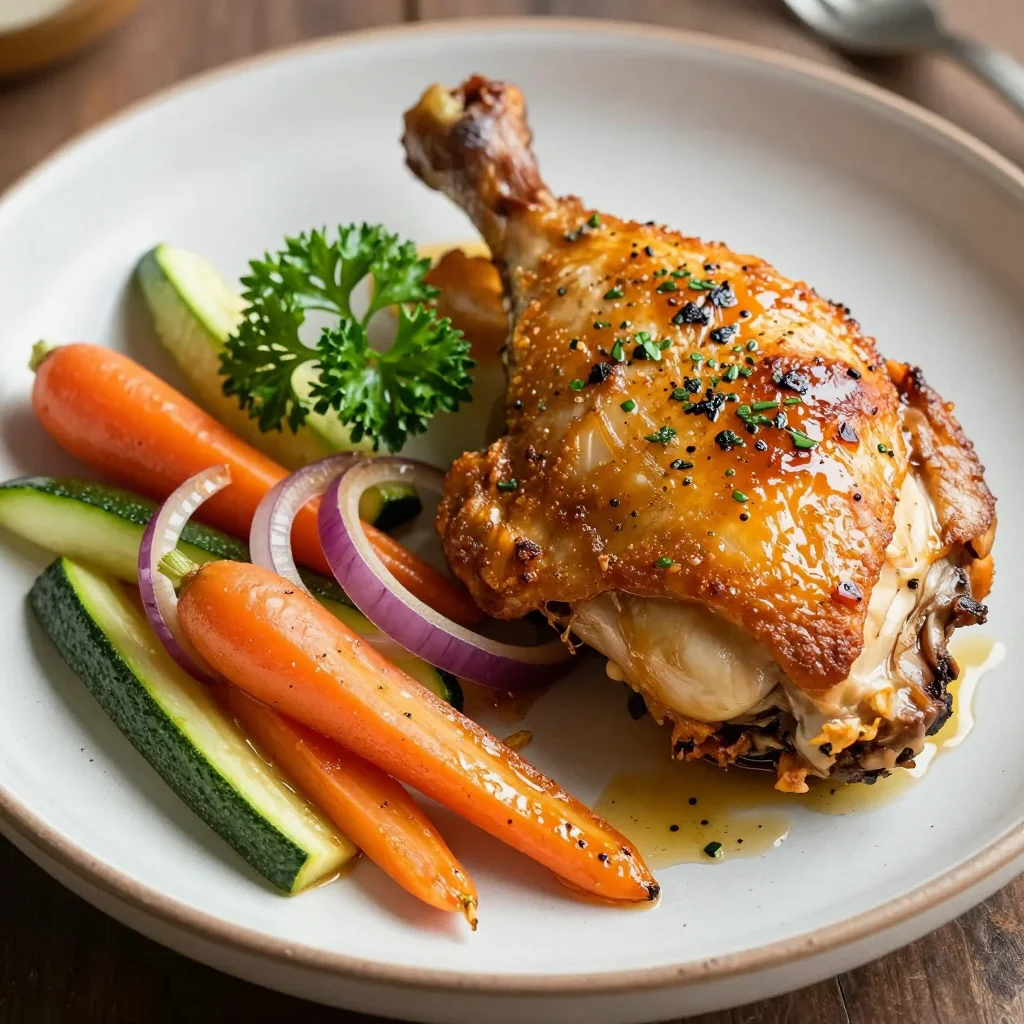
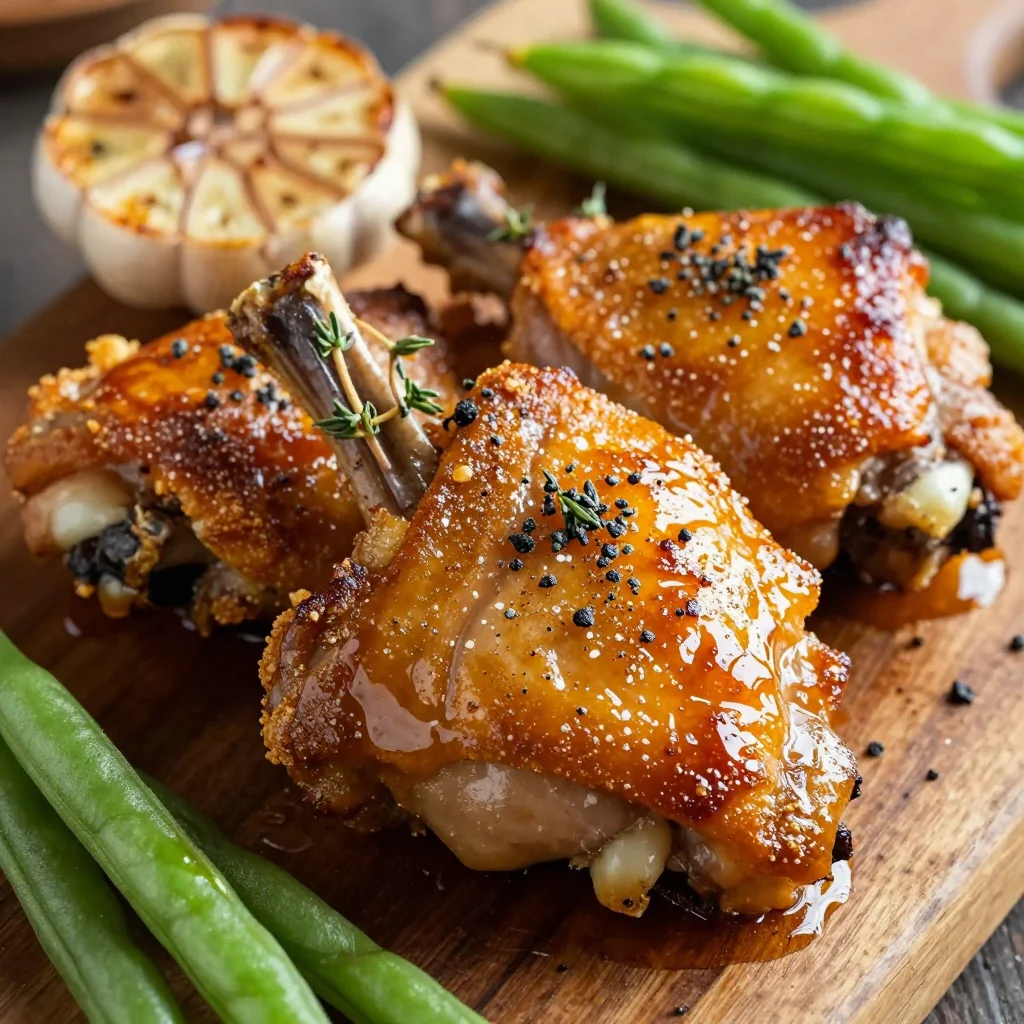
There’s something almost magical about pulling a sheet pan of burnished, honey-kissed chicken thighs from the oven—the skin lacquered and crackling, the glaze catching the light like liquid gold. The first time I served these to my book-club friends, the room went quiet except for the sound of forks scraping plates. One bite in, someone mumbled (mouth full), “I need this recipe yesterday.” That was three years ago, and every month someone still texts me a photo of their own attempt, captioned with the heart-eyes emoji and a time stamp that usually reads 8:47 p.m.—because these thighs have become the answer to “What can I make tonight that feels special but uses pantry staples?”
What makes this recipe a week-night hero is the way it straddles comfort and elegance. The honey glaze is a simple shake-together situation—soy, Dijon, garlic, and a whisper of cider vinegar—yet it reduces in the oven into a sticky, savory-sweet cloak that tastes like you spent hours hovering at the stove. Meanwhile, the skin crisps thanks to a low-effort, high-impact trick: a 15-minute rest with baking powder and salt that draws out moisture so the oven can concentrate on rendering fat instead of steaming it. Serve the thighs over a tangle of arugula and lemony farro for a dinner-party plate, or next to ketchup-swiped sweet-potato fries on a Tuesday. Either way, you’ll understand why my neighbor calls them “the chicken that ended the search for the perfect thigh.”
Why This Recipe Works
- Crispy-Skin Guarantee: A light dusting of baking powder plus overnight air-drying in the fridge delivers shatteringly crisp skin without deep-frying.
- One-Pan Ease: Everything—including the glaze—happens on a single rimmed sheet pan, so cleanup is minimal.
- Flavor Layering: We season under the skin, baste twice, then finish with a final honey brush for lacquered depth.
- Flexible Timing: Thighs can be prepped up to 24 hours ahead; bake straight from the fridge.
- Pantry Staples: No specialty ingredients—just soy sauce, honey, Dijon, and garlic you probably have on hand.
- Family-Friendly & Date-Night Ready: Kids love the sweet glaze; adults appreciate the subtle heat and umami.
Ingredients You'll Need
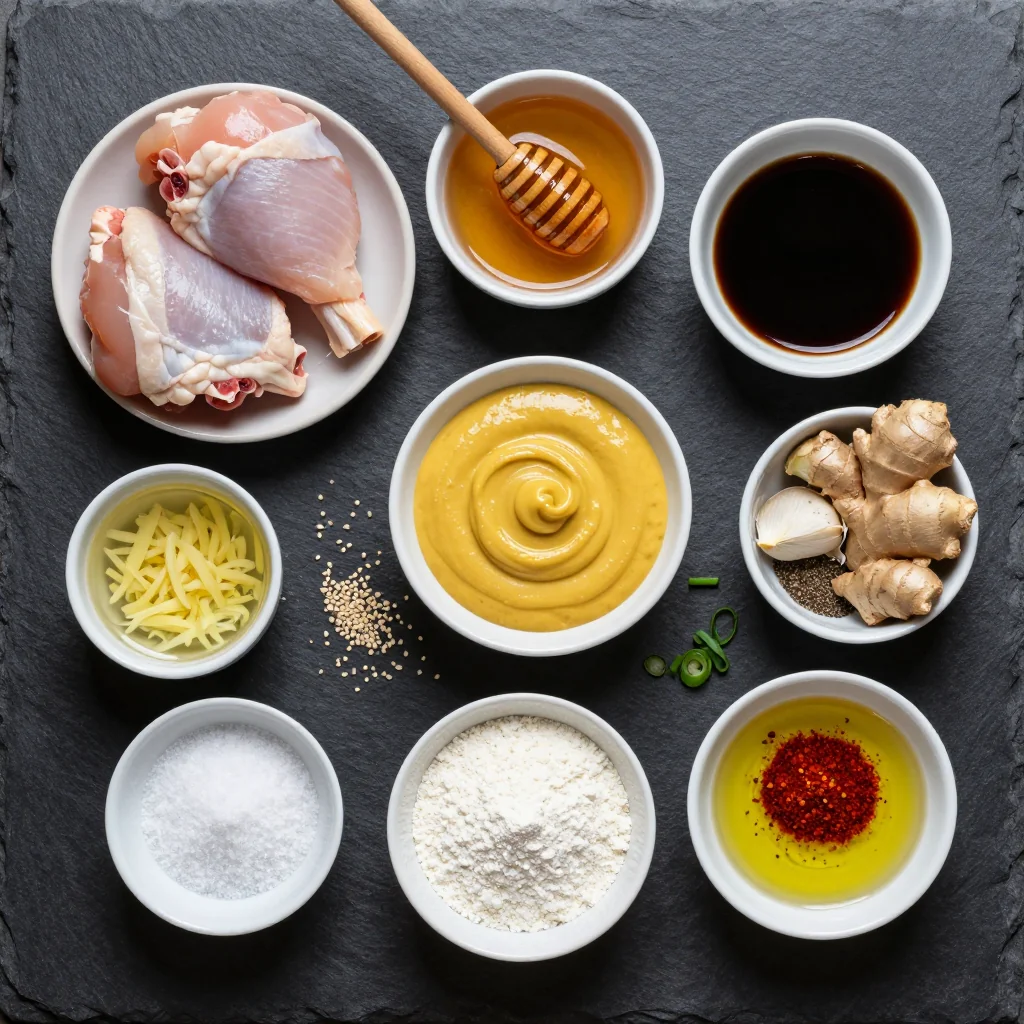
Great chicken thighs start at the butcher counter. Look for bone-in, skin-on pieces that are plump and rosy—avoid any that look gray or smell faintly of ammonia. If you can, buy air-chilled birds; they haven’t been injected with water, so the skin crisps more readily. Size matters: aim for 5–6 oz each so they cook evenly; if yours are larger, add five extra minutes in the oven.
Chicken: Bone-in, skin-on thighs are forgiving thanks to their higher fat content; even if you overshoot the temp by a few degrees, they stay juicy. Swap for drumsticks if you prefer handheld food—just reduce the initial bake by five minutes.
Baking Powder: The secret weapon. Aluminum-free varieties prevent any metallic aftertaste. Do not substitute baking soda; it’s too alkaline and will give the skin an unpleasant chemical flavor.
Kosher Salt: I use Diamond Crystal for its light, hollow grains. If you’re using Morton, reduce by 25 %. A quick overnight dry-brine seasons the meat all the way through and jump-starts skin dehydration.
Honey: A floral wildflower honey adds complexity, but any everyday clover honey works. Warm it for five seconds in the microwave so it brushes on easily.
Soy Sauce: Low-sodium keeps the glaze from becoming too salty. Tamari keeps the recipe gluten-free.
Dijon Mustard: Its sharp, vinegary backbone balances the honey’s sweetness. Whole-grain mustard works for a rustic look.
Apple Cider Vinegar: A small splash brightens the glaze and helps it reduce to a sticky consistency. Rice vinegar is a fine stand-in.
Garlic: Freshly minced cloves give a spicy punch. Jarred minced garlic is acceptable in a pinch—just pat it dry so it doesn’t steam the skin.
Smoked Paprika & Black Pepper: These add gentle heat and smoky depth without overpowering the honey. If you like a kick, add ¼ tsp cayenne.
How to Make Crispy Baked Chicken Thighs with a Honey Glaze
Pat & Prep
Remove thighs from packaging and place skin-side up on a triple-layer of paper towels. Press another layer on top to absorb surface moisture. Transfer to a wire rack set over a rimmed sheet pan. Slide into the refrigerator, uncovered, for 12–24 hours. This air-dry step is the single biggest key to crispy skin; the cold, circulating air dehydrates the epidermis so it can render and blister instead of steaming.
Seasoning Base
In a small bowl, whisk 1 tsp baking powder with 1 Tbsp kosher salt and ½ tsp black pepper. Lift the skin of each thigh and rub a pinch of the mixture directly onto the meat. Flip and massage the remaining seasoning onto the skin side. Return to the rack, skin-side up, and let stand at room temperature for 15 minutes while the oven preheats.
Preheat & Arrange
Position rack in upper-middle of oven and preheat to 425 °F (220 °C). Line the sheet pan with foil for easy cleanup, then set a wire rack inside. Arrange thighs skin-side up, leaving at least 1 inch between them so hot air can circulate.
Initial Roast
Slide pan into oven and roast for 20 minutes. The skin will start to turn opaque and faintly golden; some fat will have rendered. Meanwhile, prepare the glaze.
Whisk the Glaze
In a small jar, combine ¼ cup honey, 2 Tbsp low-sodium soy sauce, 1 Tbsp Dijon mustard, 1 Tbsp melted butter, 1 tsp apple cider vinegar, 2 minced garlic cloves, ½ tsp smoked paprika, and a pinch of cayenne if desired. Screw on lid and shake vigorously until emulsified. (Make-ahead: glaze keeps 1 week refrigerated; re-warm 10 seconds so it brushes easily.)
First Baste
After 20 minutes, brush thighs lightly with about one-third of the glaze, focusing on the skin. Return to oven for 10 minutes. The sugar in the honey will begin to caramelize; watch for light browning.
Second Baste & Crisp
Brush with another third of glaze. Switch oven to broil on high and move pan to upper rack. Broil 3–4 minutes, rotating pan halfway, until skin is blistered and mahogany in spots. Internal temp should read 175 °F (80 °C) for optimal tenderness.
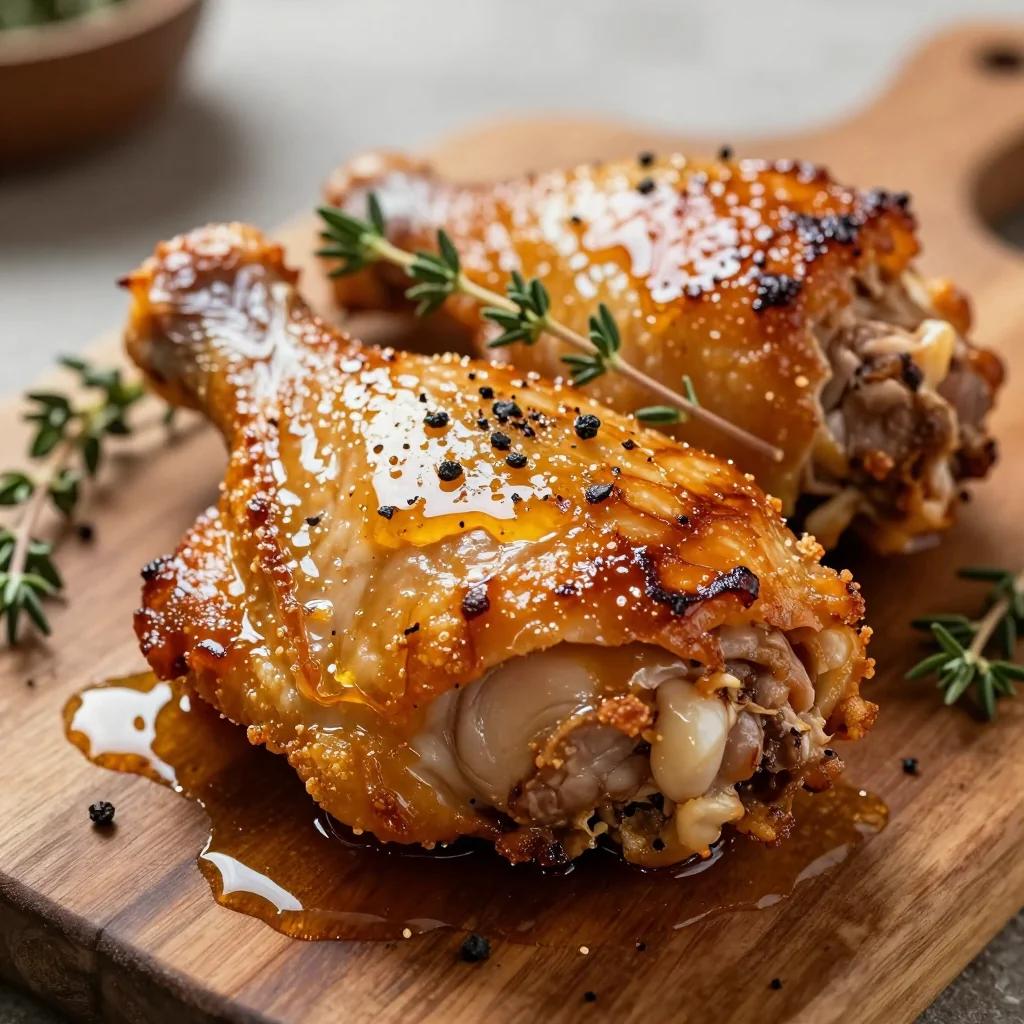
Final Gloss
Transfer thighs to a platter and brush with remaining glaze while they rest 5 minutes. The residual heat will set the honey into a shiny lacquer. Serve immediately, spooning any sticky pan juices over the top.
Expert Tips
No Wire Rack? No Problem
Crumple foil into golf-ball-size pieces and scatter across the pan to create mini-elevators that keep the skin elevated so it doesn’t stew in rendered fat.
Thermometer Trumps Time
Thighs vary in thickness; use an instant-read thermometer inserted near but not touching the bone for guaranteed juiciness.
Glaze Too Thin?
Simmer leftovers in a small saucepan for 1 minute to reduce; brush over roasted vegetables or tomorrow’s sandwich.
Skin Still Soggy?
Pop thighs under the broiler for an extra 60–90 seconds, watching like a hawk. The intense heat blisters any lingering soft spots.
Double the Batch
Bake a second pan simultaneously; cool completely, then freeze on a tray and bag for up to 3 months. Reheat skin-side up at 400 °F for 12 minutes.
Make It a Sheet-Pan Dinner
Add baby potatoes tossed in oil and salt during the first 20-minute roast; they’ll finish cooking alongside the chicken and soak up glaze drippings.
Variations to Try
- Spicy Maple: Swap honey for dark maple syrup and add ½ tsp chipotle powder.
- Orange-Ginger: Replace cider vinegar with orange juice and grate 1 tsp fresh ginger into glaze.
- Keto-Friendly: Substitute monk-fruit syrup for honey and use skin-on, bone-in chicken quarters for higher fat ratio.
- Miso-Honey: Whisk 1 Tbsp white miso into glaze and omit extra salt.
- Smoky Bourbon: Replace 1 Tbsp soy with bourbon and add ¼ tsp liquid smoke.
Storage Tips
Refrigerator: Cool completely, then store in an airtight container up to 4 days. Reheat skin-side up on a wire rack at 400 °F for 8 minutes to restore crispness.
Freezer: Freeze individual thighs on a tray until solid, then transfer to a zip-top bag with as much air removed as possible. Best used within 3 months. Thaw overnight in the fridge, then reheat as above.
Make-Ahead: Season and air-dry the thighs up to 24 hours ahead; keep uncovered on the rack. Glaze can be whisked and chilled for 1 week. When ready to serve, simply brush and bake.
Frequently Asked Questions
Crispy Baked Chicken Thighs with a Honey Glaze
Ingredients
Instructions
- Air-Dry: Pat thighs dry, season with baking-powder mixture, and refrigerate uncovered 12–24 hours.
- Preheat: Set oven to 425 °F. Place thighs skin-side up on a wire rack inside a foil-lined sheet pan.
- Roast: Bake 20 minutes. While roasting, shake together honey glaze ingredients.
- Baste: Brush thighs with one-third of glaze; roast 10 minutes more.
- Broil: Brush with another third, broil 3–4 minutes until deeply caramelized.
- Finish: Brush with remaining glaze, rest 5 minutes, serve hot.
Recipe Notes
For ultra-crispy skin, refrigerate thighs uncovered up to 48 hours. Do not skip the wire rack—it keeps the bottom from steaming.