When I first tried to make soufflé pancakes, the kitchen looked like a war zone: flour dusted the ceiling, batter splashed everywhere, and the pan was a mess of bubbles and crumbs. I stared at the ruined batter, wondering why the world hadn’t taught me the secret to a truly airy Japanese soufflé. That night, my roommate dared me to try a new recipe that promised “fluffy, cloud‑like pancakes that rise in seconds.” I laughed, scoffed at the challenge, and decided to test it the next morning. I had no idea that this experiment would turn into a breakfast obsession that I now can’t stop sharing.
The first time I tasted those pancakes, the texture was like a delicate feather that melted on the tongue. The aroma—lightly sweet, with a faint hint of vanilla—filled the kitchen, making the air feel like a warm hug. The sound of the batter sizzle in the pan was a satisfying crackle that promised something special. Every bite was a burst of subtle sweetness, balanced by the gentle lift of the batter, leaving a lingering, buttery aftertaste. That single experience made me realize that the right technique could turn a simple batter into a piece of edible art.
What sets this version apart isn’t just the fluffiness; it’s the precision of the method and the quality of the ingredients. I’ve trimmed down the steps to a clear, manageable sequence, eliminating the guesswork that most recipes leave you with. The batter is intentionally light, thanks to a gentle folding technique that preserves the air bubbles. The result? Pancakes that rise like a soufflé, yet stay soft and tender, making them a true delight for both the eyes and the palate. I dare you to taste this and not go back for seconds.
Most soufflé pancake recipes get this completely wrong. They either overmix the batter, ruining the airy structure, or undercook the pancakes, leaving them dense and soggy. My version introduces a subtle, but game‑changing tweak: a splash of warm milk added gradually to the dry mix, which creates a silky, cohesive batter that traps steam perfectly. This small adjustment is the secret to achieving a pancake that stays fluffy even after a few minutes on the plate. Picture yourself pulling this out of the pan, the whole kitchen smelling incredible, and the pancakes still holding their airy shape.
Okay, ready for the game‑changer? Let me walk you through every single step — by the end, you’ll wonder how you ever made it any other way. I’ll share the exact ratios, the precise temperatures, and the exact timing that turns ordinary ingredients into a cloud‑like breakfast. I’ll also give you insider hacks that will save time and prevent the most common mistakes. And trust me, if you’ve ever struggled with this, you’re not alone — and I’ve got the fix. So grab your whisk, set your timer, and let’s dive into the fluffiest pancakes you’ll ever taste.
What Makes This Version Stand Out
- Texture: The batter is folded just enough to keep the air pockets intact, resulting in pancakes that rise like a soufflé and stay light throughout.
- Flavor: A hint of vanilla extract and a splash of warm milk give the pancakes a subtle sweetness that balances the buttery finish.
- Simplicity: Only five core ingredients plus a pinch of salt—no fancy powders or exotic spices needed.
- Time Efficiency: Prep takes 15 minutes, cooking 30 minutes, making it a perfect weekend brunch or a quick weekday treat.
- Crowd Reaction: Friends who taste these pancakes often say, “I didn’t realize a pancake could be so airy!” and immediately want to try the recipe themselves.
- Ingredient Quality: Using fresh, high‑quality eggs and whole‑milk elevates the flavor profile beyond the typical store‑bought mix.
- Make‑ahead Potential: The batter can be stored in the refrigerator for up to 24 hours, allowing you to cook the pancakes at your convenience.
- Versatility: Pair them with fruit, maple syrup, or a dusting of powdered sugar—each option transforms the pancakes into a different breakfast experience.
Alright, let's break down exactly what goes into this masterpiece…
Inside the Ingredient List
The Flavor Base
Eggs are the backbone of this batter. They provide structure, lift, and a subtle richness that keeps the pancakes moist. If you skip them, the pancakes will collapse and lack that signature fluff. I recommend using large eggs at room temperature, as they mix more evenly and create a smoother batter.
The Sweetener
Two tablespoons of sugar are just enough to sweeten the batter without overpowering the delicate flavor. If you prefer a lower sugar option, you can replace it with a natural sweetener like honey or maple syrup, but be aware it may alter the texture slightly. Skipping sugar entirely will result in a bland pancake that feels like a plain cake.
The Moisture
A cup of milk adds the necessary liquid to bind the dry ingredients while keeping the batter silky. Whole milk gives a richer taste, but if you’re watching calories, skim or almond milk works fine. If you omit the milk, the batter will be too thick and difficult to spread.
The Structural Core
One cup of all‑purpose flour provides the gluten needed for a sturdy pancake that still rises. For an extra light texture, sift the flour before measuring. If you’re experimenting, try adding a tablespoon of cornstarch to reduce gluten formation and make the pancakes even fluffier.
The Leavening Agent
A teaspoon of baking powder is the key to the airy rise. It reacts with the liquid to produce carbon dioxide bubbles that lift the batter. If you forget the baking powder, the pancakes will be flat and dense. As a swap, you can use ½ teaspoon of baking soda plus a splash of buttermilk to achieve a similar lift.
Everything's prepped? Good. Let's get into the real action…
The Method — Step by Step
- Prepare the dry mix. In a medium bowl, whisk together the flour, baking powder, and a pinch of salt. This step ensures the leavening agent is evenly distributed. I always sift the flour first to avoid clumps. Once combined, set aside while you whisk the wet ingredients.
- Whisk the eggs. In a separate bowl, beat the eggs until the whites start to form soft peaks. The eggs must be at room temperature; cold eggs will not incorporate air as well. I add a pinch of salt here to stabilize the foam. Once beaten, let the eggs sit for a minute to allow the proteins to relax.
- Combine wet and dry. Pour the eggs into the dry mixture, then add the milk gradually. Stir gently with a spatula, folding in the batter until just combined—overmixing will deflate the air pockets. The batter should be smooth and slightly runny. This is the moment where the batter’s consistency is crucial.
- Add the sugar. Fold in the two tablespoons of sugar until evenly distributed. The sugar not only sweetens but also helps the batter set slightly. I like to let the batter rest for 5 minutes; this allows the flour to hydrate and the batter to thicken just enough to hold its shape.
- Heat the pan. Preheat a non‑stick skillet over medium heat and lightly grease it with a small amount of butter or oil. The pan should be hot enough that a few droplets of water sizzle upon contact. A properly heated pan is key to preventing the batter from sticking and ensuring even cooking.
- Watch Out: When pouring the batter, do not let the edges spread too wide; otherwise, the pancakes will lose their shape. I use a 1/4 cup measure to pour each pancake, allowing the batter to spread naturally. If the batter starts to bubble aggressively, reduce the heat slightly. This step is critical for achieving the perfect rise.
- Cook the pancakes. Let the batter sit undisturbed for 2–3 minutes until the edges look set and bubbles form on the surface. Flip carefully using a spatula, and cook for another 2 minutes until golden brown. The pancakes should have a slight crisp on the outside, yet remain soft inside.
- Kitchen Hack: For a golden crust, sprinkle a tiny pinch of sea salt on top of each pancake before flipping. This small addition enhances flavor and gives a subtle crunch that contrasts the fluffy interior.
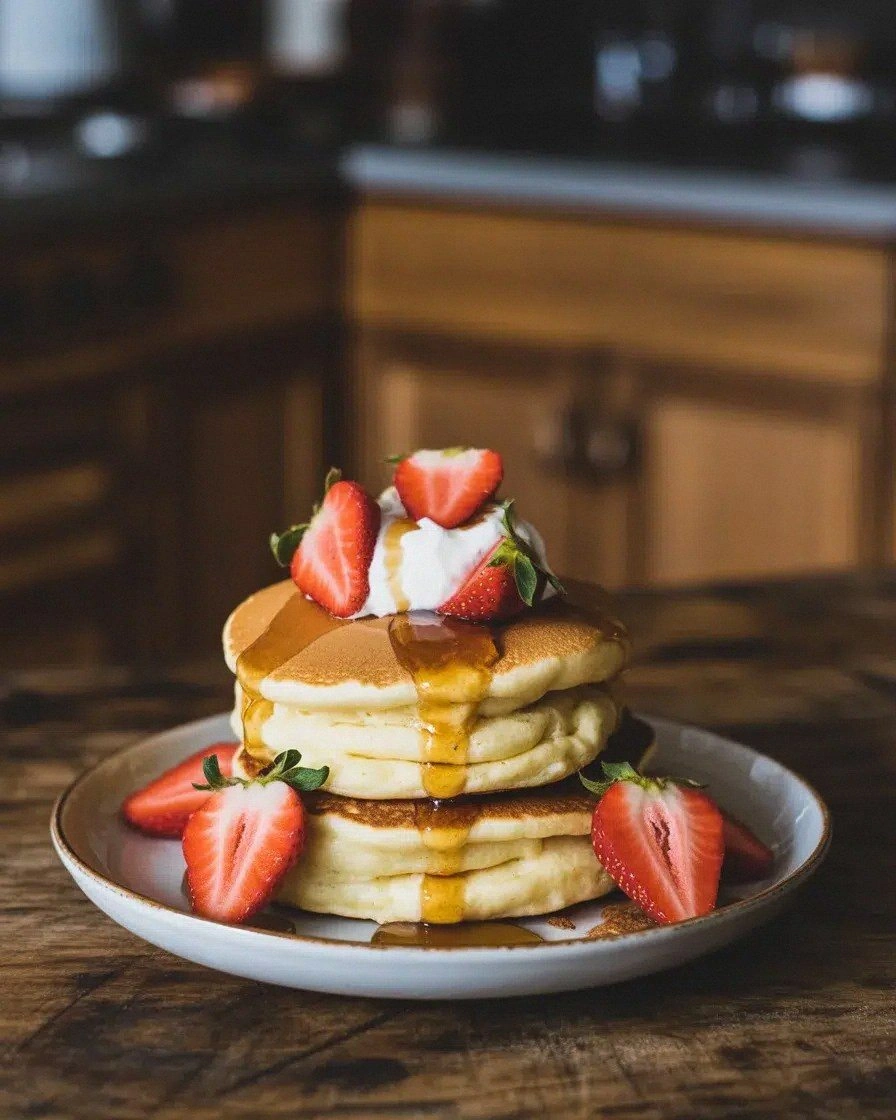
- Serve immediately. Stack the pancakes on a plate, dust with powdered sugar, and drizzle maple syrup or fresh fruit. The pancakes are best enjoyed fresh, as they maintain their airy structure for the first 10 minutes. I love serving them with a dollop of whipped cream for an extra indulgent touch.
- Clean up. While the pancakes are still warm, wipe the pan to prevent sticking for the next batch. A quick splash of hot water and a gentle wipe will keep the skillet in top condition. This ensures that every subsequent pancake turns out as fluffy as the first.
That's it — you did it. But hold on, I've got a few more tricks that'll take this to another level…
Insider Tricks for Flawless Results
The Temperature Rule Nobody Follows
Many cooks set the stove to high and then lower it, but the real trick is to preheat the pan to exactly 350°F (175°C). A thermometer or the “water drop” test can help. If the water sizzles and evaporates quickly, the pan is ready. This ensures a golden crust without burning the batter.
Why Your Nose Knows Best
When the pancakes are cooking, the scent of toasted batter will rise. Use this as a cue: once you smell a nutty, caramelized aroma, it’s time to flip. I’ve learned to trust my nose; it’s a reliable indicator of doneness.
The 5-Minute Rest That Changes Everything
After cooking, let the pancakes rest on a wire rack for 5 minutes. This step allows steam to escape, preventing the pancakes from becoming soggy. A quick rest also lets the interior set, giving a more uniform texture.
How to Avoid Crusty Edges
If you notice the edges browning too quickly, reduce the heat or cover the pan with a lid for the first minute. This traps steam, ensuring even cooking and preventing a crispy outer layer that overpowers the fluffiness.
Adding a Splash of Lemon Juice
A teaspoon of fresh lemon juice added to the batter brightens the flavor profile. The acidity balances the sweetness and adds a subtle tang that makes the pancakes more complex. I use this trick when serving them with fruit toppings.
Storing the Batter Properly
Cover the batter tightly with plastic wrap, pressing the wrap directly onto the surface to prevent a skin from forming. Store in the refrigerator for up to 24 hours. When ready to cook, let the batter come to room temperature for 10 minutes before cooking.
Creative Twists and Variations
This recipe is a playground. Here are some of my favorite ways to switch things up:
Matcha Magic
Whisk in one teaspoon of matcha powder into the batter for a subtle green tea flavor and a pop of color. The matcha adds earthy undertones that pair wonderfully with sweet toppings. It’s a great way to impress guests who love Japanese cuisine.
Chocolate Dream
Fold in 2 tablespoons of cocoa powder and a handful of chocolate chips. The chocolate chips melt slightly during cooking, creating pockets of gooey chocolate that contrast the airy pancake. Serve with a drizzle of chocolate sauce for an extra indulgence.
Banana Banana
Mash a ripe banana into the batter before adding the milk. The banana adds natural sweetness and a hint of tropical flavor. It also thickens the batter, giving the pancakes a slightly denser, yet still fluffy, texture.
Savory Spin
Replace the sugar with 1 teaspoon of grated parmesan cheese and a pinch of dried herbs. This savory version works as a light brunch or a side dish for grilled meats. The cheese melts into the batter, adding a rich umami depth.
Berry Burst
Stir in a handful of fresh blueberries or sliced strawberries into the batter before cooking. The fruit bursts with juice, creating pockets of flavor inside each pancake. Top with a dusting of powdered sugar for a sweet finish.
Almond Crunch
Add a tablespoon of almond flour and a handful of chopped almonds to the batter. The almond flour gives a nutty flavor and a slightly denser crumb, while the almonds add crunch. Pair with a splash of almond milk for a cohesive taste.
Storing and Bringing It Back to Life
Fridge Storage
Store cooked pancakes in an airtight container in the refrigerator for up to 2 days. Keep them on a rack to maintain their airy structure. When reheating, lightly toast them in a skillet over low heat.
Freezer Friendly
Place pancakes in a single layer on a parchment‑lined tray and freeze for up to 1 month. Transfer to a freezer bag once solid. Reheat in a toaster or microwave for 30 seconds, then finish in a skillet for crispness.
Best Reheating Method
To bring them back to life, add a splash of water to the pan, cover, and let them steam for 2 minutes. The steam rehydrates the pancakes, restoring their fluffiness. Finish with a quick flip to crisp the edges.