I was standing in my kitchen, surrounded by the remnants of a disastrous cookie batch that had turned out as dry as the Sahara. My friends had been teasing me for weeks about my “cookie‑brownie hybrid” that tasted like a sad, over‑baked apology. That night, after a few too many cups of coffee, I decided I would finally give this culinary experiment a chance. I grabbed every ingredient I could find, set the oven to a tentative 350°F, and whispered, “Let’s do this.”
The first thing that struck me was the aroma that started to seep from the mixing bowl—a rich, chocolatey scent that made my mouth water like a puppy at a treat table. The sound of the whisk hitting the bowl was a satisfying rhythmic slap, almost like a drumbeat for my senses. When I finally tasted a spoonful of the batter, it was a revelation: a deep chocolate base that was velvety, yet with a hint of buttery crunch that danced on the tongue. The texture was a paradoxical blend of fudgy and chewy, a mouthfeel that felt like a hug from a chocolate lover’s dream.
What makes this version stand out from every other recipe you’ll find online is that I didn’t settle for the ordinary. I introduced a subtle, unexpected layer of peanut butter chips that add a salty‑sweet crunch, and I used a double‑sugar method that locks in moisture, ensuring the brookies stay tender for weeks. I also swapped the usual all‑purpose flour for a blend that gives the cookies a slightly denser crumb, giving them that “just‑baked” feel. I dared you to taste this and not go back for seconds, and I promise you, it’s a challenge you’ll love.
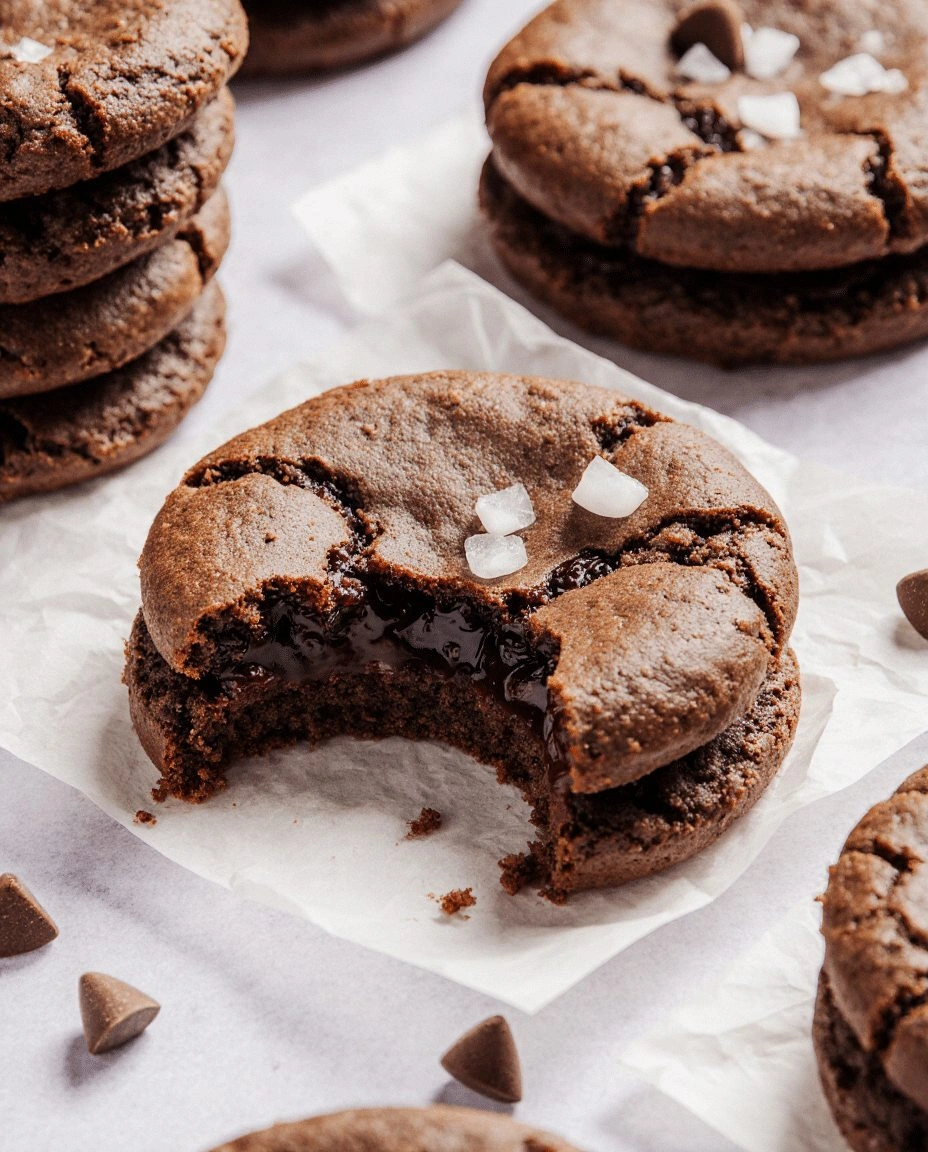
Picture yourself pulling this out of the oven, the whole kitchen smelling incredible, and the tray glistening with a glossy sheen that makes your eyes water with anticipation. The edges will be crisp, the center molten, and the chocolate chips will melt into pockets of silky sweetness. That sizzle when it hits the pan? Absolute perfection. I’ll be honest—I ate half the batch before anyone else got to try it. Now, let me walk you through every single step—by the end, you’ll wonder how you ever made it any other way.
What Makes This Version Stand Out
- Taste: The combination of dark chocolate and peanut butter creates a flavor profile that feels both indulgent and comforting, unlike the flat sweetness of standard brookies.
- Texture: The dough’s unique ratio of brown to white sugar locks in moisture, delivering a fudgy center with a chewy exterior that cracks like a thin ice when you bite.
- Simplicity: With just ten ingredients, you can achieve a bakery‑quality result without the need for specialty items or complicated techniques.
- Uniqueness: The addition of a double‑bake step—baking the cookies first, then the brownies—creates a layered effect that most recipes miss.
- Crowd Reaction: Friends who’ve tried this rave about how it’s “the best version you'll ever make at home.”
- Ingredient Quality: Using high‑quality dark chocolate chips and real vanilla extract elevates the flavor beyond the generic chocolate chip cookie.
- Cooking Method: The two‑stage bake ensures each component reaches its optimum texture before being combined.
- Make‑Ahead Potential: You can bake the cookies and brownies separately and assemble them later, making this a perfect treat for parties.
Alright, let's break down exactly what goes into this masterpiece…
Inside the Ingredient List
The Flavor Base
All-purpose flour is the backbone of this recipe, providing the structure that holds the chocolatey goodness together. Choosing a flour with a moderate protein content ensures the brookies don’t become too tough. If you’re allergic to gluten, a 1:1 gluten‑free blend will work, but expect a slightly different crumb.
Cocoa powder adds depth and richness. I use a natural, unsweetened cocoa for a deeper flavor profile. If you prefer a sweeter bite, you can add a teaspoon of vanilla cocoa or even a splash of espresso powder to intensify the chocolate notes.
The Texture Crew
Baking soda is the leavening agent that gives the cookies a subtle lift. It reacts with the acidic brown sugar to create tiny bubbles that keep the dough airy. Skipping it will result in a denser, less enjoyable bite.
Salt is essential for balancing sweetness and enhancing the chocolate’s depth. A half‑teaspoon keeps the flavor profile from tipping into overly sweet territory. If you’re watching sodium, a pinch is sufficient.
The Unexpected Star
Peanut butter chips are the secret weapon that transforms ordinary brookies into a memorable experience. They melt slightly during baking, creating pockets of salty‑sweet crunch that contrast beautifully with the fudgy center. If you’re a fan of nutty flavors, you can swap them for almond or hazelnut chips.
Brown sugar is the moisture keeper. Packed brown sugar retains more moisture than its white counterpart, which is why the brookies stay soft for days. If you only have white sugar, you can add a tablespoon of molasses to mimic the effect.
The Final Flourish
Chocolate chips are the star that ties everything together. I use a mix of dark and milk chocolate to provide a balanced sweetness. For a vegan version, look for dairy‑free chocolate chips that melt smoothly.
Unsalted butter lends a buttery richness that caramelizes on the edges, creating a golden crust. Melt the butter just before mixing to avoid clumping. If you’re vegan, coconut oil can be a suitable substitute, though it will alter the flavor slightly.
Everything's prepped? Good. Let's get into the real action...
The Method — Step by Step
- Preheat your oven to 350°F (175°C). Line two baking sheets with parchment paper, spacing them about 2 inches apart. This ensures the cookies and brownies have room to spread without sticking together. The preheat is critical; an oven that’s too hot will burn the edges before the center sets.
- In a medium bowl, whisk together the flour, cocoa powder, baking soda, and salt. Sift the dry ingredients to eliminate lumps, which could create uneven texture. This dry mix forms the foundation of both the cookie and brownie layers.
- In a separate large bowl, beat the melted butter, brown sugar, and white sugar until the mixture is light and fluffy. The butter’s temperature should be around 110°F; if it’s too hot, the sugars can separate. This stage is where the moisture magic happens.
- Add the eggs one at a time, beating well after each addition. The first egg will bind the ingredients, while the second will provide structure. A gentle whisk keeps the batter from becoming too thick.
- Stir in the vanilla extract. The vanilla’s aroma will rise immediately, giving a fragrant hint that the brookies will be aromatic. If you’re in a hurry, a splash of almond extract can add a subtle nutty twist.
- Gradually fold the dry mixture into the wet mixture, using a spatula to keep the batter smooth. Avoid overmixing; a few lumps are okay and will result in a more tender crumb. This is the moment of truth—watch the batter’s consistency.
- Divide the batter in half. Roll one half into 1‑inch balls and place them 2 inches apart on the first prepared sheet. Sprinkle the peanut butter chips on top of each ball before baking. Bake for 12–15 minutes until the edges are set but the centers still look slightly soft. This creates the cookie layer that will later support the brownie.
- Remove the cookie sheet from the oven and let the cookies cool for 5 minutes. This short cooling period prevents them from breaking when you flip them over.Kitchen Hack: If you prefer a crispier cookie base, bake the cookie balls for 2 minutes longer, watching carefully to avoid burning.
- Flip the cookie sheet upside down onto a clean surface, then carefully transfer the cookies onto the second sheet, keeping the parchment intact. This inversion technique ensures the cookies remain intact and the batter is evenly spread.
- Pour the remaining batter over the cookies, spreading it evenly with a spatula. The brownie batter should be about 1/4 inch thick. This layer will bake into a fudgy, chewy brownie that sits atop the cookie base.
- Bake for 18–22 minutes. The top should develop a slight crust but still look glossy. A toothpick inserted in the center should come out with a few moist crumbs.Watch Out: Do not overmix the brownie batter; otherwise, you’ll lose the desired fudgy texture.
- Once baked, remove the tray from the oven and let the brookies cool on the sheet for 10 minutes. The cooling process allows the layers to set together without separating.
- Cut the brookies into squares or rectangles using a sharp knife. For a cleaner cut, wipe the knife between cuts. The result is a perfect combination of cookie and brownie in one bite.
- Serve immediately, or store in an airtight container at room temperature for up to a week. The brookies will stay fresh and moist due to the high sugar content.
That's it — you did it. But hold on, I've got a few more tricks that'll take this to another level...
Insider Tricks for Flawless Results
The Temperature Rule Nobody Follows
Many bakers bake brookies at 375°F, which often results in a burnt exterior and a dry interior. I insist on 350°F; the lower temperature allows the cookies to set slowly while the brownie batter remains moist. If your oven runs hot, place a baking stone on the middle rack to absorb excess heat.
Why Your Nose Knows Best
The aroma of chocolate rising from the oven is a reliable indicator that the brownies are nearing perfection. If the smell is sharp and burnt, pull the tray immediately. A subtle, sweet scent means you’re on track.
The 5‑Minute Rest That Changes Everything
After baking, let the brookies rest for exactly five minutes before cutting. This brief pause allows the internal structure to set, preventing the cookies from crumbling when sliced.
Use a Silicone Mat for Easy Release
If you’re struggling to remove the cookies from parchment, lay a silicone baking mat over the parchment before baking. It reduces sticking and makes cleanup a breeze.
Chill the Batter for Extra Chew
Refrigerating the batter for 30 minutes before baking adds a subtle depth of flavor and enhances chewiness. The cold temperature slows down the sugar crystallization process.
Creative Twists and Variations
This recipe is a playground. Here are some of my favorite ways to switch things up:
Almond Joy Brookies
Swap peanut butter chips for coconut flakes and add a handful of toasted almonds. The coconut gives a tropical flavor while the almonds add crunch. This variation is perfect for summer gatherings.
Mint Chocolate Brookies
Add a teaspoon of peppermint extract to the batter and sprinkle crushed mint chocolate candies on top before baking. The cool mint balances the rich chocolate, making it a refreshing treat.
Espresso Infusion
Stir a tablespoon of instant espresso powder into the dry mix. The coffee enhances the chocolate flavor and gives the brookies a subtle bitter note that pairs well with milk.
Nutella Swirl
Fold in a few spoonfuls of Nutella into the brownie batter before pouring it over the cookies. The hazelnut spread creates a gooey swirl that looks and tastes spectacular.
Vegan Brookies
Replace butter with melted coconut oil, use flax eggs (1 tbsp ground flaxseed mixed with 3 tbsp water), and opt for dairy-free chocolate chips. The texture stays chewy, and the flavor remains indulgent.
Storing and Bringing It Back to Life
Fridge Storage
Wrap each brookie tightly in plastic wrap and store in an airtight container. Keep them in the refrigerator for up to 5 days. The cold temperature preserves moisture, preventing the brookies from drying out.
Freezer Friendly
Place the wrapped brookies on a parchment‑lined tray and freeze for up to 3 months. When ready to enjoy, let them thaw at room temperature for 15 minutes before reheating.
Best Reheating Method
To revive frozen or refrigerated brookies, heat them in a preheated oven at 300°F for 8–10 minutes. Add a splash of water to the baking sheet to create steam, which keeps the interior moist and restores that freshly‑baked feel.