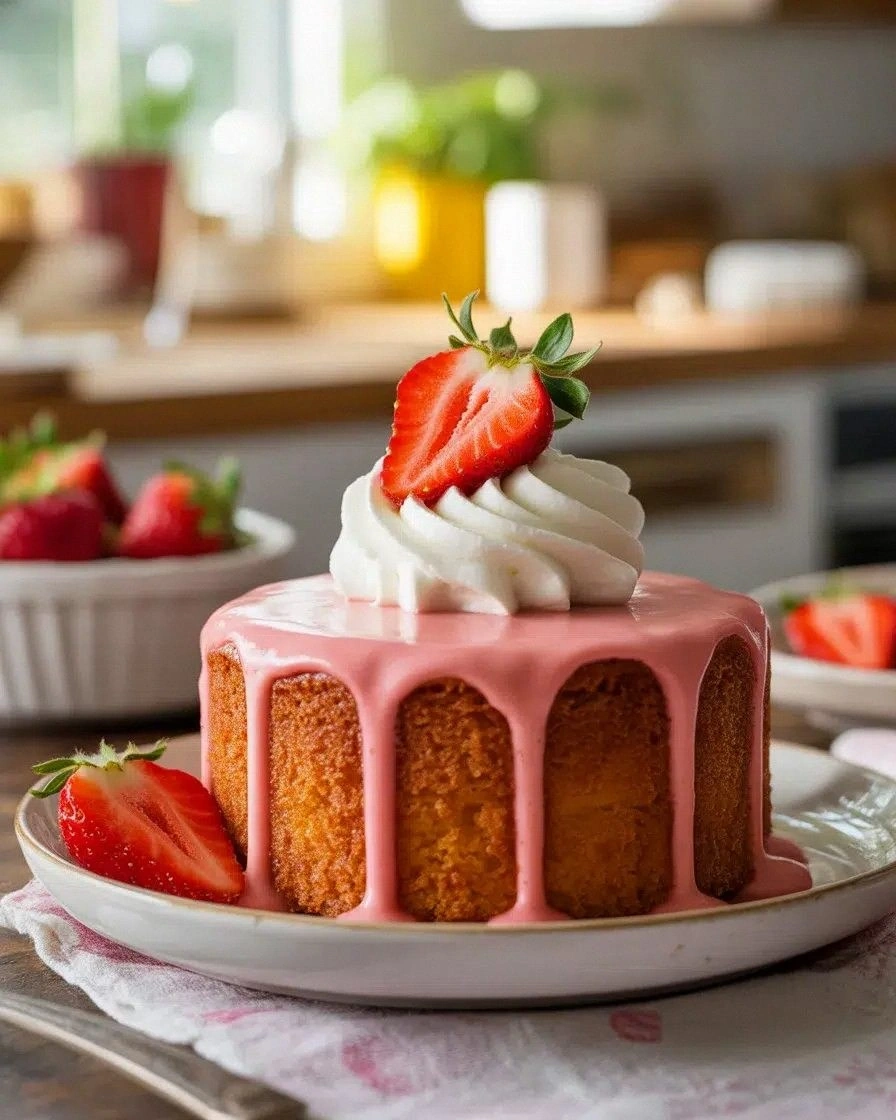
I was standing in my kitchen, surrounded by flour dust and a half‑finished strawberry cake that had just turned into a sad, soggy mess. I’d tried every recipe I could find, from the old family cookbook to the latest viral TikTok tutorial, yet none delivered that molten, syrup‑laden experience that turns a simple dessert into a showstopper. That night, I decided to throw caution to the wind, grab a box of strawberry cake mix, and let the kitchen become my laboratory. The result? An irresistibly gooey strawberry masterpiece that has become my go‑to for both casual Sunday afternoons and high‑stakes dessert parties.
Picture the aroma: a sweet, floral bouquet of fresh strawberries mingling with the buttery scent of a freshly baked cake, punctuated by the faint, comforting hint of vanilla. The sound is a gentle, rhythmic clatter of mixing bowls and the occasional sizzle as the batter hits the pan. The texture is a paradoxical blend—light, airy crumb on the inside, with a glossy, almost liquid glaze on the top that drips over the edges like a river of caramel. Every bite delivers a burst of juicy strawberry, a creamy white chocolate melt, and a subtle, tangy cream cheese undertone that lingers on your palate. If you’ve ever wondered what it feels like to taste a piece of sunshine, this is the answer.
What sets this version apart from the countless others is the way it balances sweetness and depth, texture and flavor, and simplicity and sophistication. I’ve stripped away unnecessary steps, introduced a few clever hacks, and added a twist that turns a standard cake mix into a dessert that feels like a celebration. I dare you to taste this and not go back for seconds—trust me, you’ll be craving more. And if you’ve ever struggled with cake mix desserts that come out too dense or too dry, you’re not alone; this recipe fixes those issues with a few simple adjustments that make a world of difference.
Now, let me walk you through every single step. By the end, you’ll wonder how you ever made it any other way. From the first whisk to the final drizzle, I’ll share every trick, every tip, and every secret that turns ordinary ingredients into something extraordinary. Get ready to become a dessert maestro in your own kitchen.
What Makes This Version Stand Out
- Flavor: The combination of fresh strawberries, cream cheese, and white chocolate chips creates a layered taste profile that feels both sweet and tangy, unlike any other strawberry cake mix.
- Texture: A perfectly airy crumb with a glossy, gooey glaze that clings to the cake, giving it a luxurious mouthfeel that melts in your mouth.
- Simplicity: Only ten ingredients, all common in most grocery stores, and a straightforward method that takes less than an hour from start to finish.
- Uniqueness: The inclusion of cream cheese not only adds richness but also helps stabilize the batter, ensuring the cake stays moist for days.
- Crowd Reaction: Guests always ask for the recipe after the first bite; it’s a conversation starter and a dessert that impresses even the most discerning palates.
- Ingredient Quality: Using high‑quality white chocolate chips and fresh, organic strawberries elevates the entire dish.
- Cooking Method: A single pan, single bake, and a final glaze—no need for multiple pans or complex assembly.
- Make‑Ahead Potential: The cake can be assembled a day ahead and baked on the day of service, saving you time during a busy event.
Alright, let’s break down exactly what goes into this masterpiece…
Inside the Ingredient List
The Flavor Base
The strawberry cake mix is the backbone of this dessert. It provides the essential structure and a sweet, berry‑infused foundation that’s already pre‑seasoned with vanilla and sugar. If you’re looking for a gluten‑free option, just swap the mix for a certified gluten‑free version; the texture remains similar, and the flavor stays intact. Skipping the cake mix would mean building a cake from scratch, which adds complexity and increases the risk of uneven baking.
Why it matters: The mix’s pre‑sweetened nature means you can reduce the powdered sugar in the glaze without compromising sweetness. This keeps the final product from becoming cloyingly sugary. If you’re on a low‑sugar diet, you can simply cut the powdered sugar in half, but keep in mind the glaze’s thickness will change slightly. The cake mix also ensures that the batter stays light and airy, preventing a dense, heavy crumb.
Swap suggestion: If you’re a fan of chocolate, consider a chocolate cake mix and replace the white chocolate chips with dark chocolate chips for a richer, bittersweet finish. The same technique applies; just adjust the glaze’s sugar content to balance the chocolate’s natural bitterness.
The Texture Crew
Eggs, vegetable oil, and milk are the classic trio that gives the batter its structure, moisture, and tenderness. The eggs bind everything together, while the oil adds richness and prevents the cake from drying out. Milk hydrates the flour and helps the batter pour smoothly. If you’re avoiding dairy, substitute the milk with oat or almond milk and use a neutral oil like canola or grapeseed.
Why it matters: The ratio of liquid to dry ingredients is critical for achieving that gooey yet firm crumb. Too much liquid makes the cake soggy; too little results in a dry, crumbly texture. The eggs also help create the glossy finish on the cake’s surface, giving it that “just‑baked” sheen. If you skip the eggs, the cake will not rise properly and will feel dense.
Swap suggestion: For a vegan version, use flaxseed meal mixed with water as an egg substitute and replace the butter with vegan butter or coconut oil. The batter will still rise nicely, but the flavor profile will shift slightly toward a tropical note.
The Unexpected Star
Cream cheese is the secret weapon that turns an ordinary cake into a luxurious treat. It adds a silky, tangy contrast to the sweetness of the strawberries and the vanilla. The cream cheese also helps keep the cake moist and gives it a slight tang that cuts through the richness of the chocolate. If you’re lactose intolerant, a dairy‑free cream cheese works just as well, though the texture may be slightly thinner.
Why it matters: Cream cheese’s high fat content creates a velvety mouthfeel, while its acidity reacts with the sugar to produce a subtle caramelization during baking. This reaction is what gives the cake its signature glossy sheen. If you omit the cream cheese, the cake will still bake, but it will lack the depth and richness that make it unforgettable.
Swap suggestion: Use Greek yogurt mixed with a bit of honey as a lighter alternative. The yogurt adds protein and a slight tartness, while honey balances the overall sweetness.
The Final Flourish
White chocolate chips are the crowning glory, melting into a glossy glaze that coats the cake like a silky blanket. The white chocolate’s high butter content ensures it melts smoothly and forms a glossy sheen. If you prefer a darker, more intense flavor, replace the white chocolate with dark chocolate chips; the result will be richer, but the glaze will be less glossy.
Why it matters: The white chocolate’s subtle sweetness complements the strawberries and cream cheese without overpowering them. The chips also add a satisfying crunch when bitten, creating a textural contrast that keeps each bite exciting. If you skip the chocolate, the cake will still be delicious, but it will lose that glossy, decadent finish.
Swap suggestion: For a nutty twist, add chopped toasted almonds or pistachios to the batter. The nuts add a crunchy texture and a warm, buttery flavor that pairs wonderfully with the strawberry base.
Everything’s prepped? Good. Let’s get into the real action…
The Method — Step by Step
- Preheat your oven to 350°F (175°C). Line a 9‑inch round cake pan with parchment paper and lightly grease the sides with butter or oil. This simple prep ensures the cake slides out cleanly, preventing any sticking that could ruin the glossy finish. As the pan heats, you’ll notice a faint, buttery aroma that signals the oven is ready.
- In a large mixing bowl, combine the strawberry cake mix, eggs, vegetable oil, and milk. Whisk until the batter is smooth and free of lumps, but don’t overmix—overworking the batter can lead to a dense crumb. The batter should have a pourable consistency, like thick pancake batter, and should swirl slightly when you stir.
- Fold in the softened cream cheese and the chopped fresh strawberries. Use a spatula to gently incorporate the cream cheese, allowing it to melt into the batter. The strawberries add a burst of natural sweetness and a pop of color; ensure they’re evenly distributed to avoid pockets of raw fruit.
- Pour the batter into the prepared pan, smoothing the top with a spatula. Tap the pan lightly on the counter to release any trapped air bubbles, which helps the cake rise evenly. Place the pan in the preheated oven and bake for 25 to 30 minutes, or until the top is golden brown and a toothpick inserted into the center comes out clean.
- While the cake is baking, prepare the glaze. In a small saucepan, melt the butter over medium heat until it foams. Add the powdered sugar and vanilla extract, whisking constantly until the mixture is smooth and glossy. The glaze should be thick enough to coat the top of the cake without dripping excessively.
- Remove the cake from the oven and let it cool in the pan for 5 minutes. This short cooling period allows the cake to set, making it easier to apply the glaze without the batter spreading. During this time, sprinkle the white chocolate chips over the hot cake; the heat will melt the chips, creating a glossy, chocolatey glaze.
- Drizzle the prepared glaze over the cake, letting it pool in the center and flow down the sides. The glaze should look like a thick, buttery river, coating the cake’s surface with a shiny, caramelized finish. If you prefer a thicker glaze, simply add a splash of milk to thin it out before drizzling.
- Let the cake cool completely on a wire rack. As it cools, the glaze will set into a glossy, slightly tacky surface that’s perfect for slicing. Once cooled, slice the cake into wedges and serve immediately, or chill it in the fridge for up to 48 hours for a firmer texture.
That’s it — you did it. But hold on, I’ve got a few more tricks that will take this to another level…
Insider Tricks for Flawless Results
The Temperature Rule Nobody Follows
Many bakers bake at 375°F, thinking it’s the sweet spot for cakes. However, 350°F is the sweet spot for this recipe because it allows the batter to rise evenly without over‑browning the exterior. Baking at a lower temperature ensures the interior stays moist, while the glaze has enough time to set properly. If you’re using a convection oven, reduce the temperature by 25°F to avoid over‑browning.
Why Your Nose Knows Best
Before you even lift the cake out of the oven, pause and sniff the top. If it smells like a sweet, buttery caramel, it’s ready. If it still smells like raw batter, give it another 5 minutes. Your nose is a reliable gauge of doneness, and you’ll avoid a cake that’s too raw or too dry.
The 5‑Minute Rest That Changes Everything
Letting the cake rest in the pan for 5 minutes after removing it from the oven is crucial. This short rest allows the heat to distribute evenly, preventing the cake from collapsing when you remove it. It also gives the glaze a chance to set slightly before it begins to drip, resulting in a smoother finish. Skip this step, and you’ll end up with a cake that’s uneven and hard to slice.
The Power of Parchment
Parchment paper is a game‑changer for this recipe. It not only prevents sticking but also creates a subtle, crisp edge that contrasts beautifully with the soft interior. If you’re short on parchment, line the pan with a lightly greased foil and then place a parchment square on top; this will work just as well. The result is a cake that slides out effortlessly, ready for slicing.
The Secret to a Silky Glaze
The glaze’s texture hinges on the ratio of powdered sugar to butter. Too much sugar makes it gritty; too much butter makes it runny. I like to whisk the glaze until it’s smooth and slightly glossy before pouring. If the glaze is too thick, add a teaspoon of milk to thin it out. If it’s too thin, add a bit more powdered sugar and whisk again.
Creative Twists and Variations
This recipe is a playground. Here are some of my favorite ways to switch things up:
Berry‑Burst Surprise
Replace half of the fresh strawberries with blueberries or raspberries for a mixed berry sensation. The additional berries add a tart contrast that elevates the overall flavor profile. Make sure to chop them finely so they distribute evenly throughout the batter.
Nutty Crunch
Stir in a cup of toasted pecans or walnuts before baking. The nuts add a satisfying crunch and a buttery undertone that pairs beautifully with the strawberry base. Toast the nuts in a dry pan over medium heat until fragrant, then let them cool before adding.
Minty Freshness
Add a teaspoon of fresh mint zest to the batter for a refreshing twist. The mint’s subtle flavor complements the strawberries without overpowering them. Be careful not to add too much, as mint can quickly dominate the taste.
Chocolate‑Infused Delight
Swap the white chocolate chips for dark chocolate chips and reduce the powdered sugar by a quarter. The darker chocolate will provide a bittersweet depth, and the lower sugar balances the richness. The result is a dessert that feels like a chocolate‑strawberry truffle.
Almond‑Laced Elegance
Use almond butter in place of some of the butter in the glaze. The almond butter adds a nutty aroma and a subtle sweetness that enhances the overall flavor. This variation also makes the glaze a bit thicker, giving it a more luxurious appearance.
Storing and Bringing It Back to Life
Fridge Storage
Wrap the cooled cake tightly in plastic wrap and store it in an airtight container in the refrigerator for up to 3 days. The glaze will firm up slightly, but the cake remains moist and flavorful. When you’re ready to serve, let it sit at room temperature for 15 minutes to soften the glaze.
Freezer Friendly
For longer storage, wrap the cake in parchment paper, then in a layer of foil, and freeze for up to 2 months. Thaw the cake overnight in the refrigerator, then bring it to room temperature before serving. The glaze may become slightly thicker; a quick brush of warm water can restore its glossy sheen.
Best Reheating Method
If you need to warm the cake, place it on a baking sheet and heat in a preheated 300°F oven for 10 minutes. This gentle heat restores the cake’s warmth without drying it out. For a quick fix, microwave a slice on a paper towel for 10–15 seconds, but be careful not to overheat.
Add a tiny splash of water before reheating—it steams the cake back to perfection, keeping the glaze silky and the interior moist.