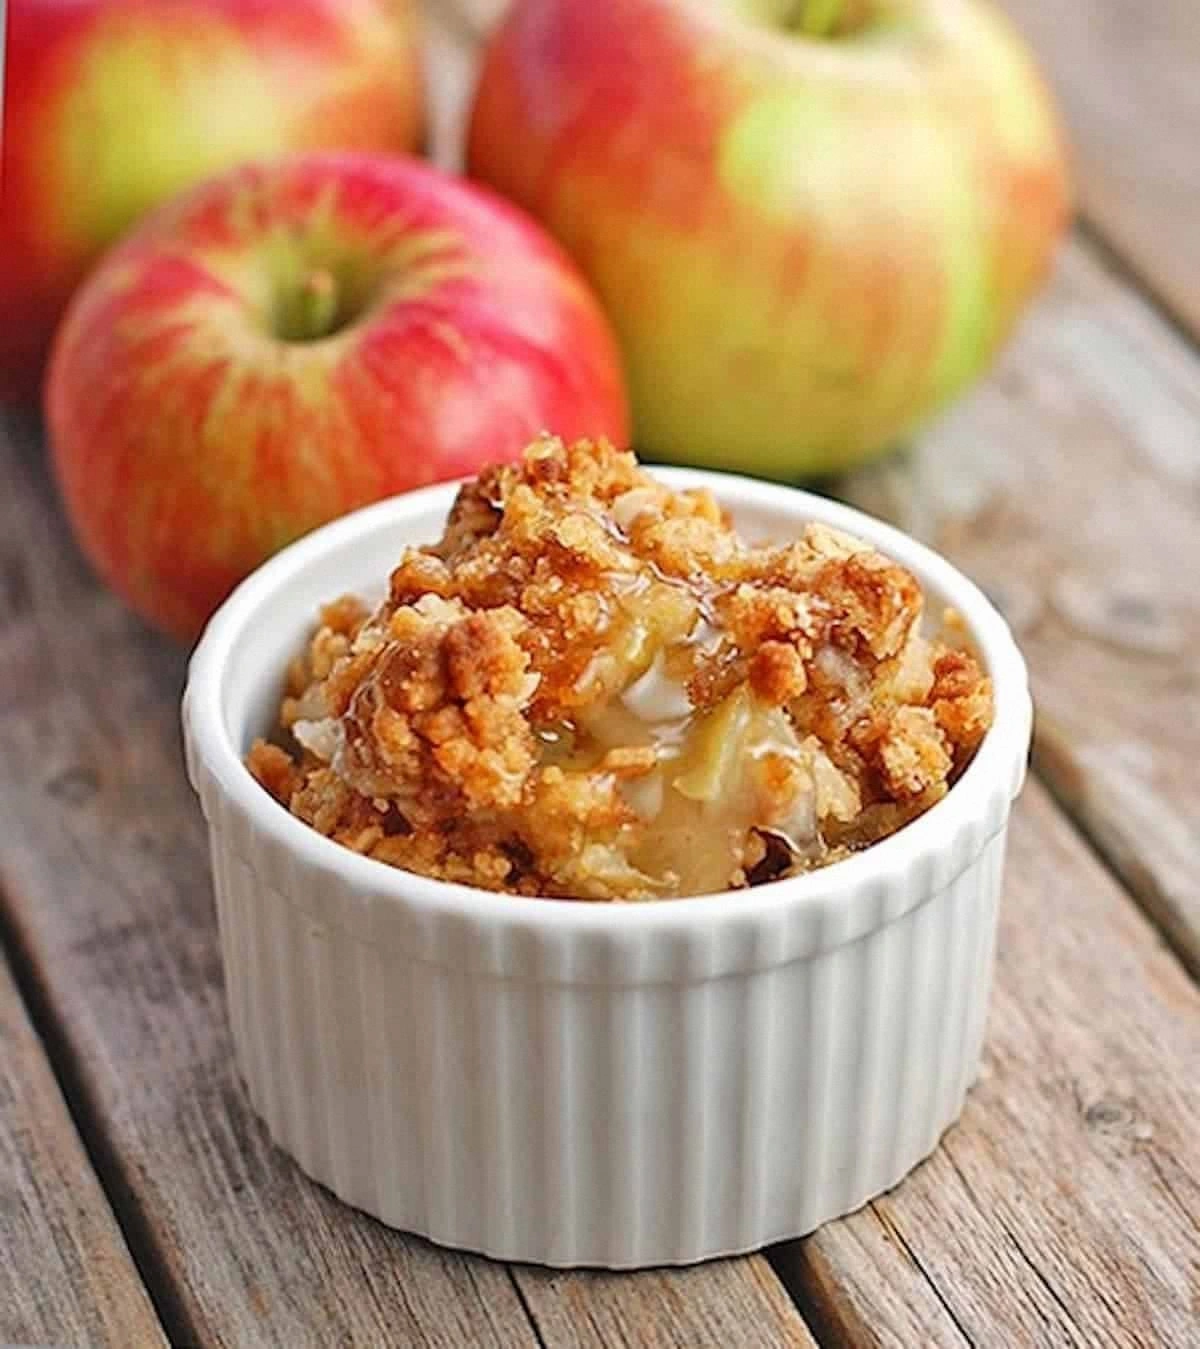
I was standing in my kitchen on a rainy Tuesday, staring at a half‑eaten bag of apples that had been begging for redemption since the last time I tried to make a crumble. The first attempt? A soggy mess that tasted more like apple‑scented mush than anything worth bragging about. I swear I heard the oven sigh in disappointment as the topping refused to crisp, and I thought, “Okay, this is a sign—something has to change.” Then, in a moment of culinary desperation, I grabbed a handful of rolled oats, a slab of cold butter, and a dash of cinnamon, and I promised myself I would not settle for anything less than perfection. The result? A golden‑brown, crackly crown that shatters like thin ice when you dig in, and an apple base that’s tender yet still holds its shape, singing with sweet‑tart harmony.
Picture this: the kitchen fills with the scent of caramelized apples, the buttery crunch of the topping, and a whisper of nutmeg that makes you feel like you’ve just stepped into a cozy autumn market. The first bite is an explosion of textures—soft, juicy apple slices that melt on the tongue, followed by a buttery, crunchy topping that crackles under your fork. I dare you to taste this and not go back for seconds; the contrast is so addictive you’ll wonder how you ever tolerated store‑bought desserts. Most recipes get the crumble ratio wrong, ending up either dry as a desert or soggy as a swamp; this version nails the balance by using a precise butter‑to‑flour ratio and a quick‑bake technique that locks in moisture.
What truly sets this Classic Apple Crisp apart is a secret ingredient that most home cooks overlook: a splash of lemon juice right before baking. That acidity cuts through the sweetness, brightening the flavor profile and preventing the apples from turning mushy. I’ll be honest — I ate half the batch before anyone else got a chance to try it, and the leftover crumbs still smelled like a bakery for days. If you’ve ever struggled with a soggy bottom or a topping that never reaches that coveted golden hue, you’re not alone — and I’ve got the fix. Ready for the game‑changer? Let me walk you through every single step — by the end, you’ll wonder how you ever made it any other way.
What Makes This Version Stand Out
- Texture: The topping is a perfect marriage of buttery crumble and toasted oats that shatters like delicate glass, while the apples stay tender but not mushy.
- Flavor Balance: A hint of lemon juice lifts the sweetness, and a pinch of nutmeg adds depth without overwhelming the fruit.
- Simplicity: Fewer than ten ingredients, all pantry staples, make this a weekend‑ready recipe that doesn’t require a trip to the specialty store.
- Speed: From prep to plate in under an hour, thanks to a quick‑bake method that doesn’t demand hours of simmering.
- Versatility: Works as a comforting dessert, a breakfast topping, or even a sweet snack paired with a scoop of vanilla ice cream.
- Make‑Ahead Potential: Assemble the night before, refrigerate, and bake straight from the fridge for a stress‑free dinner party.
- Crowd Reaction: Guests often claim this is the best apple crisp they’ve ever tasted, and the recipe spreads faster than gossip at a potluck.
- Ingredient Quality: Using crisp, tart apples like Granny Smith or Honeycrisp ensures the fruit holds up under heat, delivering that perfect bite.
Alright, let's break down exactly what goes into this masterpiece...
Inside the Ingredient List
The Flavor Base
The apples are the heart of this dish. I recommend using a mix of Granny Smith for tartness and Fuji for natural sweetness; this combo creates a layered flavor that’s more interesting than a single‑variety approach. If you skip the lemon juice, the apples can become overly sweet and lose that bright, refreshing bite. A quick tip: toss the sliced apples with lemon juice and a pinch of salt right after cutting—they’ll stay vibrant and won’t brown.
The Sweeteners
Granulated sugar and brown sugar work together to give the filling a caramel‑like depth while keeping the topping crunchy. The brown sugar’s molasses adds a subtle earthiness that you won’t get from white sugar alone. If you’re watching sugar, you can reduce each by a tablespoon without sacrificing texture, but don’t go below 1/4 cup total or the apples will dry out.
The Texture Crew
All‑purpose flour, rolled oats, and butter form the crumble. The flour provides structure, the oats add chew, and the butter creates those melt‑in‑your‑mouth pockets. Skipping the oats? You’ll end up with a dense, pastry‑like topping that lacks the signature crunch. For a gluten‑free twist, swap the flour for a 1:1 gluten‑free blend and keep the oats as they are.
The Unexpected Star
A pinch of nutmeg is the secret whisper that elevates the whole dish. It adds warmth without overwhelming the apple’s natural flavor. If you’re allergic to nutmeg, a dash of ground ginger can provide a similar spice kick. When buying nutmeg, look for whole seeds and grate fresh—you’ll notice a brighter, more aromatic profile.
Everything's prepped? Good. Let's get into the real action...
The Method — Step by Step
Preheat your oven to 350°F (175°C). While the oven warms, line a 9‑inch square baking dish with parchment for easy cleanup. This temperature is the sweet spot that lets the apples soften without turning mushy while the topping browns evenly.
In a large bowl, combine the sliced apples, lemon juice, granulated sugar, brown sugar, cinnamon, nutmeg, and a pinch of salt. Toss gently until every slice is evenly coated; you’ll hear a faint rustle that signals the sugar is starting to dissolve. Let the mixture sit for five minutes—this short maceration draws out the juices, creating a natural syrup.
Transfer the apple mixture to the prepared baking dish, spreading it into an even layer. The apples should fill the dish but not overflow; if they do, you can trim a few slices. The bottom will become a glossy, caramel‑kissed pool as it bakes.
Now for the crumble: In a separate bowl, whisk together flour, rolled oats, a quarter teaspoon of salt, and the remaining cinnamon. Add the cold, cubed butter and, using your fingertips, rub it into the dry ingredients until the mixture resembles coarse crumbs. This is the moment of truth—if you see small butter pea‑sized bits, you’re on the right track.
Kitchen Hack: If the butter refuses to blend, pulse the mixture briefly in a food processor for 5 seconds; don’t over‑process.Evenly sprinkle the crumble over the apple layer, ensuring you reach the edges of the dish. The topping should cover the fruit completely but still allow a glimpse of the bubbling sauce beneath. This coverage is crucial for that signature crackly top that shatters when you dig in.
Place the dish in the oven and bake for 35‑40 minutes. Around the 20‑minute mark, rotate the pan to promote even browning. You’ll know it’s done when the edges pull away from the sides and the top is a deep golden‑brown, smelling like a caramel‑laden forest after a rainstorm.
Watch out for the crust—if it starts to darken too quickly, loosely cover the dish with foil to prevent burning while the interior finishes cooking. This trick saves the crumble from turning bitter and keeps the flavor balanced.
Watch Out: Over‑baking can dry out the apples; keep an eye on the timer and test with a fork.When the timer dings, remove the crisp and let it rest for 10 minutes. This short rest lets the juices settle, preventing a soggy bottom when you serve. The scent at this point will be intoxicating—think of a warm orchard with a hint of toasted sugar.
Serve warm, optionally topped with a scoop of vanilla ice cream or a dollop of lightly sweetened whipped cream. The contrast of cold cream against the hot, buttery crumble is pure magic. And there you have it—an apple crisp that’s both nostalgic and elevated.
That's it — you did it. But hold on, I've got a few more tricks that'll take this to another level...
Insider Tricks for Flawless Results
The Temperature Rule Nobody Follows
Never bake a crisp straight from a cold fridge at a high temperature; the sudden heat shock can cause the butter to melt too quickly, resulting in a soggy base. Instead, let the assembled dish sit at room temperature for 15 minutes before sliding it into the oven. This gentle transition allows the butter to melt evenly, creating that coveted flaky texture. I once tried skipping this step and ended up with a gummy bottom—lesson learned.
Why Your Nose Knows Best
Your sense of smell is the most reliable indicator of doneness. Around the 30‑minute mark, pause and inhale deeply; if you detect a toasted, caramel aroma with a hint of butter, the crisp is ready. If the scent is still raw or overly sugary, give it another five minutes. Trusting your nose beats watching the clock every single time.
The 5‑Minute Rest That Changes Everything
Allowing the crisp to rest for exactly five minutes after baking lets the juices thicken slightly, preventing a runny sauce on the plate. This short pause also makes the crumble easier to cut, giving you clean slices instead of a mushy mess. I’ve seen friends rush to serve immediately and end up with a puddle of apple syrup—don’t be that person.
Butter Distribution Mastery
When incorporating butter into the crumble, aim for pea‑sized pieces rather than fully melted butter. Those tiny pockets of cold butter melt during baking, creating steam that lifts the flour and oats, resulting in a light, airy topping. If you end up with a paste, your crumble will be dense and heavy.
Layering for Extra Crunch
For an added crunch, sprinkle a thin layer of sliced almonds or chopped pecans on top of the crumble before baking. The nuts toast alongside the butter, adding a nutty depth that complements the apples beautifully. Just remember to keep the nut layer thin; too many nuts can overpower the delicate apple flavor.
Creative Twists and Variations
This recipe is a playground. Here are some of my favorite ways to switch things up:
Berry Burst
Swap half the apples for mixed berries—blueberries, raspberries, and blackberries add a tangy pop and a burst of color. The berries release extra juice, so reduce the added sugar by a tablespoon to keep the sweetness balanced.
Caramel Swirl
Drizzle a generous spoonful of homemade caramel sauce over the apple layer before adding the crumble. The caramel deepens the flavor, creating a rich, indulgent version perfect for special occasions.
Spiced Chai
Add a pinch of ground cardamom, ginger, and clove to the apple mixture for a chai‑inspired twist. This aromatic combo transforms the crisp into a cozy, winter‑ready dessert that pairs beautifully with a cup of hot tea.
Gluten‑Free Glory
Replace the all‑purpose flour with a 1:1 gluten‑free blend and use certified gluten‑free oats. The texture remains delightfully crunchy, and the flavor stays true to the original.
Savory Surprise
Introduce a savory element by adding a handful of crumbled blue cheese into the crumble and a splash of balsamic reduction over the apples before baking. The sweet‑savory contrast is bold and unexpected—perfect for adventurous palates.
Storing and Bringing It Back to Life
Fridge Storage
Cool the crisp completely, then cover tightly with foil or transfer to an airtight container. It will keep in the refrigerator for up to three days. When ready to serve, reheat in a 300°F (150°C) oven for 15 minutes; the topping will regain its crunch.
Freezer Friendly
Portion the uncooked crisp into freezer‑safe containers, covering the top with parchment before sealing. Freeze for up to two months. When you’re ready, bake straight from frozen, adding an extra 10‑15 minutes to the cooking time; the result is indistinguishable from fresh.
Best Reheating Method
To revive leftover crisp, place it on a baking sheet, sprinkle a tiny splash of water around the edges, and bake at 350°F (175°C) for 8‑10 minutes. The steam generated by the water restores moisture to the apples while the topping crisps up again, delivering that just‑baked experience.