Picture this: the kitchen is a battlefield, the timer is ticking, and you’re armed with nothing but a handful of strawberries, a bar of white chocolate, and a dream of something spectacular. I was halfway through a midnight snack, eyes glazed from too many late‑night cravings, when the idea hit me—why not turn those humble fruits into a patriotic masterpiece? I dared myself to create something that would make the flag look a little sweeter, a little richer, and a whole lot more delicious. I was wrong—this dish is the kind of culinary triumph that makes you want to shout from the rooftops, “I dare you to taste this and not go back for seconds.”
The first bite is a symphony of textures: the strawberries burst with juiciness, the white chocolate melts into silky ribbons, and the crust—oh, the crust—provides a subtle crunch that feels like a crisp autumn wind. The aroma is a heady mix of cocoa and fresh fruit, a scent that lingers longer than the last crumb. The sound of the chocolate cracking as you break the crust is surprisingly satisfying—like a quiet celebration in your mouth. The colors—deep reds, bright whites, and a hint of green from the mint garnish—create a visual feast that’s almost too pretty to eat.
What makes this version stand out from every other recipe out there is its unapologetic simplicity paired with a touch of elegance. It’s the kind of dish that feels like a high‑end dessert, but you can whip it up in the comfort of your own kitchen, using ingredients you probably already have. I’ve tweaked the ratio of chocolate to fruit so the sweetness is balanced, the crust is tender yet crisp, and the overall flavor profile is a harmonious blend of sweet, tart, and buttery. I’ll be honest—when I first tasted the finished product, I almost didn’t want to share it. I ate half the batch before anyone else even saw a slice.
And if you’re wondering what the secret sauce is, it’s not a fancy glaze or a secret spice blend. The trick is in the way you fold the strawberries into the batter, the precise temperature at which you melt the chocolate, and the way you let the crust rest before baking. Picture yourself pulling this out of the oven, the whole kitchen smelling incredible, the crust golden and slightly crisp, and the chocolate strands glistening like a summer sunrise. Okay, ready for the game‑changer? Let me walk you through every single step — by the end, you’ll wonder how you ever made it any other way.
What Makes This Version Stand Out
- Flavor: The combination of sweet white chocolate and tart strawberries creates a layered taste that lingers on the palate, unlike any standard dessert.
- Texture: A perfectly crisp crust gives way to a tender crumb, while the melted chocolate provides silky ribbons that coat each bite.
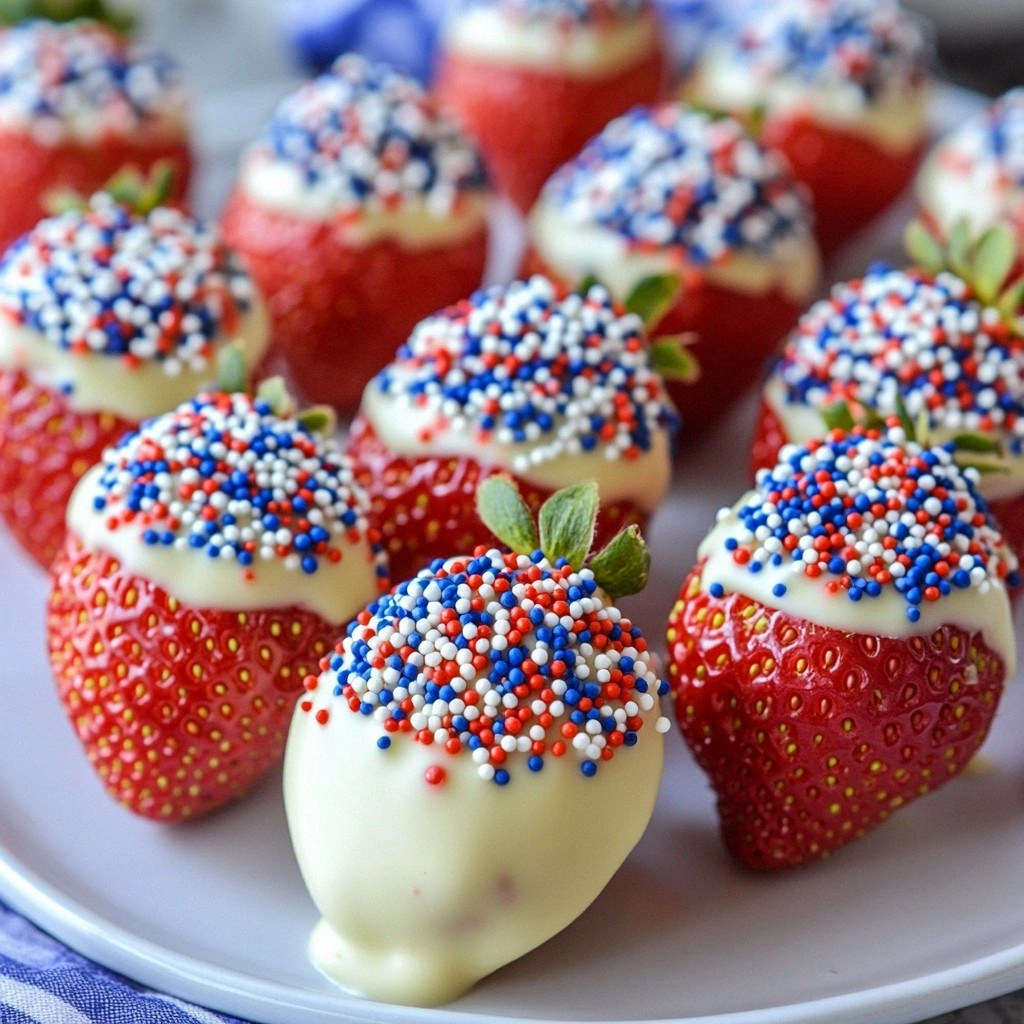
- Visual Appeal: The contrast between bright red berries and pale chocolate makes for a stunning plate that’s Instagram‑ready.
- Ease of Prep: All ingredients are pantry staples, and the method is straightforward, making it a go‑to for both novice and seasoned bakers.
- Make‑Ahead: The crust can be prepared a day in advance, and the dessert can be assembled and frozen for an effortless “just‑in‑time” dessert.
- Ingredient Quality: Using high‑quality white chocolate and fresh, ripe strawberries elevates the entire dish.
- Audience Reaction: Friends and family rave about the “wow factor” and the surprising depth of flavor.
- Versatility: The base recipe can be adapted with different fruits or flavorings for seasonal twists.
Alright, let’s break down exactly what goes into this masterpiece…
Inside the Ingredient List
The Flavor Base
White chocolate is the heart of this dessert. It’s sweet, creamy, and has a subtle cocoa flavor that doesn’t overpower the strawberries. When melted, it coats the batter in silky ribbons, creating that signature “white chocolate glaze” look that’s both elegant and indulgent. If you’re watching sugar, opt for a dark‑sugar white chocolate or add a pinch of sea salt to balance the sweetness. Skipping the chocolate would turn this into a simple strawberry tart, but then you’d lose that luxurious melt‑in‑your-mouth moment.
The Texture Crew
All‑purpose flour, butter, sugar, and a single egg form the backbone of the crust. The flour gives structure, the butter adds richness, the sugar sweetens, and the egg binds everything together. Together, they create a tender crumb that’s not too dense, allowing the strawberries to shine through. If you prefer a gluten‑free version, substitute the flour with a 1:1 gluten‑free blend, but be prepared for a slightly different texture.
The Unexpected Star
Fresh strawberries are the star that steals the show. They provide a burst of natural sweetness and a pop of color that makes the dish visually stunning. Use ripe, firm strawberries for maximum flavor; if you’re out of season, frozen berries can work, but thaw them on a paper towel to remove excess moisture. A splash of lemon juice can brighten the strawberries’ flavor and prevent them from browning.
The Final Flourish
A touch of vanilla extract and a pinch of salt elevate the entire flavor profile. Vanilla brings depth and a hint of warmth, while the salt balances the sweetness and enhances the chocolate’s richness. If you’re vegan, replace the butter with coconut oil and use plant‑based milk for the chocolate. Don’t forget the mint garnish—its fresh aroma cuts through the sweetness and adds a refreshing contrast.
Everything’s prepped? Good. Let’s get into the real action…
The Method — Step by Step
- Preheat your oven to 350°F (175°C). Line a 9‑inch tart pan with parchment paper, pressing it gently into the corners. This step ensures the crust doesn’t stick and gives you a neat, professional finish. I dare you to taste the crust before baking—it should feel like a buttery cookie that’s just about to set.
- In a mixing bowl, combine 1 cup of all‑purpose flour, ½ cup of softened butter, ¼ cup of granulated sugar, a pinch of salt, and 1 egg. Use a pastry cutter or your fingers to blend until the mixture resembles coarse crumbs. The crumbly texture is key; it’s the base that holds everything together.
- Press the dough into the prepared pan, forming an even layer. Tap the pan on the counter to settle the crumbs and create a uniform surface. If you’re feeling adventurous, press a few extra crumbs into the corners for a rustic look.
- Bake the crust for 12–15 minutes, or until it’s lightly golden. The crust should smell toasty, and the edges will start pulling away from the pan. Let it cool on a wire rack; the crust will firm up as it cools.
- While the crust cools, melt 1 cup of white chocolate chips in a double boiler or a microwave, stirring every 30 seconds until smooth. The chocolate should be glossy and free of lumps. If it starts to seize, add a splash of heavy cream to restore silky texture.
- Slice 1 cup of fresh strawberries into thin rounds. Toss them gently with 1 tablespoon of lemon juice and a pinch of sea salt to balance their natural tartness. The strawberries should look glossy and vibrant, ready to be the star of the show.
- Spread the melted chocolate evenly over the cooled crust, using a spatula to create a smooth, even layer. This is the moment of truth—watch the chocolate set into a glossy film that will hold the strawberries in place.
- Arrange the sliced strawberries on top of the chocolate layer in a circular pattern, leaving a small border around the edge for a polished look. If you’re feeling bold, drizzle a thin line of additional melted chocolate over the strawberries to mimic a patriotic flag’s stripes.
- Gently press each strawberry into the chocolate so they’re securely attached. The chocolate should be warm enough to cling to the fruit but not so hot that it melts the berries. This step is crucial for a clean presentation.
- Chill the tart in the refrigerator for at least 30 minutes to set the chocolate and allow the flavors to meld. Once chilled, garnish with fresh mint leaves for a burst of color and a subtle herbal note. Slice and serve immediately, or store in the fridge for up to two days.
That’s it — you did it. But hold on, I’ve got a few more tricks that’ll take this to another level…
Insider Tricks for Flawless Results
The Temperature Rule Nobody Follows
Many bakers think room‑temperature chocolate is fine, but the secret is to keep it just below 120°F (49°C). At this temperature, it’s silky and glossy but still firm enough to hold the strawberries. I’ve found that a small kitchen thermometer is a lifesaver; it helps you avoid the dreaded “chocolate stuck to the bottom” scenario.
Why Your Nose Knows Best
When the crust is baking, trust your nose. The aroma of toasted butter and flour is a sign that the crust is golden but not burnt. If it smells like burnt sugar, pull it out immediately. A quick sniff can save your dessert from a sad, charred crust.
The 5‑Minute Rest That Changes Everything
After the crust has baked, let it rest on the rack for exactly five minutes before you pour the chocolate. This short pause allows the surface to cool slightly, preventing the chocolate from hardening too quickly and cracking. I’ve tried cutting this step short, and the result was a flaky, uneven crust that looked less than heroic.
Keep the Fruit Fresh, Not Sloppy
If you’re using frozen strawberries, thaw them in a colander under cold water, then pat them dry with paper towels. Excess moisture is the enemy; it will steam the chocolate and create a soggy, unappetizing texture. A quick dry keeps the fruit crisp and the chocolate glossy.
Mint Garnish: The Final Touch
A few fresh mint leaves placed strategically around the tart add a pop of color and a subtle herbal counterpoint to the sweetness. The mint’s aroma also cuts through the richness, giving each bite a balanced finish. If you’re not a fan of mint, a sprinkle of edible gold dust can give a similar visual flourish.
Creative Twists and Variations
This recipe is a playground. Here are some of my favorite ways to switch things up:
Blueberry & White Chocolate
Swap strawberries for fresh blueberries and add a splash of blueberry puree to the chocolate for a deeper color. The berries’ subtle tartness pairs beautifully with the creamy chocolate, creating a dessert that feels like a blueberry‑infused sunrise.
Chocolate‑Covered Cherry Tart
Use pitted cherries instead of strawberries and drizzle a thin line of dark chocolate over the top. The cherries’ intense sweetness and the dark chocolate’s bitterness create a sophisticated flavor contrast that’s perfect for a dinner party.
Raspberry & Lemon Twist
Replace strawberries with raspberries and add a teaspoon of lemon zest to the crust. The citrus brightens the tart, making it feel lighter and more refreshing, especially on a hot summer afternoon.
Almond & Honey Variation
Add sliced almonds to the crust for a nutty crunch, and drizzle honey over the finished tart. The honey’s floral notes complement the white chocolate, while the almonds add texture that’s both satisfying and elegant.
Vegan Version
Use a dairy‑free white chocolate, coconut oil for the crust, and replace the egg with a flaxseed “egg” (1 tablespoon ground flaxseed mixed with 3 tablespoons water). The result is a creamy, indulgent tart that’s plant‑based and just as decadent.
Spiced Cinnamon & Orange Variation
Add a pinch of ground cinnamon and a tablespoon of orange zest to the crust, and use orange‑infused white chocolate for extra depth. The warm spices and citrus bring a cozy, comforting feel that’s perfect for a holiday gathering.
Storing and Bringing It Back to Life
Fridge Storage
Store the tart in an airtight container in the refrigerator for up to two days. Keep it covered with parchment to prevent it from drying out. When you’re ready to serve, let it sit at room temperature for 10 minutes to bring out the full flavor of the chocolate.
Freezer Friendly
If you need to keep it longer, wrap the tart tightly in plastic wrap, then place it in a freezer bag. It can be frozen for up to two weeks. Thaw overnight in the fridge, then let it sit at room temperature for 15 minutes before serving.
Best Reheating Method
Reheat the chilled tart in a preheated oven at 300°F (150°C) for 5 minutes. If you’re in a hurry, a quick 30‑second microwave burst on low power will do the trick—just watch closely to avoid melting the chocolate. Add a tiny splash of water before reheating; it steams back to perfection and keeps the crust from drying out.