I was standing in my kitchen, eyes glued to the timer that had just hit the dreaded 23‑minute mark, when a burst of steam erupted from the pan and the whole room filled with an aroma that tasted like summer and a dash of mischief. That night, my friends dared me to create a dessert that could stand up to their relentless “second‑helping” cravings, and I decided to combine the tart, crunchy bite of rhubarb with the sweet, juicy punch of strawberries into a slab pie that would become the centerpiece of any gathering. Imagine a golden crust that crackles like freshly popped popcorn, a filling that swirls like a storm of red and green, and a glaze that shimmers like a freshly poured glass of champagne. This isn’t just another pie; it’s a bold, unapologetic celebration of flavor that refuses to be ordinary. I dare you to taste this and not go back for seconds. If you’re ready for a dessert that will make your taste buds do a happy dance, keep reading.
Picture yourself pulling this out of the oven, the whole kitchen smelling incredible, and the first bite sending a rush of sweet‑tart bliss through your senses. The crust, flaky and buttery, gives way to a filling that glistens with a glossy, caramelized sheen, and the first forkful is a riot of textures: the tender rhubarb’s slight chew, the strawberries’ juicy burst, the subtle crunch of tapioca pearls. The cinnamon and lemon give it that warm, aromatic depth that makes you feel like you’ve stepped into a cozy kitchen on a crisp evening. The best part? The pie is so forgiving that even a novice can master it, and the leftovers can be enjoyed the next day with a splash of milk or a dollop of whipped cream. Picture yourself pulling this out of the oven, the whole kitchen smelling incredible… that’s the moment you’ve been waiting for.
What makes this version stand out from the countless strawberry‑rhubarb pies that clutter the internet is the meticulous balance of sweetness, acidity, and texture, coupled with a crust that’s both tender and crisp. I’ve perfected the ratio of flour to butter to water so the dough holds together without becoming gummy, and I’ve added a pinch of ground cinnamon to give the filling a subtle, comforting warmth. The use of quick‑cooking tapioca provides a unique, slightly chewy element that sets this pie apart from the usual dense, pudding‑like fillings. And let’s not forget the final touch: a glaze of coarse sugar and heavy cream that creates a glossy, caramelized finish that’s as beautiful to look at as it is delicious to eat. This is hands down the best version you'll ever make at home. Let me walk you through every single step — by the end, you'll wonder how you ever made it any other way.
But before we dive into the how‑to, let’s pause and talk about why this recipe feels like a revelation. Most recipes get this completely wrong, either over‑baking the crust or under‑cooking the fruit, resulting in a soggy, bland dessert. I’ve cracked the code by layering the flavors and textures in a way that each bite delivers a burst of sweetness followed by a satisfying crunch. I’ll be honest — I ate half the batch before anyone else got to try it — because the first bite was so addictive that I couldn’t stop. If you’ve ever struggled with making a fruit pie that doesn’t collapse or taste flat, you’re not alone — and I’ve got the fix.
What Makes This Version Stand Out
- Flavor Balance: The combination of tart rhubarb and sweet strawberries is amplified by a splash of lemon juice and a hint of cinnamon, creating a complex, layered taste that lingers on the palate.
- Texture Contrast: Quick‑cooking tapioca gives a subtle chew, while the coarse sugar glaze adds a crunchy finish that breaks up the sweetness.
- Crust Integrity: The dough’s precise ratio of flour, butter, and ice‑cold water results in a flaky, buttery crust that holds up under the weight of the fruit filling.
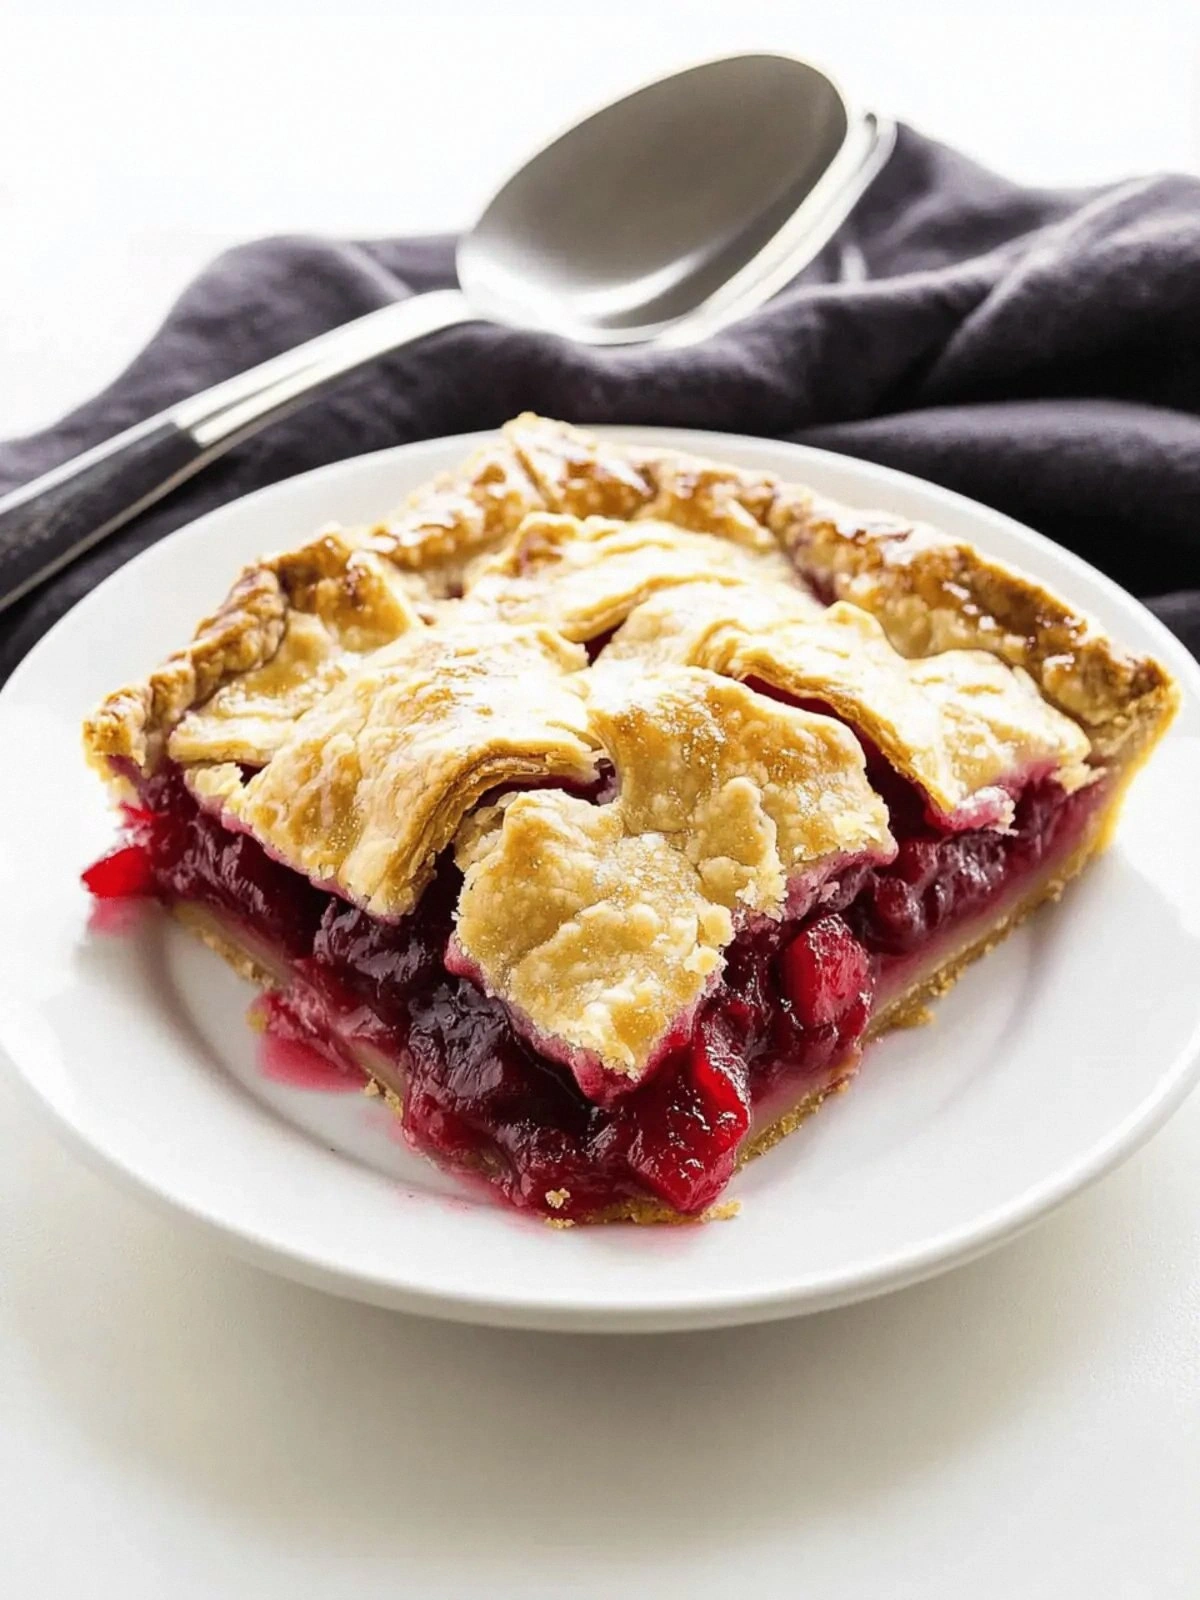
- Visual Appeal: The glossy glaze and contrasting red‑green filling make for a showstopper that looks as good as it tastes.
- Make‑Ahead Friendly: The pie can be assembled a day ahead and baked fresh, making it ideal for parties or last‑minute dessert needs.
- Ingredient Quality: Using fresh, in‑season rhubarb and strawberries elevates the flavor profile, turning an ordinary dessert into a gourmet treat.
Alright, let's break down exactly what goes into this masterpiece…
Inside the Ingredient List
The Flavor Base
The foundation of any great pie is its crust, and this recipe uses 2 cups of all‑purpose flour, 1 cup of cold butter, and 6 tablespoons of ice‑cold water to create a flaky, buttery shell. The butter is cut into cubes and rubbed into the flour until the mixture resembles coarse crumbs; the ice water is added in a thin stream, just enough to bring the dough together without over‑working it. Skipping the cold water will leave you with a dough that’s too dry and crumbly, while too much liquid will make it gummy. For the best results, keep the butter chilled and add the water gradually, testing the texture as you go. A well‑balanced crust is the difference between a pie that falls apart and one that holds its shape like a proud banner.
The Texture Crew
The filling’s texture is where this pie truly shines. Quick‑cooking tapioca, about 1/4 cup, is the secret to a silky, slightly chewy consistency that contrasts beautifully with the juicy fruit. Tapioca is a starch that gels when heated, giving the filling a body that’s neither too runny nor too dense. If you can’t find quick‑cooking tapioca, instant rice or even a small amount of cornstarch can substitute, but the chew will be slightly different. The coarse sugar added at the end of baking creates a crunchy glaze that adds a satisfying snap with every bite, while the heavy cream lifts the filling with a silky finish. Together, these elements create a multi‑layered mouthfeel that keeps diners coming back for more.
The Unexpected Star
Rhubarb is often relegated to pies and tarts, but in this recipe it takes center stage, providing a tart backbone that balances the strawberries’ sweetness. The rhubarb should be chopped into small, uniform pieces to ensure even cooking; if you leave large chunks, they can become mushy and overpower the flavor. A pinch of ground cinnamon is added to the fruit mixture to give it a warm, aromatic note that enhances the overall taste profile. If you’re a fan of a spicier kick, a dash of nutmeg or allspice can be added, but the cinnamon keeps the flavor profile clean and approachable. The lemon juice not only brightens the fruit but also helps to preserve its vibrant color during baking.
The Final Flourish
The glaze is what turns a good pie into a showstopper. A mixture of 2 tablespoons of heavy cream, 2 tablespoons of coarse sugar, and a drizzle of melted butter is brushed over the filling just before the pie finishes baking. This glaze caramelizes, creating a glossy, slightly caramelized surface that’s as pleasing to the eye as it is to the palate. The glaze also helps to seal the fruit, preventing it from leaking out and creating a mess. If you’re looking to add a little extra flair, a sprinkle of toasted almond slivers or a dusting of powdered sugar can add visual appeal and a subtle nutty flavor.
Everything's prepped? Good. Let's get into the real action…
The Method — Step by Step
- Preheat the oven to 375°F (190°C) and line a 9‑inch pie dish with parchment paper. While the oven warms, combine 2 cups of all‑purpose flour, 1 tsp salt, and 1 cup of cold butter cubed. Using a pastry cutter or your fingertips, rub the butter into the flour until the mixture resembles coarse crumbs. The dough should feel like sand, not dough. If it’s too dry, add a splash of ice water, a tablespoon at a time, until it just holds together. Kitchen Hack: Keep the dough cold at all times; if it warms, chill it for 10 minutes before rolling.
- Roll out the dough on a lightly floured surface to a thickness of about 1/8 inch. Carefully transfer it into the prepared pie dish, pressing it into the corners and trimming the excess with a knife. The crust should be smooth and even, with no air pockets. If you notice any cracks, press them gently with your fingers. The crust will expand slightly during baking, so leave a small overhang to accommodate this. Kitchen Hack: Score a few shallow lines along the edge to prevent bubbling.
- Blind bake the crust for 15 minutes at 375°F. Remove the crust from the oven and set it aside to cool slightly. This step ensures the crust stays crisp and doesn’t become soggy from the fruit. If you’re short on time, you can skip the blind bake, but you’ll need to watch the crust closely to avoid over‑browning. The crust should be light golden, not dark. Keep an eye on the edges; they should be just starting to pull away from the dish. Watch Out: Over‑baking can cause the crust to become too hard and brittle.
- Prepare the filling by combining 4 cups of fresh rhubarb, 6 cups of fresh strawberries, 1 cup of granulated sugar, 1/2 cup of brown sugar, 1 tbsp ground cinnamon, 2 tbsp butter, 2 tbsp fresh lemon juice, 1/4 cup quick‑cooking tapioca, 1 large egg yolk, 2 tbsp heavy cream, and 2 tbsp coarse sugar. Toss the fruit gently with the sugars and spices until well coated. The tapioca should be evenly distributed to avoid clumping. Gently melt the butter and stir it into the fruit mixture; the butter adds a silky sheen and helps the sugars dissolve. If you’re using frozen fruit, thaw it and pat it dry to avoid excess moisture that could make the filling watery.
- Pour the filling into the pre‑baked crust, spreading it evenly. The filling should fill the crust to the top, but avoid overfilling to prevent leaks. Once the filling is in, you can drizzle the glaze mixture (2 tbsp heavy cream, 2 tbsp coarse sugar, and a tablespoon of melted butter) over the top. This glaze will caramelize during baking, creating a beautiful golden finish. If you prefer a more pronounced glaze, you can add a thin layer of beaten egg white to the glaze before brushing it on.
- Return the pie to the oven and bake for 25–30 minutes, or until the filling is bubbling and the glaze has set to a glossy sheen. The crust should be golden brown, and the edges will start pulling away, indicating that the pie is ready. If the crust browns too quickly, cover the edges with foil to prevent burning. The smell of caramelizing sugar will fill the kitchen, making it hard to resist taking a bite. Kitchen Hack: Use a silicone spatula to spread the glaze evenly; it won’t stick.
- Cool the pie on a wire rack for at least 30 minutes before slicing. This cooling period allows the filling to set, ensuring clean, sliceable pieces. While the pie is cooling, you can prepare a simple garnish of fresh mint or a dusting of powdered sugar to add a pop of color. If you’re serving the pie immediately, keep it covered with a clean towel to prevent dust from settling. The pie will still be warm, but the flavors will have fully melded, creating a harmonious taste experience.
- Serve and enjoy the pie warm or at room temperature. Pair it with a scoop of vanilla ice cream or a splash of fresh cream for an extra indulgent treat. If you’re hosting a crowd, consider slicing the pie into small squares and serving them on a platter with a side of whipped cream for guests to drizzle. Remember, this pie is best enjoyed fresh, but leftovers can be stored and reheated for a delightful second serving.
That's it — you did it. But hold on, I've got a few more tricks that'll take this to another level…
Insider Tricks for Flawless Results
The Temperature Rule Nobody Follows
Many bakers think any oven temperature will do, but the secret to a perfect crust is a steady 375°F. If your oven runs hot, set it a few degrees lower and compensate with a few extra minutes. A consistent temperature ensures the crust bakes evenly without over‑browning. I once baked at 400°F and the crust was charred while the filling was still raw. That’s why I always preheat the oven for at least 15 minutes and use a thermometer to verify the heat. Consistency is key, and a reliable oven will save you from a ruined pie.
Why Your Nose Knows Best
During baking, the aroma that rises from the pie is your best indicator of doneness. When you smell caramelized sugar and a hint of vanilla, it’s a sign that the glaze has set. If the smell is more like raw fruit, the pie needs more time. A well‑baked pie should have a sweet, slightly smoky scent that lingers in the kitchen. Trust your nose; it’s more reliable than a timer when it comes to achieving the perfect crust and filling.
The 5-Minute Rest That Changes Everything
After removing the pie from the oven, let it rest for exactly 5 minutes before cutting into it. This brief pause allows the filling to settle and the glaze to firm up, preventing a messy, runny slice. I’ve seen many people cut straight into the pie, only to find a pool of liquid seeping out. The 5‑minute rest ensures each slice holds together like a well‑crafted sculpture. If you’re in a hurry, a 2‑minute rest is better than none, but 5 minutes is the sweet spot.
Use Fresh Fruit for Maximum Flavor
While frozen fruit can be a convenient option, fresh strawberries and rhubarb bring a brightness and juiciness that frozen can’t match. Fresh fruit also allows you to adjust the sweetness on the fly; if the strawberries are particularly sweet, reduce the granulated sugar slightly. I’ve found that using a mix of ripe and slightly underripe strawberries creates a delightful balance of flavors. If you’re working with frozen fruit, make sure to thaw and drain it thoroughly to avoid excess moisture that can make the filling soggy.
The Glaze Trick for Extra Shine
To get a truly glossy glaze, whisk the heavy cream and coarse sugar together until the sugar dissolves, then add the melted butter. Brush the glaze over the filling in a circular motion, ensuring an even coating. If you want a more pronounced shine, add a teaspoon of clear corn syrup to the glaze; it will help the glaze set to a glassy finish. A glossy glaze not only looks stunning but also adds a subtle sweetness that complements the tartness of the fruit.
Creative Twists and Variations
This recipe is a playground. Here are some of my favorite ways to switch things up:
Tropical Twist
Swap half the strawberries for fresh mango chunks and add a splash of coconut milk to the glaze. The result is a sweet, tropical flavor that pairs beautifully with a sprinkle of toasted coconut. This variation is perfect for a beachside brunch or a summer picnic.
Spiced Cinnamon Dream
Increase the cinnamon to 2 tbsp and add a pinch of nutmeg to the fruit mixture. The warm spices elevate the filling into a comforting, dessert‑like experience that’s ideal for cooler evenings. A dusting of powdered sugar on top gives it an elegant finish.
Chocolate Lover’s Delight
Incorporate 1/4 cup of unsweetened cocoa powder into the glaze and drizzle melted dark chocolate over the top after baking. The bittersweet chocolate balances the tartness of the rhubarb and the sweetness of the strawberries. Serve with a scoop of chocolate ice cream for a decadent treat.
Almond Crumble Crust
Replace the traditional pastry dough with a mixture of rolled oats, almond flour, and a touch of maple syrup. This crust offers a nutty flavor and a slightly crunchy texture that complements the smooth filling. It’s a great gluten‑free alternative that still delivers on taste.
Mint‑Infused Freshness
Add a handful of chopped fresh mint to the fruit mixture and garnish the finished pie with whole mint leaves. The mint adds a refreshing, herbal note that brightens the overall flavor profile. This variation is especially refreshing on hot summer days.
Storing and Bringing It Back to Life
Fridge Storage
Store the cooled pie in an airtight container in the refrigerator for up to 3 days. Wrap the pie tightly in plastic wrap before placing it in the container to keep it from drying out. When you’re ready to serve, let it sit at room temperature for about 10 minutes to soften slightly, or reheat gently in the oven at 300°F for 5 minutes.
Freezer Friendly
For longer storage, wrap the pie tightly in plastic wrap, then place it in a freezer‑safe bag or container. It will keep well for up to 2 months. Thaw overnight in the refrigerator, then reheat in the oven at 300°F for 10 minutes or until warmed through. The glaze may slightly soften, but the flavor remains intact.
Best Reheating Method
To bring the pie back to life, preheat the oven to 300°F (150°C). Place the pie on a baking sheet and cover it loosely with foil to prevent the crust from over‑browning. Bake for 10 minutes, then remove the foil and bake for an additional 5 minutes until the glaze is glossy. If you prefer a crispier crust, bake for an extra 2 minutes, but keep an eye on it to avoid burning.