Picture this: I’m standing in a kitchen that smells like burnt popcorn, the clock ticking, and my friend’s voice on the phone asking, “You’re still on that recipe?” I stared at a half‑cooked chicken on the stove, the skin browned but the inside still looking pale. I had to admit, it was a disaster, but it sparked a craving that wouldn’t let go. I promised myself I’d find the ultimate way to bake chicken that’s effortless, flavorful, and never a flop.
The moment I opened the oven, the air filled with a golden promise. The chicken, coated in a fragrant blend of herbs and spices, released a scent that made my mouth water even before the timer chimed. The sizzling sound as the first few minutes ticked by felt like a drumbeat, each pop a reminder that something delicious was happening. The texture was already teasing my senses—skin crisping, juices glinting, the promise of melt‑in‑your‑mouth tenderness. I could already taste the savory, smoky undertone that would dance on my tongue.
What makes this version stand out is that it turns a simple oven bake into a culinary triumph with minimal effort. I’ve stripped the recipe down to the essentials, removed the guesswork, and added a few secret touches that elevate the flavor profile. No more over‑seasoning, no more uneven cooking—just a single pan, a handful of ingredients, and a recipe that delivers consistent results every time. It’s the kind of dish that turns a weekday dinner into a celebration.
I’ll drop a hint now: there’s a single ingredient that, when added at the end, gives the chicken a silky finish that feels like a velvet ribbon of flavor. It’s something you probably haven’t tried before, and it’s the secret to the “hands down the best version” claim. Stay with me, because by the end of this post, you’ll wonder how you ever made chicken any other way.
What Makes This Version Stand Out
- Flavor: The combination of smoked paprika, garlic powder, and fresh herbs creates a depth that lingers on the palate. Each bite is a burst of savory, slightly sweet, and aromatic notes that make the dish memorable.
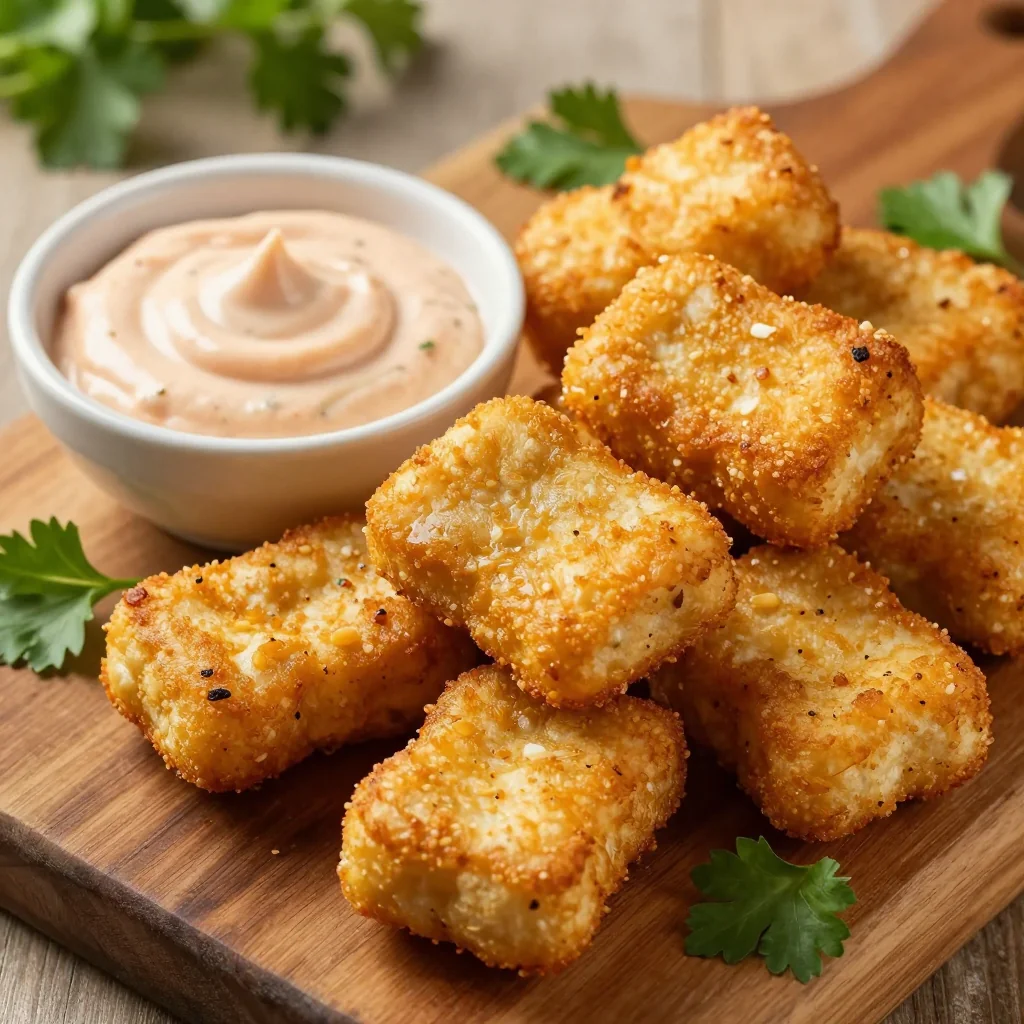
- Texture: The panko and Parmesan crust crisps to a golden edge, while the inside stays juicy and tender. The contrast feels like a delightful dance of crunch and melt.
- Convenience: The entire process takes less than an hour, with no special equipment or prep tricks. One pan, one rack, and a few minutes of attention.
- Versatility: It pairs beautifully with rice, quinoa, or a simple salad, and it can be tweaked to suit any dietary preference. Swap the breadcrumbs for almond flour, or use a low‑fat cheese for a lighter version.
- Crowd‑Pleaser: Friends and family rave about how easy it is to cook and how the flavors hit the spot. I’ve had people ask for the recipe after every dinner.
- Quality Focus: Using fresh, high‑quality chicken and a small amount of butter gives the dish a richness that feels indulgent yet wholesome.
Inside the Ingredient List
The Flavor Base
Olive oil is the canvas that holds all the seasonings together. It prevents the chicken from drying out and allows the herbs to bloom. Without it, the spices would cling to the surface rather than infuse the meat. If you’re watching calories, a tablespoon of avocado oil works just as well.
Salt is the silent hero that awakens every other flavor. It balances sweetness, sharpness, and umami. A pinch of sea salt adds a subtle crunch that contrasts with the crispy crust. Too much, and you’ll end up with a salty mess; too little, and the dish will taste flat.
The Texture Crew
Panko breadcrumbs give that unmistakable crunch that shatters like thin ice when you bite. They absorb the oil and create a golden crust that stays crisp even after cooling. If you prefer a gluten‑free version, use crushed cornflakes or almond flour. Remember to toast them lightly for extra crunch.
Parmesan cheese adds a salty, nutty depth that melts into the panko, binding the crust together. Its sharpness cuts through the richness of the butter and olive oil. If you’re lactose intolerant, try a vegan parmesan or nutritional yeast for a similar effect.
The Unexpected Star
Butter, though it seems like a simple ingredient, brings a silky finish that coats the chicken like velvet. It also helps the crust brown evenly, giving the dish that irresistible golden sheen. If you’re avoiding dairy, a drizzle of coconut oil will do the trick, but the flavor profile will shift slightly.
Lemon wedges add a bright, citrusy note that cuts through the richness. They also provide a natural tenderizing effect thanks to their acidity. Squeeze the juice over the chicken before baking for a burst of freshness.
Everything's prepped? Good. Let's get into the real action...
The Method — Step by Step
- Preheat your oven to 425°F (220°C). While the oven heats, pat the chicken breasts dry with paper towels to ensure a crisp skin. In a small bowl, combine olive oil, salt, pepper, garlic powder, smoked paprika, thyme, and rosemary. Toss the chicken in the mixture, making sure each piece is evenly coated. Let the chicken rest for 10 minutes to absorb the flavors before baking.
- In a shallow dish, whisk together melted butter, grated Parmesan, and panko breadcrumbs until well combined. This mixture will form the crunchy crust. Gently press the chicken onto the breadcrumb mixture, pressing lightly to ensure the coating adheres. Arrange the coated chicken on a wire rack set over a baking sheet to allow air circulation.
- Place the baking sheet in the preheated oven and bake for 18 minutes. The first 10 minutes will allow the crust to develop a golden color, while the remaining time cooks the chicken through. Keep an eye on the edges; when they start pulling away, the chicken is close to done.
- While the chicken bakes, prepare the rice. In a medium saucepan, bring 2 cups of chicken broth to a boil. Add 1 cup of rice, reduce the heat to low, cover, and simmer for 15 minutes. Fluff with a fork and keep warm.
- When the chicken is done, remove it from the oven and let it rest on the rack for 5 minutes. Resting allows the juices to redistribute, keeping the meat moist. Squeeze fresh lemon juice over each piece for a bright, zesty finish.
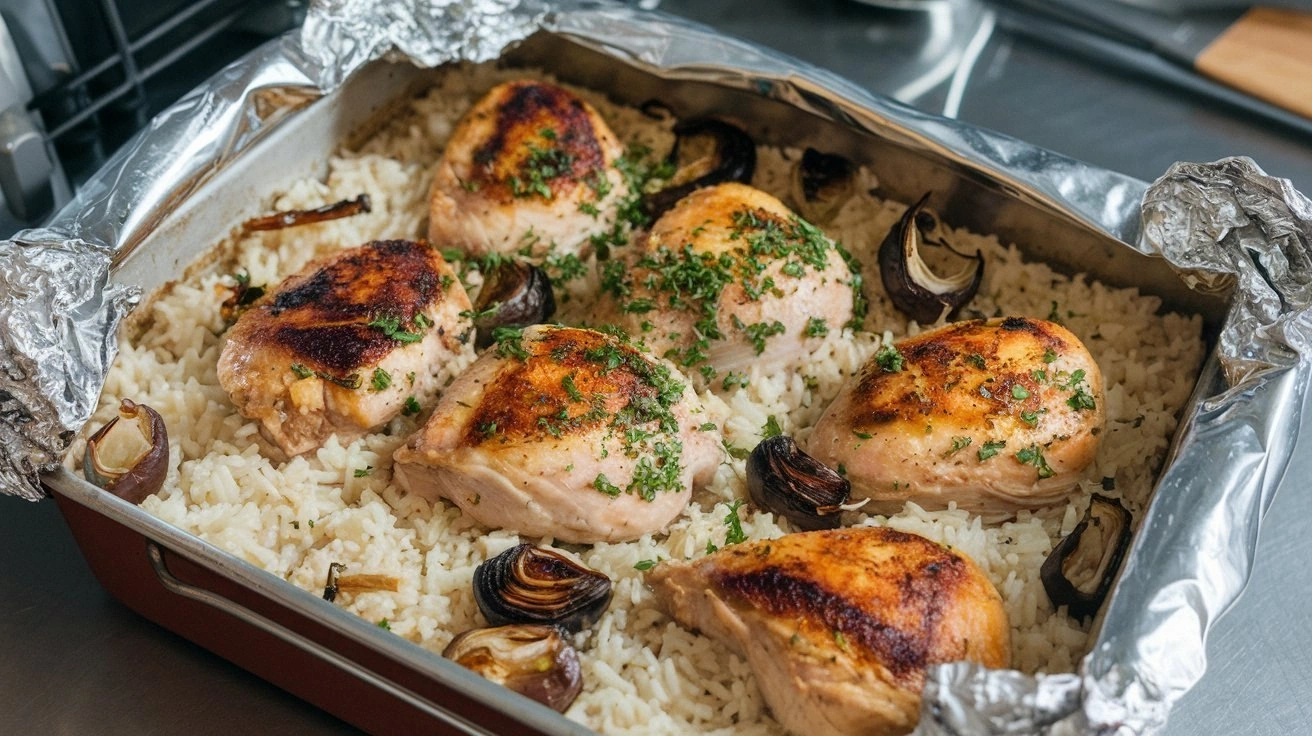
- Serve the chicken over a bed of fluffy rice. Garnish with chopped parsley for a pop of color and a fresh herbal note. The combination of crispy chicken, creamy rice, and lemon tang creates a symphony of textures and flavors.
- If you prefer a cheese‑y topping, sprinkle shredded mozzarella over the chicken during the last 3 minutes of baking. The cheese will melt into the crust, adding another layer of indulgence. Be careful not to over‑bake, or the cheese will burn.
- Enjoy while hot. The dish is best served immediately, but you can reheat leftovers in a skillet with a splash of broth to revive the crispness. Pair it with a crisp white wine or a light sparkling water for a balanced meal.
That’s it—you did it. But hold on, I've got a few more tricks that will take this to another level. Let’s dive into the insider tips that will make you a baking superstar.
Insider Tricks for Flawless Results
The Temperature Rule Nobody Follows
Many people bake at 400°F, but the extra 25 degrees makes a world of difference. The higher heat caramelizes the crust faster, locking in moisture and preventing the chicken from drying out. If your oven runs hot, lower the temperature by 10°F to avoid burning.
Why Your Nose Knows Best
Smell the chicken as it bakes; it should smell toasty, almost like a toasted sandwich. If you detect a sharp, metallic scent, the oven might be too hot or the oil might be oxidizing. Trust your nose—if it’s smelling like a summer picnic, you’re on the right track.
The 5‑Minute Rest That Changes Everything
Letting the chicken rest after baking is not just a courtesy; it redistributes juices, making each bite succulent. Skipping this step often results in a dry center. Even a quick 5‑minute pause on a plate can make a difference.
Cheese is Optional, Flavor is Not
If you’re dairy‑free, replace Parmesan with nutritional yeast for a cheesy flavor. The yeast provides umami and a nutty finish that pairs well with the breadcrumb crust. Don’t forget to sprinkle it before baking to let it melt into the coating.
The Lemon Trick
Squeezing lemon juice over the chicken before baking can help tenderize the meat, thanks to its natural acidity. The zest also adds a bright, fresh aroma that lifts the overall dish. Keep a wedge on the side for a quick squeeze right before serving.
Creative Twists and Variations
This recipe is a playground. Here are some of my favorite ways to switch things up:
Spicy Cajun Kick
Swap smoked paprika for Cajun seasoning and add a pinch of cayenne pepper. The result is a fiery crust that pairs beautifully with a cool cucumber yogurt sauce. Perfect for those who like a bit of heat.
Mediterranean Medley
Replace the thyme and rosemary with oregano and basil, and add a handful of sun‑dried tomatoes to the breadcrumb mix. The chicken will have a sweet, savory Mediterranean flair that’s ideal for summer evenings.
Herb‑Infused Creamy Spinach
Fold fresh spinach into the rice along with a splash of cream cheese. The spinach adds a pop of color and a subtle earthy taste that complements the chicken’s crispness. The creamy element makes the dish richer.
Asian‑Inspired Glaze
Brush the chicken with a mixture of soy sauce, honey, and ginger during the last 5 minutes of baking. The glaze caramelizes, giving the crust a glossy sheen and a sweet‑savory depth that’s reminiscent of teriyaki.
Vegan Version
Use a plant‑based protein like tofu or tempeh instead of chicken. Coat the tofu with the same breadcrumb mixture and bake until crispy. Pair with a quinoa pilaf for a complete vegan meal.
Storing and Bringing It Back to Life
Fridge Storage
Store leftovers in an airtight container in the refrigerator for up to 3 days. Keep the chicken and rice separate to maintain the crispness of the crust. Reheat the chicken in a skillet with a splash of broth to revive the moisture.
Freezer Friendly
Wrap the cooked chicken tightly in foil and place in a freezer bag. It can stay in the freezer for up to 2 months without loss of flavor. Thaw overnight in the refrigerator before reheating.
Best Reheating Method
Reheat in a preheated oven at 350°F (175°C) for 10–12 minutes, or until heated through. A quick microwave burst can also work, but the oven preserves the crunch. Add a tiny splash of water before reheating to keep the rice from drying out.